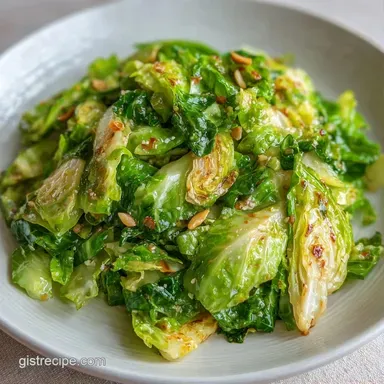
Garlicky Pan Fried Cabbage: Restaurant Style Char
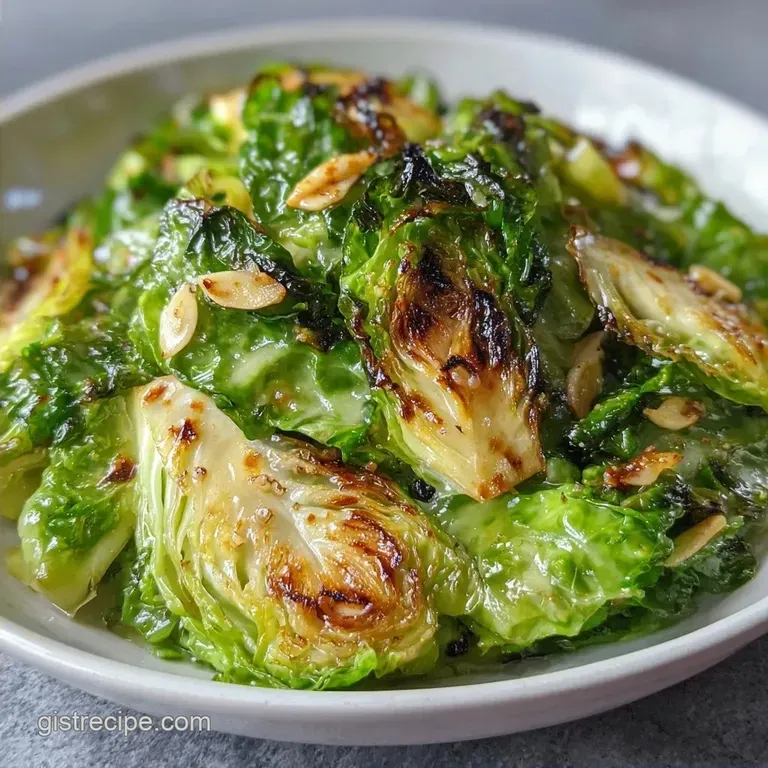
- Time: 5 min active + 15 min cook
- Flavor/Texture Hook: Mahogany charred edges with a tangy finish
- Perfect for: A fast weeknight side or a bold addition to Sunday roast
That smell of butter browning in a heavy skillet is enough to make anyone hungry. I remember the first time I tried to do this; I just tossed everything in the pan and stirred it constantly. I ended up with a pale, soggy heap of cabbage that tasted like it had been boiled in a vacuum. It was a total letdown.
The trick is actually in the patience. Once you let that cabbage sit still, it starts to develop these deep, browned edges that taste almost nutty. It changes the whole vibe of the vegetable from "boring health food" to something you actually crave.
You're looking at a total time of 20 minutes for this Garlicky pan fried Cabbage. It's the kind of side dish that feels fancy but requires almost zero effort, making it a win for those nights when you're exhausted but still want a real meal.
Garlicky pan fried Cabbage
Right then, let's get into why this actually works. Most people treat cabbage like it needs to be softened first, but we're going for a over high heat sear. This creates a massive contrast between the crispy bits and the tender heart of the vegetable.
- over High heat Searing
- High temperatures trigger the browning of natural sugars in the cabbage, creating a savory crust.
- Fat Based Infusion
- Butter and oil combined allow the garlic to toast without burning too quickly.
- Acid Balancing
- A splash of vinegar at the end cuts through the heavy fats and wakes up the sulfur notes.
- Controlled Moisture
- Cooking in batches prevents the cabbage from steaming in its own juices, which keeps it from getting mushy.
| Method | Time | Texture | Best For |
|---|---|---|---|
| Stovetop | 20 mins | Charred & snappy | Quick weeknight sides |
| oven roasted | 45 mins | Soft & caramelized | Large crowds/hands off |
| Braised | 60 mins | Silky & tender | Winter comfort meals |
Component Analysis
| Ingredient | Science Role | Pro Secret |
|---|---|---|
| Green Cabbage | Structural Base | Slice thinly for faster browning |
| Unsalted Butter | Flavor Carrier | Let it foam before adding veg |
| Apple Cider Vinegar | pH Balancer | Stir in AFTER removing from heat |
| Sliced Garlic | Aromatic Punch | Slice thinly for even toasting |
Essential Pantry Components
For this to work, you need a few basics. Don't go for the pre shredded bagged stuff if you can avoid it; it's often too wet, which leads to steaming instead of frying.
- 1 medium head green cabbage, shredded (approx. 2 lbs / 900g) Why this? Dense leaves hold up better to high heat
- 1 tbsp extra virgin olive oil Why this? Raises the smoke point of the butter
- 1 tbsp unsalted butter Why this? Adds a rich, nutty flavor profile
- 4 cloves garlic, thinly sliced Why this? Slices toast more evenly than minced garlic
- ½ tsp kosher salt Why this? Coarser grains distribute more evenly
- ¼ tsp freshly cracked black pepper Why this? Freshly ground adds a sharp bite
- 1 tsp apple cider vinegar Why this? The tang balances the rich butter
Quick Substitutions
| Original Ingredient | Substitute | Why It Works |
|---|---|---|
| Unsalted Butter | Ghee (1 tbsp) | Higher smoke point; great for very high heat |
| Apple Cider Vinegar | Lemon Juice (1 tsp) | Similar acidity. Note: Tastes brighter, less "earthy" |
| Green Cabbage | Savoy Cabbage (2 lbs) | More crinkled leaves. Note: Softer texture, less "crunch" |
| Olive Oil | Avocado Oil (1 tbsp) | Neutral flavor and very high heat tolerance |
If you're looking for something to serve alongside this, a creamy garlic sauce works great as a dip or a drizzle over the top.
Necessary Kitchen Tools
You don't need a professional kitchen, but the pan matters here. A 12 inch cast iron skillet is the gold standard because it holds heat consistently. If you don't have one, a heavy bottomed stainless steel pan works too.
Avoid non stick if you can, as they often can't handle the high heat needed for that mahogany crust.
You'll also need a sharp chef's knife for the shredding. If you have a mandoline, use it, but be careful with your fingers. A wide spatula is essential for flipping the cabbage without breaking the leaves into tiny pieces.
Steps From Prep to Plate
Let's crack on with the cooking. Keep a close eye on the pan, as the transition from "browned" to "burnt" happens fast with butter and garlic.
- Heat the olive oil and butter in your 12 inch skillet over medium high heat. Wait until the butter stops foaming and smells nutty. Note: This ensures the pan is hot enough to sear.
- Add the shredded cabbage to the pan. If you have a small skillet, work in batches. Let it sit undisturbed for 3–4 minutes until the bottom layer develops a deep, mahogany colored crust.
- Push the cabbage to the edges of the pan to create a small well in the center.
- Add the sliced garlic to that center well. Sauté for 60 90 seconds until the garlic is golden and smells fragrant, then toss everything together.
- Reduce the heat to medium.
- Sprinkle in the salt and pepper. Stir occasionally for another 5–7 minutes until the cabbage is tender but still has a slight snap.
- Remove the pan from the heat immediately.
- Stir in the apple cider vinegar. You'll hear a slight sizzle as the acid hits the hot pan.
Chef's Note: If the cabbage looks too dry during step 6, add a tiny knob of butter. It helps the salt penetrate the leaves and adds a velvety finish.
Solutions for Common Mishaps
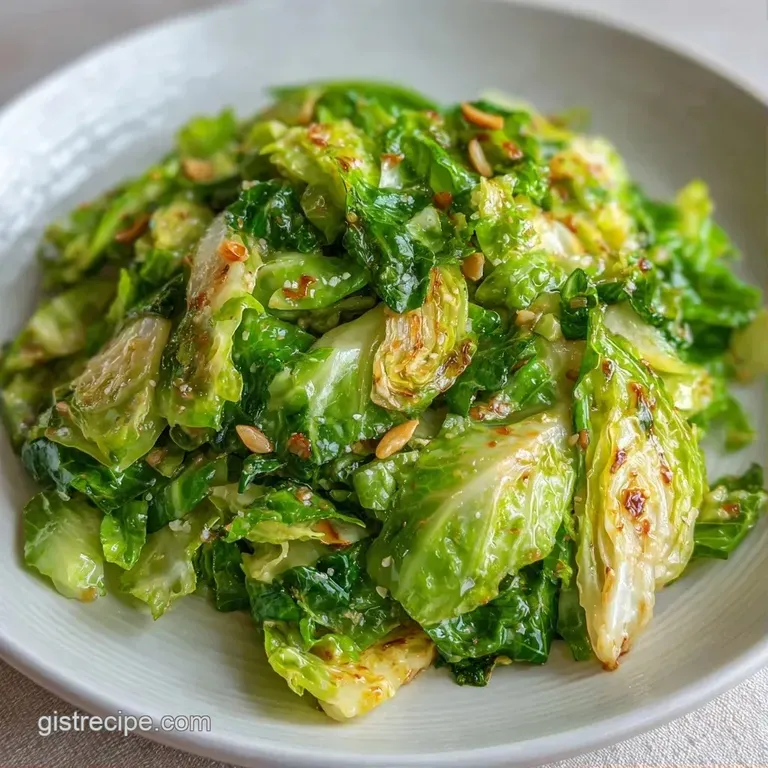
The most common complaint with this recipe is that the cabbage turns into a soggy mess. This usually happens because the pan was too crowded or the heat was too low. According to Serious Eats, overcrowding a pan drops the temperature, causing the vegetables to release moisture and steam rather than sear.
Reasons for Mushy Cabbage
If your cabbage is limp and pale, you probably stirred it too much. The cabbage needs that initial undisturbed contact with the hot metal to brown. Also, check your heat; if the butter isn't sizzling when the cabbage hits the pan, you're just boiling it in fat.
Prevent Burnt Garlic
Garlic burns in a heartbeat. By adding it to the center of the pan after the cabbage has seared, you're protecting it from the most intense heat while still letting it bloom.
Balancing the Sulfur
Cabbage can sometimes have a strong, sulfurous smell. The apple cider vinegar is the fix here. It chemically balances those compounds, turning a pungent scent into something bright and savory.
| Problem | Root Cause | Solution |
|---|---|---|
| Pale Cabbage | Heat too low / Too much stirring | Increase heat; leave cabbage alone for 4 mins |
| Bitter Taste | Burnt garlic | Add garlic only after cabbage has seared |
| Watery Pan | Overcrowded skillet | Cook in two separate batches |
Common Mistakes Checklist
- ✓ Did you wait for the butter to stop foaming?
- ✓ Did you leave the cabbage undisturbed for at least 3 minutes?
- ✓ Did you slice the garlic instead of mincing it?
- ✓ Did you add the vinegar after taking the pan off the heat?
- ✓ Did you avoid overcrowding the pan?
Alternative Dietary Versions
Depending on what you're serving, you might want to tweak the ingredients. This is a very flexible base.
The Savory Indulgence For a heartier version, fry 3 strips of diced bacon in the pan before adding the oil and butter. Use the rendered bacon fat as your primary cooking oil. This turns the dish into a Garlic pan fried Cabbage with Bacon, which is a total crowd pleaser.
The Plant Based Swap To make this a Vegan Cabbage Stir Fry, swap the butter for a high-quality vegan butter or just use more olive oil. I recommend adding a teaspoon of nutritional yeast at the end for a cheesy, savory depth.
The Asian Inspired Stir Fry Replace the apple cider vinegar with rice vinegar and add 1 tbsp of soy sauce during the final stir. This creates a Fried Cabbage with Garlic and Soy Sauce that pairs perfectly with steamed rice.
Low Sodium Alternative If you're watching your salt, skip the kosher salt and use a squeeze of fresh lime juice and a pinch of smoked paprika. The acidity and smokiness trick the tongue into not missing the salt.
| Modification | Swap | Impact |
|---|---|---|
| Vegan | Butter → Vegan Butter | Maintains creaminess, removes dairy |
| Asian Style | ACV → Rice Vinegar + Soy | Shifts flavor to umami/salty |
| Extra Smoky | Add Smoked Paprika | Adds a wood fired aroma |
If you're making a larger feast, this pairs beautifully with a homemade turkey gravy poured over a roast.
Scaling for Different Groups
When you're cooking for a crowd, you can't just double the ingredients and throw them in the same pan. You'll end up with a steamed cabbage soup.
Cooking for Two (Half Batch) Use a smaller 8 inch skillet. Reduce the cook time in step 6 by about 20% because the smaller mass of cabbage will soften faster.
Cooking for Twelve (Double/Triple Batch) Work in batches. Seriously. Sear half the cabbage, remove it to a bowl, and then do the second half. Once both are seared, toss them back into the pan together for the final seasoning and vinegar step.
Also, only increase the salt and pepper to 1.5x the original amount; you can always add more at the end, but you can't take it out.
Cabbage Myths
Myth: Searing "seals in" the nutrients. Truth: Searing is for flavor, not nutrition. While you might lose a tiny bit of vitamins to heat, the browning creates flavor compounds that make you actually want to eat the vegetable.
Myth: You have to boil cabbage first to make it tender. Truth: Parboiling is a waste of time here. over High heat frying softens the cabbage while keeping the edges crisp. Boiling first just adds excess water, which kills the sear.
Storage and Reheating Tips
Fridge Storage Place the cabbage in an airtight container. It stays good for about 4 days. Note that the texture will soften as it sits, so it won't be as "snappy" as it was fresh.
Freezing I don't recommend freezing this recipe. Cabbage has a high water content, and once frozen and thawed, it becomes mushy and loses all its structural integrity.
Reheating Avoid the microwave if you can. To bring back the crunch, toss the cabbage back into a hot skillet for 2-3 minutes. If it seems dry, add a teaspoon of water or a tiny bit of butter to loosen it up.
Zero Waste Tips Don't toss the outer leaves or the tough core. Use the core and any scraps in a vegetable stock. If you have leftover Garlicky pan fried Cabbage, chop it up and stir it into an omelet or use it as a base for a warm slaw.
Final Plating and Presentation
Because this dish has those deep mahogany colors, it looks best on a light colored plate. I like to pile the cabbage high in the center of the dish to keep the heat trapped.
For a professional touch, garnish with a sprinkle of fresh parsley or some thinly sliced green onions. The bright green pops against the browned cabbage. If you're feeling fancy, a crack of fresh black pepper right before serving adds a visual element and a burst of aroma that hits the diner immediately.
Trust me, the contrast of the dark sear and the bright herbs makes this look like it came from a bistro.
Recipe FAQs
Can you put garlic in fried cabbage?
Yes, it adds a rich, aromatic depth. In this recipe, thinly sliced garlic is sautéed in the center of the pan for 60 90 seconds until golden before being tossed with the cabbage.
What is the secret to the best fried cabbage?
Avoid stirring the cabbage initially. Let the shredded leaves sit undisturbed for 3 4 minutes to develop a deep, mahogany colored crust.
What are some common mistakes to avoid when making fried cabbage?
Don't crowd the pan. Adding too much cabbage at once drops the temperature and steams the vegetables instead of searing them, so work in batches if necessary.
What is the secret ingredient for brightening sauteed cabbage?
Apple cider vinegar. Stirring in a teaspoon at the very end cuts through the richness of the butter and olive oil to balance the flavors.
How to cook fresh cabbage leaves for maximum flavor?
Sear in a cast iron skillet over medium high heat. Start with olive oil and butter, let the cabbage brown without moving it, and finish with a splash of acidity.
What should I serve with garlicky pan fried cabbage?
Pair it with hearty proteins or bold sauces. It works well as a side for grilled meats or alongside a savory beef and broccoli dish.
Is it true that cabbage must be boiled before frying?
No, this is a common misconception. Boiling removes structural integrity and flavor; searing fresh, shredded cabbage provides a superior snap and caramelized taste.
Garlicky pan fried Cabbage