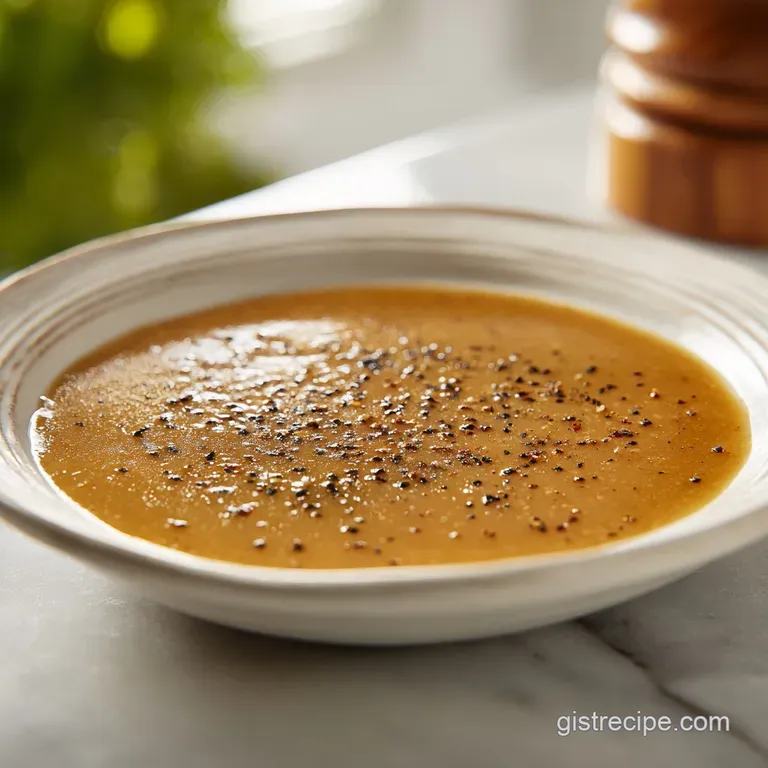
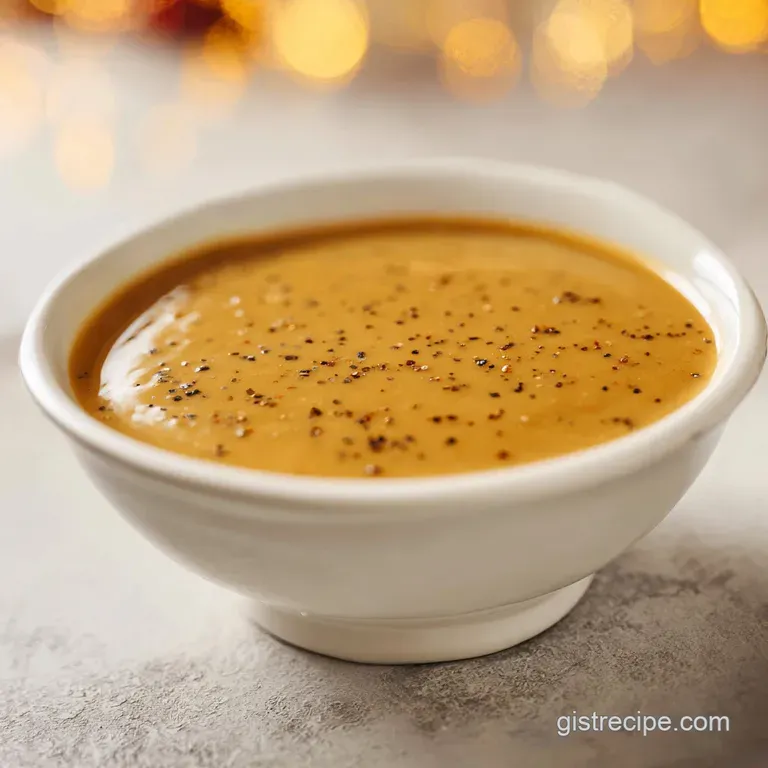
Homemade Turkey Gravy: Velvety and Failure-Proof
- Time: 5 min active + 10 min cook = Total 15 minutes
- Flavor/Texture Hook: Velvety, savory, and glossy
- Perfect for: Thanksgiving dinner, roast turkey, or mashed potato night
- The Best Homemade Turkey Gravy Recipe
- Why This Gravy Works
- Ingredient Deep Dive
- Shopping List Breakdown
- Essential Kitchen Gear
- Step By Step Method
- Fixing Common Gravy Mistakes
- Flavor and Diet Twists
- Adjusting the Batch Size
- Gravy Truths and Myths
- Saving Your Leftovers
- Best Ways To Serve
- Recipe FAQs
- 📝 Recipe Card
The Best Homemade Turkey Gravy Recipe
The smell of a roasting turkey is the official scent of "home" for so many of us. It's that heavy, salty aroma that fills every corner of the house, signaling that the big meal is finally almost here.
For generations, the gravy has been the glue that holds the entire plate together, turning a simple slice of meat and a scoop of potatoes into a comforting masterpiece. In many families, the person who makes the gravy is the unofficial hero of the kitchen, because we all know the dread of a dry bird or, even worse, a lumpy sauce.
I remember watching my grandmother handle the pan drippings like they were liquid gold. She didn't use a fancy thermometer or a digital scale, but she knew exactly when the flour had cooked long enough to lose that raw taste.
There's a real cultural weight to this dish; it's about tradition, patience, and the desire to make everything feel cohesive. When you pour that warm, glossy sauce over the meal, it's not just about the taste, it's about the feeling of being taken care of.
Trust me on this, you don't need to be a professional to get this right. This homemade turkey gravy recipe is designed to be foolproof, focusing on a few key movements that guarantee a smooth result. We're going to avoid the panic and the whisking until your arm-hurts phase by following a simple flow.
Let's crack on and get this sorted.
Why This Gravy Works
Getting a smooth sauce isn't about magic, it's about how the ingredients bond together. If you've ever had gravy that tasted like raw flour, it's because the fat and flour didn't get enough heat to transform. When we cook them together, we create a structure that can hold onto the turkey stock without separating.
The Fat Bond: Flour particles are coated in fat, which prevents them from clumping together when the liquid hits. This is what stops the dreaded lumps from forming.
The Slow Pour: Adding stock in small batches allows the roux to absorb the liquid gradually. This creates a stable emulsion that stays velvety rather than breaking into oil and water.
Flavor Extraction: Sautéing shallots first releases aromatic oils that deepen the base. If you've used a basic turkey brine for your bird, these aromatics will complement the seasoned meat perfectly.
The Simmer Stage: A gentle simmer allows the starch to fully hydrate. This is where the sauce thickens and the flavors meld into one cohesive, savory profile.
| Method | Time | Texture | Best For |
|---|---|---|---|
| Stovetop | 15 mins | Glossy & Smooth | Quick serving, total control |
| Oven | 45 mins | Rich & Concentrated | Slow roasting, large batches |
Ingredient Deep Dive
Before we start, let's look at what's actually happening in the pan. Each ingredient has a specific job, and knowing that makes it easier to adjust things on the fly.
| Ingredient | Science Role | Pro Secret |
|---|---|---|
| Pan Drippings | Flavor Base & Fat | Strain them first to remove burnt bits |
| All Purpose Flour | Thickening Agent | Cook until it smells like toasted nuts |
| Turkey Stock | Liquid Body | Use room temp stock to avoid roux shock |
| Nutmeg | Aroma Accent | A tiny pinch cuts through the heavy fat |
Shopping List Breakdown
You probably have most of this in your pantry, but make sure your stock is high-quality. If you're using store-bought broth, look for one with low sodium so you can control the salt yourself.
- 1/4 cup turkey pan drippings Why this? Provides the essential roasted meat flavor (Substitute: Unsalted butter)
- 1 tbsp finely minced shallots Why this? Adds a subtle, sweet onion depth (Substitute: Yellow onion)
- 1/4 cup all purpose flour Why this? Standard starch for a stable roux (Substitute: gluten-free 1:1 blend)
- 2 cups turkey stock Why this? The core liquid for a savory profile (Substitute: Chicken broth)
- 1/2 tsp cornstarch Why this? Extra insurance for a glossy finish (Substitute: Arrowroot powder)
- 1 tbsp water Why this? To create a slurry for the cornstarch (Substitute: Extra stock)
- 1/2 tsp kosher salt Why this? Enhances all other flavors (Substitute: Sea salt)
- 1/4 tsp black pepper Why this? Adds a slight woody heat (Substitute: White pepper)
- 1/8 tsp ground nutmeg Why this? The "secret" ingredient for warmth (Substitute: Allspice)
Essential Kitchen Gear
You don't need a lab, just a few reliable tools. A heavy bottomed pan is your best friend here because it distributes heat evenly, preventing the flour from scorching in one spot.
I highly recommend a balloon whisk rather than a fork. The wide wires hit more of the pan's surface, which is crucial when you're trying to incorporate that stock quickly. If you're worried about lumps, a fine mesh strainer is a great backup for the final pour.
For the shallots, a sharp chef's knife or a small food processor works, but keep the mince fine so they melt into the sauce.
Step by step Method
Now we get to the actual cooking. The key is to stay with the pan - don't walk away during the roux phase, or you'll end up with burnt flour.
Phase 1: Preparing the Flavor Base
Place a medium saucepan over medium heat and add the 1/4 cup of turkey pan drippings. Note: If your drippings are very gelatinous, they'll melt quickly. Sauté the finely minced shallots for 1-2 minutes until they are translucent and fragrant.
You want them soft, not browned.
Phase 2: Creating the Golden Roux
Whisk in the 1/4 cup of all purpose flour. Stir constantly for 3-5 minutes until the mixture smells nutty and turns a light golden brown color. This is the most important part of this homemade turkey gravy recipe; don't rush it, or the gravy will taste like raw dough.
Phase 3: The Gradual Incorporation
Slowly pour in the turkey stock, approximately 1/4 cup at a time. Whisk vigorously after each addition until the mixture transforms into a smooth, heavy cream consistency. If it looks like it's clumping, stop pouring and whisk until it's smooth before adding more.
Phase 4: The Final Simmer
Increase the heat slightly to bring the gravy to a gentle simmer. Stir in the kosher salt, black pepper, and ground nutmeg. Simmer for 2-3 minutes until the gravy coats the back of a spoon. If it's too thin, mix the cornstarch and water into a small paste and whisk it in now.
| Original Ingredient | Substitute | Why It Works |
|---|---|---|
| All Purpose Flour | Cornstarch Slurry | Thicker and clearer. Note: Lacks the nutty flavor of a roux |
| Turkey Stock | Chicken Broth | Very similar flavor profile. Note: Slightly less "gamey" than turkey |
| Turkey Drippings | Unsalted Butter | Provides the necessary fat. Note: Lose the roasted meat taste |
Right then, we've got the base sorted. But let's be honest, things sometimes go sideways in the kitchen. Whether it's a sudden lump or a sauce that's too thin, it's all fixable.
Fixing Common Gravy Mistakes
Solving Lumpy Gravy
Lumps usually happen when the flour isn't fully incorporated or the liquid is added too fast. It's a common headache, but you don't have to start over.
The easiest fix is a whisk, but if the lumps are stubborn, use a blender or a fine mesh strainer. Pouring the finished sauce through a sieve into your serving boat will catch every single bit of flour.
Fixing Greasy Gravy
If you see oil slicks on top, you likely had too many drippings or the emulsion broke. This often happens if the heat was too high during the simmering phase.
To fix this, you can skim the oil off the top with a spoon. Alternatively, whisk in a tiny bit more stock and simmer gently to re emulsify the fats.
Adjusting Too Thick Gravy
Sometimes the gravy continues to thicken as it sits, becoming more of a paste than a sauce. This is just the starch continuing to absorb liquid.
Simply whisk in a tablespoon of stock or water at a time over low heat. Do this slowly so you don't accidentally make it too thin.
| Problem | Root Cause | Solution |
|---|---|---|
| Lumpy texture | Liquid added too quickly | Strain through a fine mesh sieve |
| Too thin | Not enough simmering time | Simmer 2 mins more or add cornstarch slurry |
| Bitter taste | Flour burnt during roux | Start over (burnt flavor cannot be removed) |
Common Mistakes Checklist
- ✓ Never add all the stock at once; it's a recipe for lumps.
- ✓ Don't skip the shallots; they provide the aromatic base.
- ✓ Ensure the roux is golden brown, not just hot.
- ✓ Use a whisk, not a spoon, for the incorporation phase.
- ✓ Taste for salt at the very end, as stock reduces and concentrates.
Flavor and Diet Twists
Once you've mastered this homemade turkey gravy recipe, you can start playing with the flavors. Gravy is a great canvas for different herbs and depths.
The Savory Boost
For a deeper, "umami" punch, stir in a teaspoon of soy sauce or Worcestershire sauce during the final simmer. This adds a dark color and a salty complexity that mimics a long roasted bird.
The Herb Infusion
If you have leftover herbs from your turkey stuffing, chop some fresh sage and thyme and stir them in at the end. It gives the gravy a fresh, garden like quality that cuts through the richness.
The gluten-free Swap
If you need a gluten-free version, swap the flour for a high-quality 1:1 gluten-free flour blend. Be aware that some GF blends thicken differently, so you might need to rely more on the cornstarch slurry at the end to get that velvety feel. If you enjoy other thick sauces, you might find my sausage gravy an interesting comparison in terms of thickness.
The Creamy Twist
For a more decadent, "country style" finish, stir in two tablespoons of heavy cream or a knob of cold butter right before serving. This creates a silky sheen and a milder flavor.
Adjusting the Batch Size
Scaling a sauce is usually simple, but there are a few traps. When you increase the volume, the evaporation rate changes, which can affect the final thickness.
Scaling Down (½ batch): Use a smaller saucepan to prevent the fat from spreading too thin and burning. Reduce the cooking time for the roux by about 20%, as smaller amounts of flour brown faster.
Scaling Up (2x-4x batch): Be careful with the salt and nutmeg. Start with 1.5x the seasoning rather than double, then taste and adjust. Adding too much salt early on is a mistake because the sauce will concentrate as it simmers.
Work in batches when adding the stock to ensure you don't overwhelm the roux.
Gravy Truths and Myths
There are a few things people say about gravy that just aren't true. Let's clear them up so you can cook with confidence.
Myth: You must use a cornstarch slurry for a glossy look. Truth: A well made roux (flour and fat) creates a beautiful, natural gloss. Cornstarch can actually make gravy look slightly translucent or "gel like" if you use too much.
Myth: Adding flour directly to stock is the fastest way. Truth: This is the fastest way to get lumps. Always cook the flour in fat first, or mix the flour with cold water before adding it to the hot liquid.
Myth: You can't make great gravy without drippings. Truth: While drippings are best, using butter and a high-quality stock with a bit of soy sauce for color can get you 90% of the way there.
Saving Your Leftovers
Don't let a single drop of this homemade turkey gravy recipe go to waste. It's often better the next day once the flavors have had time to settle.
Storage Guidelines: Store any leftover gravy in an airtight container in the fridge for up to 4 days. It will thicken significantly in the cold, which is normal.
Freezing Tips: Gravy freezes surprisingly well. Pour it into freezer bags or containers and keep it for up to 3 months. When thawing, do it in the fridge overnight to avoid separation.
Zero Waste Ideas: If you have a bit of gravy left that's too thick to pour, use it as a base for a pot pie filling or stir it into a creamy mash for the next day's breakfast hash. If you have leftover turkey skin, fry it up and use the oil as the base for a fresh batch of gravy.
Best Ways To Serve
The presentation is the final touch. To keep the gravy velvety and hot, serve it in a warmed ceramic boat. If you're serving a crowd, keep the boat on a warming tray or in a slow cooker on the "warm" setting.
This gravy is a natural partner for mashed potatoes, but it's also incredible over a slice of toasted sourdough or stirred into a bowl of wild rice. For a more modern twist, try drizzling it over roasted root vegetables like carrots and parsnips.
The richness of the homemade turkey gravy recipe balances the sweetness of the roasted veg beautifully.
Right then, you're all set. Just remember: trust your nose, keep whisking, and don't be afraid to add a splash more stock if it gets too thick. Happy cooking!
Recipe FAQs
How do you make homemade turkey gravy?
Sauté minced shallots in turkey pan drippings over medium heat. Whisk in flour for 3-5 minutes, then slowly incorporate turkey stock while whisking until smooth. Finish by simmering with salt, pepper, and nutmeg for 2-3 minutes.
What is the 3 2 1 rule for gravy?
It is a general ratio of 3 parts liquid, 2 parts fat, and 1 part flour. This specific recipe uses 1/4 cup drippings and 1/4 cup flour to achieve a precise, heavy cream consistency.
How to make your own easy gravy?
Whisk all-purpose flour into turkey pan drippings and sautéed shallots. Gradually stir in turkey stock and simmer with seasonings until the gravy is thick enough to coat the back of a spoon.
What is the secret ingredient for good gravy?
Ground nutmeg. Adding a small amount of nutmeg provides a subtle depth of flavor that enhances the savory profile of the turkey stock.
Why is my gravy lumpy?
You likely added the stock too quickly. Pour the turkey stock slowly, approximately 1/4 cup at a time, whisking vigorously after each addition to maintain a smooth emulsion.
Can I make this gravy without shallots?
Yes, you can omit them. The shallots add aromatic depth, but the pan drippings provide enough flavor on their own, and the result pairs perfectly with classic coleslaw.
Is it true that you must use cornstarch to thicken gravy?
No, this is a common misconception. This recipe utilizes a roux made of all-purpose flour and pan drippings to create a rich, stable thickness.
Homemade Turkey Gravy Recipe

