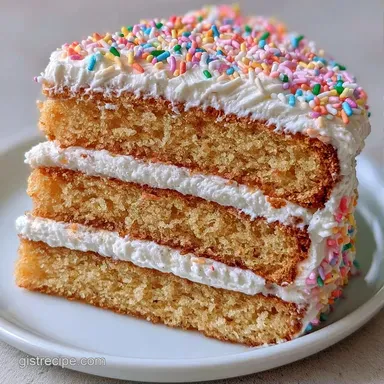
Homemade Butter Birthday Cake: Silky and Moist
- Time:15 minutes active + 40 minutes baking = Total 80 minutes
- Flavor/Texture Hook: Silky, buttery crumb with a stiff, airy frosting
- Perfect for: Birthday celebrations, anniversary parties, or a high end weekend treat
That specific, heady aroma of vanilla and browning butter hitting the oven heat is enough to trigger a core memory for me. I remember trying to make a cake for my sister's tenth birthday years ago, and I rushed the butter. I used "mostly softened" butter, which in my head meant it was still a bit chilly but squishy.
The result? A dense, rubbery brick that felt more like a sponge than a cake.
The secret I learned the hard way is that patience is an actual ingredient. If you don't give that butter and sugar enough time to marry, you lose the air pockets that make a cake feel light. This Homemade Butter Birthday Cake isn't about fancy techniques, just about respecting the time it takes for the ingredients to actually bond. Trust me, that extra few minutes of whipping makes the difference between a cake that feels "homemade" (in a bad way) and one that feels professional.
Homemade Butter Birthday Cake
Right then, let's get into why this specific version works. I've stripped away the fluff and focused on the minimal tools approach. You don't need a commercial kitchen to get a pillowy result, just a couple of bowls and a steady hand.
We're aiming for a cake that has a tight but tender crumb, topped with a frosting that holds its shape without tasting like a mouthful of pure sugar.
Since we're focusing on the butter as the hero, I always recommend using a high-quality unsalted butter. Salted butter varies too much by brand, and when you're balancing the sweetness of 1.5 cups of sugar, you want total control over the salt levels. If you're looking for something even simpler for a weekday, you might enjoy my Homemade White Bread Recipe, but for a celebration, nothing beats this classic.
Why Most Recipes Fail
The biggest issue I see with a traditional butter cake is the "curdle." This happens when your eggs are cold and your butter is warm. The fat separates from the liquid, and no matter how much you mix, the batter stays grainy. Once that happens, the cake won't rise evenly, and you end up with a heavy, uneven texture.
Another common trap is the over mixing phase. Many people treat cake batter like cookie dough, beating it into oblivion. But the moment flour hits wet ingredients, gluten starts to form. Too much gluten equals a tough cake.
The goal here is to mix just until the streaks of flour vanish, keeping the crumb tender and silky.
Finally, let's talk about the "sunken center." This usually happens because the oven door was opened too early or the baking powder was expired. A cake needs a consistent heat environment to set its structure.
If you let the cold air in during the first 20 minutes, the air bubbles collapse, and you're left with a crater in the middle.
The Basic Specs
Before we crack on, let's look at how this stacks up against the quicker alternatives you see online. Most "quick" cakes use oil because it's liquid at room temperature, but oil lacks the depth of flavor that butter provides.
| Method | Time | Texture | Best For |
|---|---|---|---|
| Quick Oil Cake | 30 mins | Spongy/Open | Casual Weeknights |
| Classic Butter | 80 mins | Velvety/Dense | Special Occasions |
| Box Mix | 50 mins | Airy/Artificial | Last minute guests |
But what about the effort? While the butter method takes a bit more active attention during the creaming phase, the payoff is a rich, old-fashioned taste that an oil cake simply can't replicate. It's the difference between a snack and a centerpiece.
Gathering Your Essentials
The butter is the soul of this Homemade Butter Birthday Cake. I choose unsalted butter specifically because it allows the vanilla and the natural creaminess of the milk to shine through without an accidental salty punch.
When butter is beaten with sugar, it creates a structural web of air; if you substitute this with margarine or a lower fat spread, the cake often lacks that signature "melt in-your mouth" quality.
For the Butter Cake
- 1 cup (225g) unsalted butter, softened Why this? Provides the structure and rich, velvety flavor
- 1 1/2 cups (300g) granulated sugar Why this? Creates air pockets during the creaming process
- 3 large (150g) eggs, room temperature Why this? Emulsifies the fat and adds lift
- 2 tsp (10ml) pure vanilla extract Why this? Adds depth and cuts through the richness
- 2 1/2 cups (315g) all purpose flour Why this? The standard for a reliable, sturdy crumb
- 1 tbsp (12g) baking powder Why this? Essential for the vertical rise
- 1/2 tsp (3g) salt Why this? Balances the sugar for a complex taste
- 1 cup (240ml) whole milk, room temperature Why this? Adds moisture and softens the crumb
For the Buttercream Frosting
- 1 cup (225g) unsalted butter, softened Why this? Base for a stable, pipeable frosting
- 3.5 cups (420g) powdered sugar, sifted Why this? Gives the frosting its sweetness and body
- 2 tbsp (30ml) heavy cream Why this? Adjusts consistency for a silky finish
- 1 tsp (5ml) vanilla extract Why this? Keeps the flavor cohesive with the cake
- 1 pinch (1g) salt Why this? Prevents the frosting from being cloying
| Original Ingredient | Substitute | Why It Works |
|---|---|---|
| All Purpose Flour | Cake Flour | Finer protein content. Note: Result is softer, more delicate crumb |
| Whole Milk | Buttermilk | Adds acidity and tang. Note: Makes the cake slightly more moist/dense |
| Granulated Sugar | Coconut Sugar | Natural sweetener. Note: Darkens color and adds a caramel note |
| Heavy Cream | Full fat Coconut Milk | Similar fat content. Note: Adds a slight coconut hint to frosting |
Essential Baking Gear
You don't need a mountain of equipment for this. In fact, using too many bowls just means more cleaning. I prefer using a single stand mixer such as a KitchenAid for the creaming, but a handheld mixer works just as well if you have a sturdy bowl.
- Two 8 inch round cake pans (the gold standard for layer cakes)
- A whisk and a rubber spatula (essential for folding)
- Measuring cups and spoons (or a digital scale for better accuracy)
- Parchment paper (don't trust the grease alone, trust the paper)
- A cooling rack (prevents the bottom from getting soggy)
Step by step Guide
1. Preparing the Base
Preheat your oven to 350°F (175°C). Grease two 8 inch round cake pans with butter and line the bottoms with parchment paper. Note: This ensures the cake slides out without shattering the edges.
2. Mastering the Creaming Process
Place the softened butter and granulated sugar in your mixer. Beat on medium high speed for 3-5 minutes until the mixture is pale ivory and fluffy. Note: If it's still yellow, keep going; you're building the air structure here.
3. Emulsifying the Batter
Add the eggs one at a time, beating well after each addition. Once the eggs are fully incorporated, stir in the vanilla extract. Note: Adding eggs slowly prevents the batter from curdling.
4. Mixing the Drys
In a separate bowl, whisk together the flour, baking powder, and salt. Note: Whisking removes lumps and ensures the baking powder is evenly distributed.
5. The Alternating Method
Gradually add the dry ingredients and the milk to the butter mixture in alternating batches (dry wet-dry). Start and end with the flour, mixing on low speed just until the last streak of flour disappears. Note: Over mixing at this stage leads to a tough, bread like texture.
6. Baking to Golden Perfection
Divide the batter evenly between your prepared pans. Bake for 30-40 minutes until a toothpick inserted into the center comes out clean. Note: Start checking at 30 minutes to avoid drying out the edges.
7. Starting the Frosting
In a clean bowl, beat the butter until creamy and smooth. Gradually add the powdered sugar one cup at a time on low speed. Note: Adding sugar slowly prevents a "powder cloud" in your kitchen.
8. Whipping the Frosting
Mix in the heavy cream, vanilla, and salt. Whip on high for 2 minutes until airy and stiff peaks form. Note: This aeration makes the frosting velvety rather than heavy.
Chef's Tip: For a truly professional finish, freeze your butter for 10 minutes before grating it into the frosting bowl. It incorporates faster and creates a smoother texture. Also, try adding a tiny pinch of espresso powder to the frosting to deepen the vanilla notes.
Fixing Common Mistakes
Baking is a science, but it's a science where things go wrong. The most common issue with a Homemade Butter Birthday Cake is the texture. If your cake feels too dense, it's usually because the butter wasn't creamed long enough or the oven temperature was too low.
Why Your Cake Sunk in the Middle
This is usually a result of over beating the batter after adding the flour, which incorporates too much air that then collapses in the heat. Or, you might have used too much baking powder.
Why Your Batter Looks Curdled
This happens when the room temperature rule is ignored. Cold eggs chill the butter, causing the emulsion to break.
| Problem | Root Cause | Solution |
|---|---|---|
| Batter is grainy | Eggs were too cold | Gently warm the bowl over a pot of simmering water for 1 minute |
| Cake is dry/crumbly | Overbaked by 5-10 mins | Use a thermometer; pull cake at 205-210°F internal temp |
| Frosting is too runny | Too much cream/warm room | Chill the frosting for 15 mins, then whip again |
Common Mistakes Checklist:
- ✓ Butter is softened (not melted) to the touch
- ✓ Eggs and milk are truly at room temperature
- ✓ Flour is measured by spooning into the cup, not scooping
- ✓ Oven is fully preheated before the cake goes in
- ✓ Cake is cooled completely before frosting
Fun Flavor Twists
While the classic version is a winner, you can easily pivot this recipe. If you want a lighter, more floral vibe, try adding a tablespoon of lemon zest to the batter. For something more indulgent, you could fold in mini chocolate chips, but be careful to toss them in a bit of flour first so they don't sink to the bottom.
If you're planning a larger dessert spread, this pairs beautifully with a Italian Tiramisu with Mascarpone recipe for a variety of textures. For those who prefer a more "breakfast style" cake, my Muffins in 40 Min recipe use a similar butter base logic but with a tangy twist.
Reducing Sugar for Subtle Sweetness
You can reduce the granulated sugar by about 1/4 cup without ruining the structure. However, be aware that sugar helps retain moisture, so the cake might bake 2-3 minutes faster and have a slightly less golden crust.
Creating a Marble Twist
Divide the batter and fold melted chocolate into one half. Swirl the two together with a knife before baking for a visually stunning look.
Adjusting for Size
Scaling a cake isn't as simple as doubling the ingredients. For a Homemade Butter Birthday Cake, you have to consider how the heat penetrates the pan.
Scaling Down (1/2 Recipe): Use one 8 inch pan or two 6 inch pans. Reduce the baking time by about 20% and start checking at 25 minutes. For the eggs, beat one egg in a small bowl and use exactly half of it.
Scaling Up (2x Recipe): When doubling, don't just double the baking powder; use about 1.5x the amount to avoid an over rise and collapse. Lower the oven temperature by 25°F (to 325°F) and extend the baking time. This prevents the edges from burning before the center is set.
I don't bake at high altitude so I can't say for sure, but I would suggest consulting this King Arthur chart if you're above 3,000 feet, as you'll likely need to increase your liquid and decrease your sugar.
Cake Baking Myths
There's a lot of bad advice out there. One big one is that you should "grease the pan with flour." While this works, using parchment paper is far superior because it provides a physical barrier that prevents sticking entirely. Flour greasing can sometimes leave a powdery residue on the sides of the cake.
Another myth is that "room temperature" means you can microwave your butter for 10 seconds. Do NOT do this. Microwaving creates hot spots that melt the fat, destroying the air trapping ability of the butter. Leave it on the counter for 2 hours, or cube it and let it sit for 30 minutes.
Storing Your Cake
To keep a Homemade Butter Birthday Cake fresh, the most important thing is to seal it. Once the frosting has set, place the cake in an airtight container.
Fridge: 3-5 days. Keep it in a cake carrier or a large airtight container. Since butter hardens when cold, let a slice sit at room temperature for 30 minutes before eating to regain that velvety texture. Freezer: 2 months.
I recommend freezing the cake layers without frosting. Wrap them tightly in plastic wrap and then foil. Thaw in the fridge overnight before frosting.
Zero Waste Tip: If you have scraps from leveling the top of your cake, don't toss them! Crumble the scraps into a bowl, mix with a spoonful of frosting, and roll them into cake pops. It's the best part of the process.
Perfect Serving Ideas
A cake this rich needs something to balance it out. I love serving a slice with a tart raspberry coulis or fresh blackberries. The acidity of the berries cuts right through the butter and sugar, making every bite feel fresh.
For drinks, a strong cup of black coffee or a cold glass of milk is the classic route. If you're feeling fancy, a glass of chilled Prosecco complements the vanilla notes of the buttercream beautifully.
Since this is a celebratory dish, feel free to overload it with colorful sprinkles or fresh sliced strawberries to give it that authentic birthday feel.
Recipe FAQs
What flavor is "birthday cake" or yellow cake?
It is a classic vanilla butter flavor. This profile creates a neutral, sweet base that pairs well with various colorful decorations and frostings.
What is the best frosting for this cake?
A vanilla buttercream is the gold standard. Beating butter and powdered sugar with heavy cream creates the stiff peaks needed for structural stability.
How to make a homemade birthday cake from scratch?
Cream softened butter and sugar for 3-5 minutes first. Then alternate adding dry ingredients and milk before baking at 350°F for 30-40 minutes.
Can this cake be served at a dinner party?
Yes, it makes a great centerpiece. It pairs wonderfully as a sweet dessert following a hearty meal like stove cooked steak.
Is it true that vanilla extract is optional for a good cake?
No, this is a common misconception. Without it, the cake loses its aromatic depth and tastes primarily of flour and sugar.
How to make a smaller version of this cake?
Reduce the ingredient quantities by half. Use a single 8 inch pan or two 6 inch pans and monitor the bake time closely.
How to achieve the look of a modern fancy cake?
Whip the frosting on high for 2 minutes. This ensures stiff, airy peaks that allow for sharp edges and smooth finishes.
Homemade Butter Birthday Cake