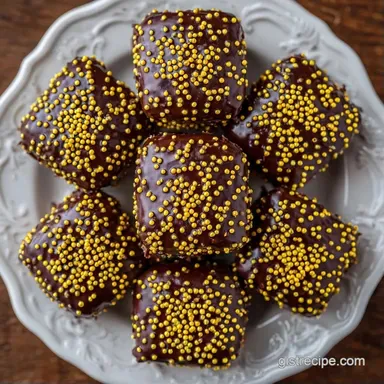
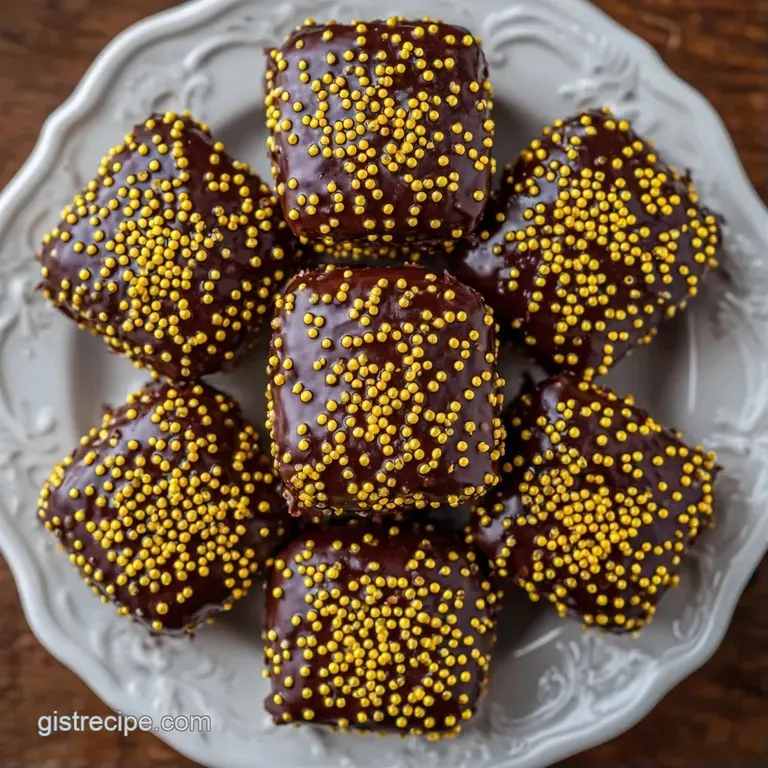
Chocolate Graduation Cap Treats: Party-Ready
- Time:15 minutes active + 15 minutes chilling
- Flavor/Texture Hook: Salty, buttery crunch with a velvety chocolate finish
- Perfect for: Graduation parties, school celebrations, or beginner friendly dessert platters
- Chocolate Graduation Cap Treat with Sprinkles Secret
- The Truth About Professional Baking
- Getting the Right Crunch and Snap
- Quick Details for Your Party
- Essential Pantry Items for Success
- Simple Tools for Assembly
- Step-by-Step Assembly Guide
- Avoiding Messy Chocolate Mishaps
- Troubleshooting Common Issues
- Adjusting the Batch Size
- Dispelling Dessert Myths
- Keeping Treats Fresh and Crisp
- What to Serve With These
- Recipe FAQs
- 📝 Recipe Card
Chocolate Graduation Cap Treat with Sprinkles Secret
That sharp snap of a buttery RITZ cracker followed by the smooth, rich melt of dark chocolate is just a killer combination. I remember the first time I tried to make "fancy" party food for a cousin's graduation.
I spent four hours trying to pipe tiny frosting hats onto cupcakes, and they all slumped over like they'd had too much punch. It was a disaster, and I almost gave up on the whole "cute dessert" idea.
Then I realized that the best party treats aren't the ones that take the most effort, but the ones that use smart shortcuts. By using a sturdy cracker as a base and a pre shaped chocolate square as the cap, you get a clean, architectural look without the stress.
This Chocolate Graduation Cap Treat with Sprinkles is basically a cheat code for looking like you spent all day in the kitchen when you actually spent about fifteen minutes.
You can expect a treat that hits all the right notes. It's not overly sweet, thanks to the salt in the crackers, and the gummy tassel adds a chewy contrast that keeps things interesting. It's the kind of recipe that makes people ask, "Wait, how did you do that?" while they're already reaching for a second one.
The Truth About Professional Baking
A lot of people think you need a culinary degree or a kitchen full of expensive gadgets to make impressive desserts. We see those pristine cakes on social media and assume there's some secret "master" technique involved. Honestly, most of the time, it's just about choosing ingredients that do the heavy lifting for you.
For this treat, we aren't tempering chocolate or baking a complex sponge. We're using the structural integrity of a commercial cracker and the stability of pre formed chocolate. It's about assembly, not alchemy. When you stop trying to be "professional" and start being practical, you actually enjoy the process more.
The real "skill" here is just temperature management. If your chocolate is too hot, it runs; if it's too cold, it won't stick. Once you get that feel for it, you're basically a pro. Trust me, your guests won't know you didn't use a piping bag and a level.
Getting the Right Crunch and Snap
The success of this recipe comes down to how the layers interact. You want a clear distinction between the buttery base and the firm top. If the chocolate is too thin, the whole thing feels flimsy. If the cracker is stale, the "snap" is gone.
Salt Sweet Contrast: The salt in the RITZ crackers cuts through the richness of the semi sweet chocolate, preventing the treat from feeling cloying.
Structural Bond: Using a small dot of melted chocolate acts as a high strength adhesive, locking the "cap" to the "base" so it doesn't slide off during serving.
Tension Balance: The chewiness of the sour belt tassel provides a different resistance than the brittle chocolate, making every bite feel dynamic.
Thermal Setting: Chilling the treats allows the fats in the chocolate to recrystallize, ensuring the sprinkles and tassels stay exactly where you put them.
| Method | Time | Texture | Best For |
|---|---|---|---|
| Microwave | 5 mins | Glossy & Quick | Fast assembly, small batches |
| Stovetop | 15 mins | Velvety & Stable | Large batches, precise heat control |
Quick Details for Your Party
Before we get into the gear, let's look at what's actually happening inside these treats. Understanding the components helps if you decide to tweak things later.
| Component | Science Role | Pro Secret |
|---|---|---|
| RITZ Crackers | Structural Foundation | Use a fresh box for maximum "snap" |
| Semi Sweet Chips | Thermal Adhesive | Stir every 30 seconds to avoid burning |
| Dark Chocolate Squares | Architectural Cap | Keep them chilled until the moment of assembly |
| Sour Belts | Texture Contrast | Cut strips against the grain for a cleaner edge |
Essential Pantry Items for Success
Stick to these specific ingredients for the best results. Since we're going for a budget friendly angle, these are all items you can find at any local grocery store.
- 1 box (16 oz) RITZ Crackers Why this? High butter content and perfect diameter for the cap
- 24 square dark chocolate pieces Why this? Holds shape better than melted chocolate caps
- 1 cup semi sweet chocolate chips Why this? Melts consistently and acts as a great "glue"
- 1/4 cup gold nonpareil sprinkles Why this? Adds the celebratory "graduation" shimmer
- 1 pack (4 oz) yellow sour belts Why this? Bright color and a chewy, tassel like texture
If you're looking for a different base, you could use a round vanilla wafer, though you'll lose that salty kick. For the "glue," any melting chocolate will work, but avoid the low quality ones that separate into oil. If you enjoy this kind of chocolate work, you might also like my One Bowl Yellow Cake for a more substantial dessert.
Simple Tools for Assembly
You don't need a fancy workshop for this. Just a few basics will do.
- Microwave safe glass bowl (essential for even heating)
- Baking sheet (standard size)
- Parchment paper (stops the treats from sticking)
- Kitchen shears or a sharp knife (for the sour belts)
- A small spoon or offset spatula (for the chocolate dots)
Step-by-step Assembly Guide
Right then, let's get into it. This is all about a clean workspace and a steady hand.
- Lay out the RITZ crackers in a single layer on a parchment lined baking sheet. Note: Space them out so they don't touch.
- Heat semi sweet chocolate chips in a microwave safe glass bowl in 30 second intervals. Stir between bursts until the mixture is smooth and glossy.
- Place a small dot (approximately 1/4 teaspoon) of melted chocolate in the center of each cracker.
- Gently press one dark chocolate square onto the melted chocolate dot, centering it on the cracker.
- Cut yellow sour belts into 1/2 inch strips using your shears.
- Apply a tiny drop of melted chocolate to the center of the chocolate square.
- Press a gummy strip on top to create the tassel.
- Scatter gold nonpareil sprinkles around the edges of the chocolate square while the adhesive is still tacky.
- Allow treats to chill for 15 minutes to set before serving.
Avoiding Messy Chocolate Mishaps
The most common issue with this Chocolate Graduation Cap Treat with Sprinkles is the "slide." This happens when the chocolate glue doesn't bond properly or the crackers are too oily.
Troubleshooting Common Issues
| Issue | Solution |
|---|---|
| Why Your Cap is Sliding | If your chocolate squares are sliding off the crackers, your "glue" might be too thin or you've used too much. A giant blob of chocolate creates a lubricated layer rather than a bond. |
| Why Your Chocolate is Lumpy | This usually happens when the chocolate is overheated in the microwave, causing it to seize. According to [Serious Eats](https://www.seriouseats. |
| Why the Tassel Won't Stay | If the sour belt is popping off, the chocolate on top of the square has likely cooled too much. Briefly re-warm your chocolate bowl for 10 seconds. |
Common Mistakes Checklist
- ✓ Always use parchment paper to avoid scrubbing the pan
- ✓ Avoid using "COMPOUND_8" chocolate chips as they don't melt as smoothly
- ✓ Don't overload the cracker with glue or the cap will slide
- ✓ Ensure the crackers are completely flat and not broken
- ✓ Keep the chocolate squares cold until the moment of assembly
Adjusting the Batch Size
If you're hosting a massive party or just making a few for your kids, you can easily scale this.
Scaling Down (for 6-12 treats): Simply halve the ingredients. Use a smaller baking sheet to keep the assembly compact. Since you're melting less chocolate, reduce your microwave intervals to 20 seconds to prevent burning.
Scaling Up (for 48+ treats): Double the ingredients, but don't double the salt if you're adding extra toppings. Work in batches of 24 so the chocolate doesn't harden before you finish the last cracker. I recommend melting the chocolate in two separate bowls to keep the temperature consistent.
If you want a more filling option for a large crowd, you could serve these alongside a Homemade Butter Birthday Cake recipe to balance the salty sweet vibe.
Dispelling Dessert Myths
Myth: You must temper chocolate for this recipe. Truth: No. Since these are chilled and served shortly after, the stability of pre formed chocolate squares combined with a quick set glue is plenty. Tempering is for professional bonbons, not party treats.
Myth: Using expensive Belgian chocolate makes a huge difference here. Truth: Not really. Because the RITZ cracker is so salty and the sour belt is so tart, the subtle notes of high end chocolate get lost. A standard store brand semi sweet chip works perfectly.
Keeping Treats Fresh and Crisp
Since these have a high fat content from the butter in the crackers and the cocoa butter in the chocolate, they can get soft if left in a warm room.
Storage Guidelines Keep these in an airtight container in the fridge for up to 5 days. If you leave them on the counter, the chocolate might bloom (get those white streaks) or the cracker might lose its crunch.
For long term storage, you can freeze them for up to 1 month, though the sour belt may change texture slightly.
Zero Waste Tips If you have leftover melted chocolate, don't throw it out! Pour it into a small mold or just a spoonful on parchment paper and top it with the remaining sprinkles. You've got yourself a little "chef's snack" for the effort.
Any leftover sour belts can be chopped up and tossed into a party mix.
What to Serve With These
Because these are small and punchy, they work best as part of a larger spread. I love pairing them with something creamy to offset the crunch.
- Fresh Berries: Strawberries or raspberries add a tart freshness.
- Creamy Dip: A simple marshmallow fluff dip is a hit with kids.
- Sparkling Cider: The bubbles cleanse the palate between the rich chocolate bites.
If you're planning a full dessert table, these are the perfect "finger food" to sit next to a larger cake. They add height and a thematic touch to the display without requiring any plates or forks.
Recipe FAQs
How to decorate these chocolate graduation caps?
Place a small dot of melted chocolate on a RITZ cracker, then press a dark chocolate square on top. Add a strip of yellow sour belt as a tassel and scatter gold nonpareil sprinkles around the edges.
How to apply sprinkles to the chocolate?
Scatter the gold nonpareil sprinkles immediately while the melted chocolate is still tacky. They will adhere to the surface before the treat is chilled.
What are some inexpensive ideas for a graduation party?
Serve bite sized treats like these chocolate caps to create a high impact dessert table on a budget. These pair perfectly with a cookies and cream cake for a complete celebration spread.
How to keep the chocolate squares from sliding off the crackers?
Use a small dot of chocolate, approximately 1/4 teaspoon. Using too much chocolate creates a lubricated layer that prevents the square from bonding to the cracker.
Why did my melted chocolate turn out lumpy?
Overheating the chocolate in the microwave causes it to seize. Heat your semi sweet chocolate chips in 30-second intervals, stirring between each burst to ensure it remains smooth and glossy.
How long should I chill the treats?
Chill them for 15 minutes. This allows the chocolate adhesive to set completely so the caps and tassels stay in place during serving.
Is it true that I need to bake these treats to set the chocolate?
No, this is a common misconception. These are no-bake treats that rely on refrigeration to firm up the chocolate.
Chocolate Graduation Cap Treats