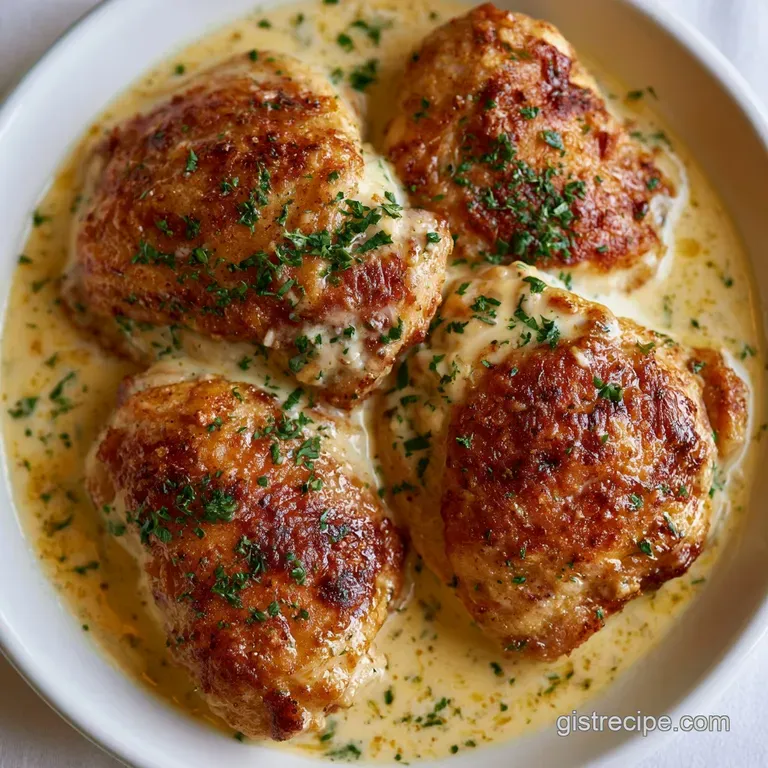
Bobby Flay's Creamy Chicken Thighs: Crispy and Rich
- Time: 10 min prep + 30 min cook = Total 40 minutes
- Flavor/Texture Hook: Mahogany crisp skin with a velvety, garlic infused sauce
- Perfect for: An impressive but reliable weeknight dinner that feels like a bistro meal
- Bobby Flays Creamy Chicken Thighs Recipe
- Secrets to the Thick Sauce
- Essential Component Analysis
- The Right Gear
- Step-by-Step Cooking Guide
- Solving Common Cooking Issues
- Troubleshooting Common Issues
- Easy Swaps and Twists
- Scaling the Portion
- Truth About Searing
- Storing and Saving Leftovers
- Plate and Serve Tips
- Recipe FAQs
- 📝 Recipe Card
That sound of the chicken skin hitting the hot butter, that immediate, aggressive sizzle, is the best part of my whole day. I remember the first time I tried a version of this, and I rushed it. I flipped the meat too early, the skin tore, and I ended up with a grey, rubbery mess.
It was a total letdown, especially when I was craving something comforting after a long shift.
But once I stopped fussing and let the pan do the work, everything changed. I realized the trick isn't in the seasoning, but in the patience. You've got to let that skin get deep, dark brown without touching it. When you finally pull those thighs out and see that mahogany crust, you know you've won.
This bobby flays creamy chicken thighs recipe is my go to when I want something that tastes like a lot of effort but actually comes together in under an hour. It's a reliable classic that brings together the salty, the creamy, and the zesty.
Trust me on this, your house is going to smell like a high end kitchen in about twenty minutes.
Bobby Flays Creamy Chicken Thighs Recipe
The beauty of this dish is how it handles textures. You have the shatter crisp skin on top, but the meat underneath stays juicy and tender. Then you've got that velvety sauce that clings to everything. It's the kind of meal that makes you want to lick the plate, though your guests might judge you if you actually do.
When I first started making this, I thought I could use low-fat cream or a substitute, but honestly, don't even bother. The heavy cream is what gives it that luxurious mouthfeel. If you're looking for a chicken thigh dinner that feels special but doesn't require a culinary degree, this is the one.
Let's crack on with the details. We're going to focus on the flow of the cook so you aren't scrambling. I've broken this down into a plan that ensures you don't overcook the meat while the sauce is thickening. It's all about the timing.
Secrets to the Thick Sauce
I used to think you needed a flour roux to get a sauce this thick, but that's not the case here. This is all about reduction and fat.
The Fond Factor: Those brown bits stuck to the pan after searing are flavor gold. When we add the broth, we lift those bits, integrating all that roasted meat flavor directly into the sauce.
Liquid Reduction: Simmering the broth by half concentrates the salt and savory notes. This prevents the final sauce from tasting watery or "thin" once the cream goes in.
The Emulsion: Adding lemon juice at the end isn't just for flavor. The acidity cuts through the heavy fat of the cream and butter, creating a balanced, silky texture that doesn't feel greasy on the tongue.
Temperature Control: Keeping the sauce at a gentle simmer instead of a rolling boil prevents the cream from breaking or curdling. According to Serious Eats, maintaining a steady temperature is key to preventing dairy separation in pan sauces.
But what about the skin? If you simmer the chicken in the sauce for too long, you lose that crunch. That's why we remove the meat, build the sauce, and then just nestle the chicken back in at the very end.
| Ingredient/Method | Fresh/Standard | Shortcut/Alternative | Impact on Result |
|---|---|---|---|
| Garlic | Fresh cloves | Jarred minced | Less punchy, slightly metallic taste |
| Lemon Juice | Fresh squeezed | Bottled juice | Lacks the bright, floral aroma |
| Chicken Broth | Low sodium liquid | Bouillon cube | Can be overly salty if not diluted |
Essential Component Analysis
I like to look at my ingredients as tools. Each one has a specific job to do in this pan. If you swap one without knowing why it's there, you might mess with the balance.
| Ingredient | Science Role | Pro Secret |
|---|---|---|
| Heavy Cream | Fat/Thickener | Use room temperature cream to avoid temperature shocks |
| Lemon Juice | Acid Balancer | Add it at the very end to keep the flavor "bright" |
| Chicken Broth | Deglazing Agent | Use low sodium so you can control the salt yourself |
| Unsalted Butter | Browning/Flavor | Use a 12 inch skillet to avoid crowding the pan |
Right then, let's talk about what you actually need to put on your counter before you start. Having everything ready is the difference between a calm cook and a kitchen crisis.
The Right Gear
You don't need a fancy kitchen, but the pan matters. I always reach for a 12 inch cast iron skillet. Cast iron holds heat better than anything else, which is how you get that mahogany skin without the meat drying out. If you don't have one, a stainless steel pan works great too.
Avoid non stick if you can, because they don't develop a good fond, and that's where the sauce gets its soul.
For the prep, a sharp chef's knife for the garlic and some sturdy paper towels are essential. Seriously, the paper towels are the most underrated tool here. If the chicken is damp, it will steam instead of sear, and you'll never get that shatter crisp texture.
I also suggest having a pair of tongs. Flipping chicken thighs with a fork is a recipe for disaster - you'll poke holes in the skin and let all the juices escape. Tongs give you a secure grip and a clean flip.
Step-by-step Cooking Guide
Let's get into the actual flow. This is a three phase process: the sear, the base, and the finish.
Phase 1: Achieving the Golden Sear
- Pat the chicken thighs completely dry with paper towels. Note: Moisture is the enemy of a good sear.
- Season both sides generously with 1 tsp kosher salt and ½ tsp cracked black pepper.
- Heat 1 tbsp olive oil and 2 tbsp unsalted butter in your skillet over medium high heat until the butter foams and just begins to brown.
- Place chicken skin side down. Let it sizzle without moving it for 5-7 minutes until the skin is mahogany colored and releases easily from the pan.
- Flip the thighs and cook for another 5 minutes. Remove the chicken to a plate and set it aside.
Phase 2: Building the Flavor Base
- Reduce the heat to medium. Add 4 cloves of minced garlic to the leftover pan fat. Sauté for 30 seconds until the garlic smells fragrant but hasn't turned dark brown.
- Pour in ½ cup chicken broth. Use a wooden spoon to scrape up all the browned bits from the bottom.
- Simmer for 3-4 minutes until the liquid has reduced by half.
Phase 3: The Final Velvety Finish
- Stir in ¾ cup heavy cream and 1 tsp fresh lemon juice. Bring to a gentle simmer for 2-3 minutes until the sauce is thick enough to coat the back of a spoon.
- Return the chicken and any juices from the plate back to the pan. Spoon the sauce over the meat and garnish with 1 tbsp chopped fresh parsley.
Chef's Tip: If you want an even deeper flavor, add a pinch of smoked paprika to the seasoning. It doesn't change the profile much but adds a subtle "grilled" depth.
Solving Common Cooking Issues
Even with a foolproof plan, things happen. Usually, it's a temperature issue or a timing mistake.
Troubleshooting Common Issues
| Issue | Solution |
|---|---|
| Why Your Sauce Split | If you see little beads of oil floating in your cream, the sauce has broken. This usually happens if the heat was too high or you added the cream too quickly. You can usually fix this by whisking in a |
| Why Chicken Sticks to the Pan | If the meat won't release, it's not ready. Chicken naturally "grips" the pan and then releases itself once the crust has formed. If you force it, you'll leave the best part of the skin stuck to the me |
| Why the Sauce is Too Thin | If your sauce looks more like soup than a coating, you didn't reduce the broth enough. Just keep simmering the cream mixture for another 2 minutes. The water evaporates, leaving behind the fat and pro |
Common Mistakes Checklist:
- ✓ Did you pat the chicken dry?
- ✓ Did you wait for the butter to foam before adding meat?
- ✓ Did you let the skin sear without moving it for 5 minutes?
- ✓ Did you scrape the brown bits (fond) into the broth?
- ✓ Did you avoid boiling the cream aggressively?
Easy Swaps and Twists
The bobby flays creamy chicken thighs recipe is a great base, but you can definitely tweak it. If you're feeling fancy, you can add a handful of spinach or sundried tomatoes during the garlic phase. This turns it into a more "Tuscan" style dish.
If you want a different kind of creaminess, you could try my Creamy Garlic Sauce recipe as a replacement for the broth/cream combo. It gives you a more concentrated garlic punch. For those who want a bit more earthiness, stirring in some sautéed mushrooms just before adding the cream is a brilliant move.
If you need to keep things lower in calories, you can swap the heavy cream for half and half, but be warned: the sauce will be thinner and won't have that same "cling" to the meat. You might need to simmer it slightly longer to get the right consistency.
Scaling the Portion
If you're cooking for a crowd, don't just double everything in one pan. If you crowd the skillet, the chicken will steam in its own juices and you'll lose the crust.
Scaling Down (2 Servings): Use a smaller 8 inch skillet. Reduce the broth and cream by half. The cooking time for the sear remains the same, but the sauce will reduce much faster, so keep a close eye on it.
Scaling Up (8 Servings): Work in batches. Sear 4 thighs at a time, remove them, and then do the next 4. Once all the meat is done, build the sauce in the full pan. Only increase the salt and pepper to 1.5x instead of 2x, as the reduction process concentrates the salt.
Truth About Searing
There's a common myth that searing meat "seals in the juices." This is actually false. Searing doesn't create a waterproof barrier; in fact, meat loses more moisture during a over high heat sear than during slow cooking. However, we do it anyway because of the flavor.
The browning creates complex, savory compounds that you just can't get any other way.
Another misconception is that you need to let the chicken "rest" for a long time like a steak. While a few minutes is good, these thighs are much more forgiving. Since they're returned to the warm sauce, they stay juicy and tender without needing a 20 minute break on the counter.
Storing and Saving Leftovers
This dish keeps remarkably well in the fridge for up to 3 days. Store the chicken and sauce together in an airtight container. When you reheat it, do it slowly on the stovetop over low heat. If you microwave it, the cream can sometimes separate, so add a splash of water or milk and stir it well.
For the freezer, I don't recommend freezing the sauce covered chicken, as the cream can grain up. Instead, freeze the seared chicken separately and make a fresh batch of sauce when you're ready to eat.
To avoid waste, save any leftover pan drippings or the remaining broth. You can use them as a base for my Homemade Turkey Gravy recipe or stir them into a risotto for extra depth. Even the parsley stems can be finely chopped and tossed into a soup.
Plate and Serve Tips
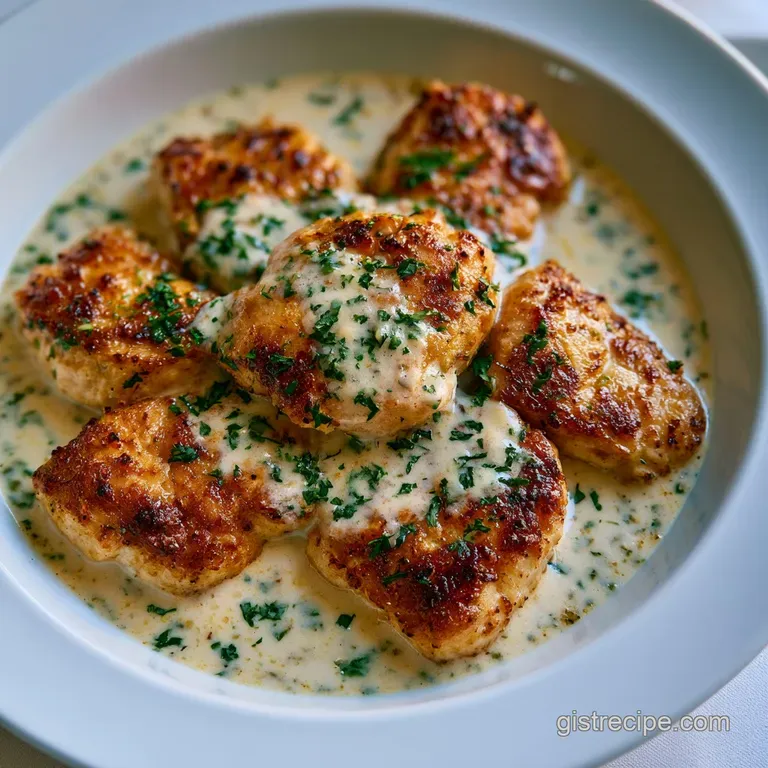
The presentation is what makes this feel like a "cheat meal" at a bistro. I recommend serving the chicken on a wide, shallow plate. Spoon a generous pool of the sauce onto the plate first, then nestle the thighs on top. This keeps the crispy skin exposed and away from the liquid, preserving the crunch.
For a low carb pairing, serve this with roasted asparagus or a simple sautéed spinach. If you're not counting carbs, mashed potatoes or a crusty piece of sourdough bread are non negotiable for soaking up that leftover garlic sauce.
Finally, hit it with one last tiny squeeze of lemon and a sprinkle of fresh parsley right before it hits the table. The contrast of the bright green herbs against the rich, mahogany chicken makes the dish pop visually and tastes incredibly fresh.
Recipe FAQs
Can I use boneless, skinless thighs instead?
No, it is not recommended. The skin is essential for creating the mahogany crust and flavoring the pan drippings, though the sauce still tastes great served over homemade cavatelli.
Why is my chicken sticking to the pan?
The meat hasn't seared enough yet. Chicken naturally grips the pan and will release itself automatically once the crust has fully formed.
How to prevent the cream sauce from splitting?
Keep the heat at medium and stir the cream in gradually. Using excessive heat or pouring the cream in too quickly can cause the oil to separate from the liquid.
Is it true that I should move the chicken around while searing?
No, this is a common misconception. You must leave the chicken undisturbed for 5 7 minutes to achieve the correct mahogany color and ensure it releases easily.
How to thicken the sauce if it is too thin?
Simmer the liquid for a few additional minutes. Continue reducing the sauce until it is thick enough to coat the back of a spoon.
Can I freeze the finished dish?
No, do not freeze the sauce. Heavy cream can become grainy when frozen; instead, freeze the seared chicken separately and prepare a fresh sauce when reheating.
What is the best way to reheat leftovers?
Warm slowly on the stovetop over low heat. This method prevents the cream from separating, which is a common issue when using a microwave.
Bobby Flay Creamy Chicken Thighs

