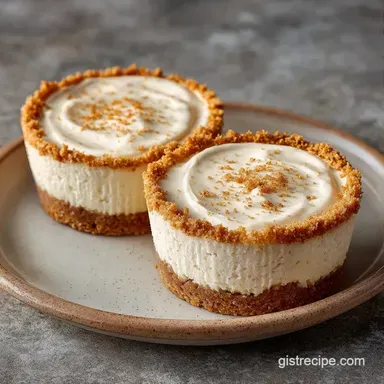
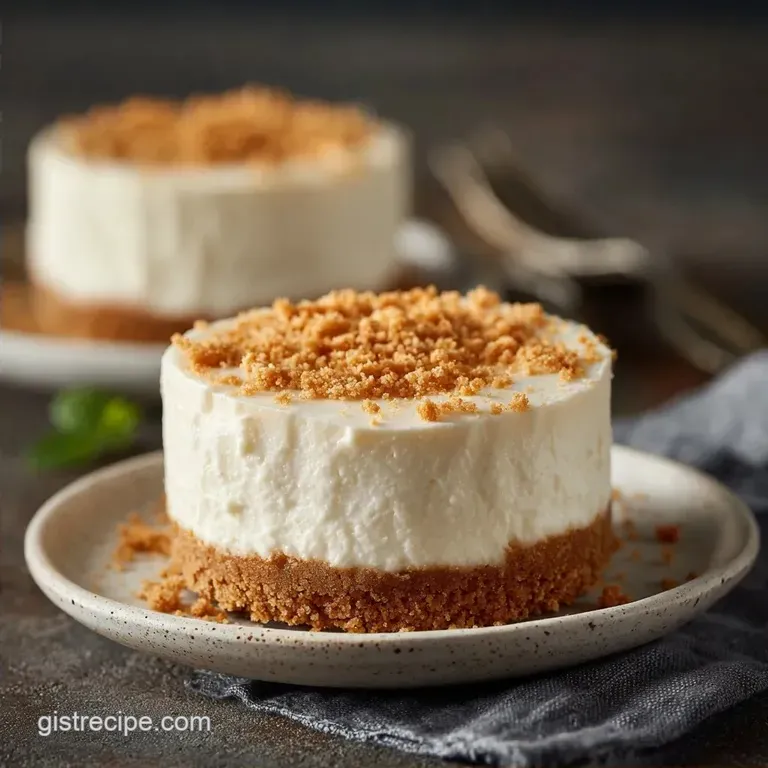
Guilt-Free Mini Cheesecake Dessert Cups: Creamy
- Time: 15 min active + 4 hours chilling
- Flavor/Texture Hook: Tangy, creamy filling with a buttery, salty sweet crunch
- Perfect for: Baby showers, graduation parties, or a simple weekend treat
Imagine the sound of a party already starting in your living room. You've got guests arriving in an hour, and you realize you forgot a dessert that doesn't require a knife and fork. I've been there. The panic is real until you realize you have a few blocks of cream cheese and some graham crackers in the pantry.
The best part about these is that they don't require a water bath or a prayer that the top doesn't crack. You just mix, pipe, and let the fridge do the heavy lifting. They look like they came from a fancy bakery, but honestly, they're just a few basic staples put together in a cup.
You can expect a treat that's rich but not cloying. Because we're using honey and yogurt, the Mini Cheesecake Dessert Cups feel a bit fresher than the traditional New York style. Plus, they're small enough that people can grab one and keep chatting.
Mini Cheesecake Dessert Cups Guide
Right then, let's talk about what actually makes this work. Most no bake recipes rely on gelatin or massive amounts of sugar to stay upright, but we're taking a different route.
Room Temp Cheese: Soft cream cheese blends without lumps, which means you don't over mix the batter and accidentally incorporate too much air. According to Serious Eats, temperature control is the biggest factor in a smooth emulsion.
Strained Yogurt: By using Greek yogurt that's been strained, we remove the excess whey. This keeps the filling thick and stable so it doesn't turn into a pudding.
| Approach | Topping Type | Taste Profile | Effort Level |
|---|---|---|---|
| Fresh | Sliced Berries | Bright and acidic | Low |
| Shortcut | Fruit Jam | Intense sweetness | Very Low |
What Each Ingredient Does
| Ingredient | What It Does | Best Swap |
|---|---|---|
| Cream Cheese | Provides the structure | Mascarpone |
| Greek Yogurt | Adds tang and lightness | Sour cream |
| Honey | Sweetens without graininess | Maple syrup |
| Graham Crackers | Creates the salty base | Digestive biscuits |
Essential Ingredient List
- 1.5 cups graham cracker crumbs Why this? Classic honey wheat flavor that balances the cheese
- 3 tbsp unsalted butter, melted Why this? Binds the crumbs into a solid base
- 1 tbsp coconut sugar Why this? Adds a slight caramel note to the crust
- 8 oz cream cheese, softened Why this? The essential fat for a creamy set
- 0.5 cup plain Greek yogurt, strained Why this? Cuts the richness with acidity
- 0.25 cup honey Why this? Liquid sweetener that keeps the filling smooth
- 1 tsp vanilla extract Why this? Rounds out the sharp lemon and cheese
- 1 tbsp lemon juice Why this? Brightens the flavor and helps the set
- 1 cup fresh strawberries Why this? Adds a fresh, juicy finish
Tools for the Job
You don't need a professional kitchen for this. A standard hand mixer works fine, though a stand mixer such as KitchenAid makes the cream cheese step a bit faster. You'll also need 12 small dessert cups (plastic or glass), a piping bag, and a small bowl for the crust.
Easy Assembly Steps
- Combine the graham cracker crumbs, melted butter, and coconut sugar in a small bowl. Stir until the mixture resembles wet sand.
- Spoon approximately 1 tablespoon of the crumb mixture into the bottom of each of the 12 mini dessert cups and press down firmly with a small spoon. Note: Press hard so the crust doesn't crumble when you eat it.
- In a large bowl, beat the softened cream cheese until smooth and lump free.
- Gradually beat in the honey, vanilla extract, and lemon juice on medium speed.
- Gently fold in the strained Greek yogurt until the mixture is airy and combined, taking care not to over beat. Note: Folding prevents the mixture from becoming too runny.
- Transfer the filling to a piping bag and pipe into each prepared cup, filling just below the rim.
- Refrigerate the cups for at least 4 hours to allow the filling to set. Wait until the filling feels firm to a light touch.
- Top each cheesecake cup with a fresh strawberry or blueberry just before serving.
Fixing Common Problems
If your filling feels a bit too soft, don't panic. It usually comes down to how the ingredients were handled before mixing.
Why Your Filling Is Runny
This often happens if the yogurt wasn't strained enough or if the cream cheese was too warm. The structure relies on the fat in the cheese staying stable. If it's too liquid, you can pop them back in the fridge for another hour, but avoid adding more sugar, as that can actually thin out the mixture.
Why Your Crust Is Loose
If the base feels like loose sand instead of a cookie, you likely didn't use enough butter or didn't press down hard enough. For the next batch, try chilling the crusts for 10 minutes before adding the filling.
| Problem | Root Cause | Solution |
|---|---|---|
| Lumpy Filling | Cheese was too cold | Microwave in 5 sec bursts |
| Soggy Base | Filling added too soon | Chill crusts first |
| Separated Mix | Over beating the yogurt | Fold by hand, don't whip |
Changing the Batch Size
Scaling these treats is pretty straightforward since there's no oven timing involved.
Cutting it down: If you only need 6 cups, just halve everything. For the eggless filling, this is easy. If you ever adapt this to a baked version using eggs, beat one egg in a bowl first and then pour out half.
Scaling up: For a party of 24 or more, double the recipe. I suggest working in two batches for the filling. If you use a giant bowl, the bottom often stays lumpy while the top gets over whipped. Keep the spices and vanilla at 1.5x the original amount rather than a full 2x to keep the flavor balanced.
Cheesecake Myths Debunked
You might hear that no bake versions aren't "real" cheesecakes. That's not true. They're just a different style that emphasizes the tang of the cheese over the custard like texture of a baked cake.
Some people think you need gelatin for a firm set. While gelatin works, using strained Greek yogurt and full fat cream cheese provides enough stability for a small cup. The cold temperature does most of the work.
Fridge and Freezer Tips
These stay great in the fridge for about 3 to 4 days. Keep them covered with plastic wrap or in an airtight container so they don't pick up the smell of that leftover onion in your fridge.
You can freeze them for up to a month. Just make sure you don't add the fresh strawberries until after they thaw. To eat, move them to the fridge for 2 hours. If you're trying to avoid waste, any leftover crust crumbs can be stirred into your morning oatmeal for a little bit of a treat.
Flavor Tweaks and Swaps
If you want to switch things up, these are very flexible. For a chocolate version, replace the graham crackers with crushed Oreos and add a tablespoon of cocoa powder to the cheese mix. These make for great Mini Oreo cheesecake dessert cups if you're serving kids.
If you have a bit more time, you can try a no bake strawberry cheesecake using a larger springform pan for a different look.
| Original Ingredient | Substitute | Why It Works |
|---|---|---|
| Honey (0.25 cup) | Maple Syrup (0.25 cup) | Similar viscosity. Note: Adds a woodier, autumnal flavor |
| Graham Crumbs | Crushed Almond Cookies | Adds a nuttier, richer base |
| Fresh Strawberries | Raspberry Coulis | More intense tartness; pourable texture |
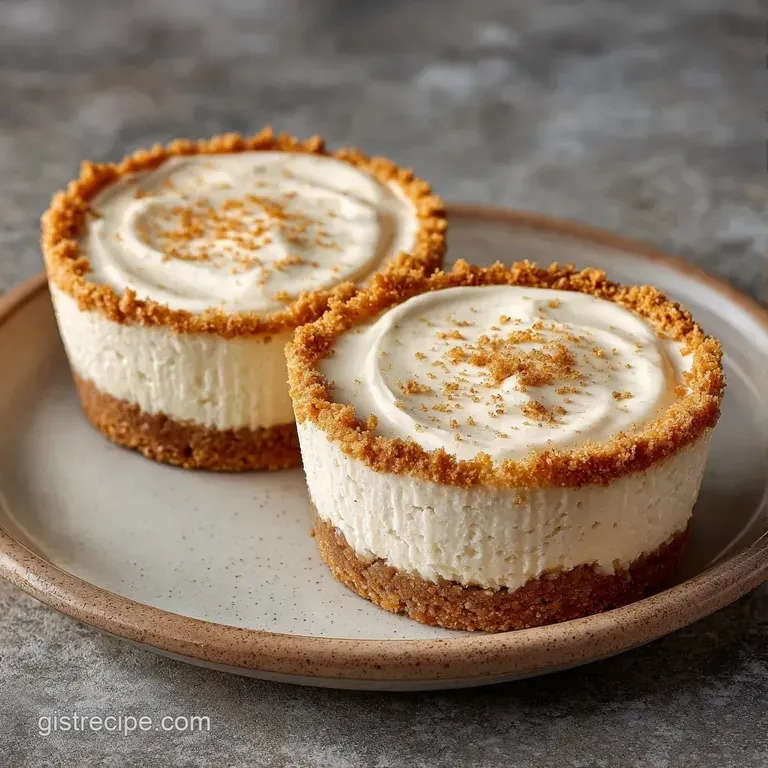
Plating and Presentation
Since these are already in cups, the hard work is done. But to make them feel like "fancy mini desserts in cups," focus on the garnish. A single mint leaf next to a strawberry makes a huge difference.
For a big event, arrange them on a slate board or a white ceramic platter. If you're doing a themed party, these pair well with mini party cakes to create a dessert table with different heights and textures. Just remember to keep them chilled until the very last second so they stay firm.
Recipe FAQs
Are mini cheesecake cups an inexpensive idea for a graduation party?
Yes, they are very budget friendly. They use simple pantry staples like graham crackers and cream cheese to create a high end presentation without professional bakery costs.
How many mini cheesecake cups should I prepare for a party?
Plan for 1.5 cups per guest. Because of their small size, guests often take a second one, especially if these are the primary dessert.
How to make mini cheesecake dessert cups?
Press a mixture of graham cracker crumbs, melted butter, and coconut sugar into the bottom of cups. Beat softened cream cheese with honey, vanilla, and lemon juice, fold in strained Greek yogurt, pipe the filling into the cups, and refrigerate for 4 hours.
Why is my cheesecake filling lumpy?
Use room temperature cream cheese. Cold cheese will not emulsify properly, which creates small lumps that are difficult to beat out without over mixing the batter.
Do I need to use a water bath to prevent these cheesecakes from cracking?
No, this is a common misconception. Since these are no-bake and served in individual cups, there is no oven heat to cause the filling to crack or shrink.
Can I make these a day in advance?
Yes, they store well in the fridge. Keep them covered to prevent them from absorbing other odors, but wait to add the fresh strawberry or blueberry toppings until just before serving.
Can I use regular yogurt instead of strained Greek yogurt?
No, regular yogurt is too thin. Strained yogurt provides the necessary structure to hold its shape; if you enjoyed the stability of a no bake pie, you will see why removing excess moisture is essential here.
Mini Cheesecake Dessert Cups