Homemade Italian Chicken Sausage in 15 Minutes
- Prep & Cook Time: 5 min active + 10 min cooking
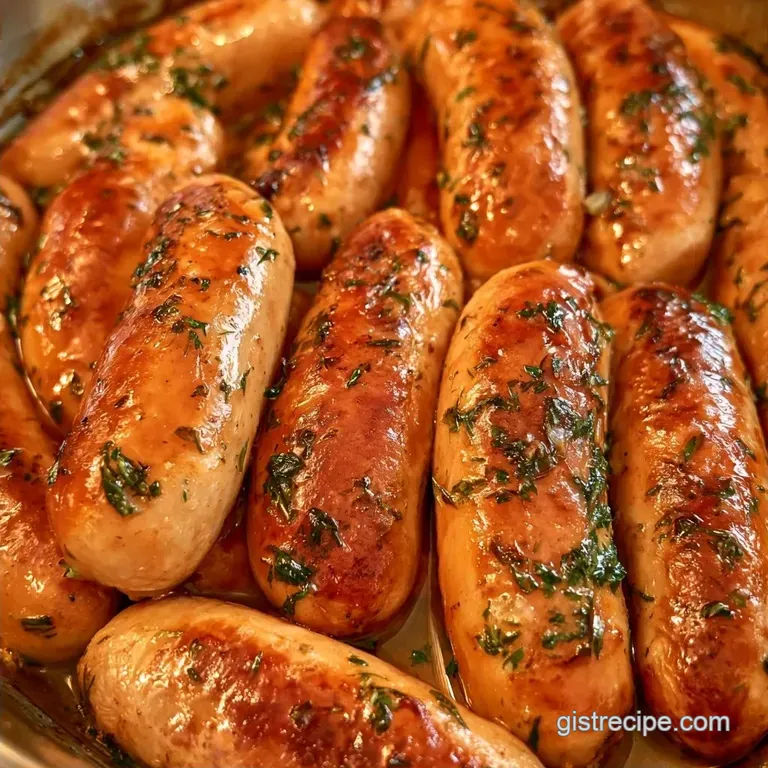
- Taste & Texture: A deep mahogany sear with a juicy center
- Ideal for: Rapid weeknight dinners or high-protein meal prep
- Homemade Italian Chicken Sausage Recipe
- Why it Stays Juicy
- Tools for the Job
- What Each Ingredient Does
- The Grocery List
- Cooking the Sausage
- Precision Checkpoints
- Scaling the Batch
- Fixing Common Issues
- Common Kitchen Myths
- Storage and Waste Tips
- Adding Your Own Twist
- Best Ways to Serve
- Recipe FAQs
- 📝 Recipe Card
Homemade Italian Chicken Sausage Recipe
The scent of toasted fennel and garlic always transports me back to the small butcheries of Italy. In my youth, the local salsiccia—typically a rich, pork based sausage was a centerpiece of every Sunday meal, whether it was grilled whole or crumbled into a sauce.
As I moved toward a leaner diet, I craved those intense flavors without the excess fat. I spent several weekends attempting to recreate that distinct herbal blend using ground poultry, but I struggled with the texture since chicken often becomes dry the moment it hits the pan.
This recipe fixes that problem. By handling the meat carefully and incorporating a bit of oil, the final product remains hearty and authentic. It's a perfect way to enjoy those classic tastes even on a hectic Tuesday night.
Why it Stays Juicy
- Added Fat: Chicken is lean, so olive oil acts as a moisture barrier to keep the meat from drying.
- Minimal Handling: Mixing too much develops proteins that make the sausage rubbery, so we stop the moment spices are blended.
Tools for the Job
This recipe requires no specialized equipment. All you really need are a large mixing bowl and a heavy bottomed skillet. I prefer using cast iron because its superior heat retention helps develop a deep brown crust. A meat thermometer is also essential to ensure the chicken doesn't overcook.
What Each Ingredient Does
| Ingredient | What It Does | Best Swap |
|---|---|---|
| Ground Chicken | Provides the protein base | Ground Turkey |
| Olive Oil | Adds moisture and helps searing | Avocado Oil |
| Fennel Seeds | Gives that "Italian sausage" aroma | Ground Fennel |
| Garlic | Adds pungent, savory depth | Garlic Powder |
The Grocery List
- 1 lb ground chicken The logic: Acts as a mild canvas for the seasonings. (Swap: Ground turkey)
- 1 tbsp extra virgin olive oil The logic: Keeps the meat moist. (Swap: Grapeseed oil)
- 3 cloves garlic, minced The logic: Fresh cloves have more impact than powder. (Swap: 1 tsp garlic powder)
- 1 tsp dried fennel seeds, slightly crushed The logic: Essential for that classic sausage profile. (Swap: 1/2 tsp ground fennel)
- 1 tsp dried oregano The logic: Adds grounded, herbal tones. (Swap: Dried basil)
- 1/2 tsp kosher salt The logic: Amplifies all the other seasonings. (Swap: Sea salt)
- 1/2 tsp freshly cracked black pepper The logic: Gives a gentle, woody warmth. (Swap: White pepper)
- 1/4 tsp red pepper flakes The logic: Provides a mild spicy touch. (Swap: Cayenne pepper)
Fast vs Classic Method
| Feature | This Skillet Method | Traditional Casing Method |
|---|---|---|
| Total Time | 15 minutes | 24+ hours |
| Texture | Crumbled/Pattie | Firm Link |
| Equipment | Single Pan | Grinder and Stuffer |
Cooking the Sausage
Phase 1: Combining the Flavors
In a large mixing bowl, stir together the ground chicken, olive oil, minced garlic, fennel, oregano, salt, pepper, and red pepper flakes. Use a fork or your hands to mix gently, ensuring the spices are evenly distributed. Avoid overmixing to keep the texture from becoming too dense or tough.
Phase 2: Searing the Meat
Heat a heavy bottomed skillet over medium high heat. When the pan is hot, add the chicken mixture and break it into small patties or bite sized chunks. Let the meat sear undisturbed for 3–4 minutes until a deep, mahogany crust develops on the bottom.
Phase 3: Finishing the Cook
Stir the sausage and continue to cook for an additional 5–7 minutes. Do so until the meat is no longer pink and hits 165°F (74°C). The edges should be crispy and the aroma should evoke a bistro.
Chef's Note: For a superior sear, pat your skillet dry before adding the oil. Any excess water in the pan will steam the meat rather than browning it.
Precision Checkpoints

- 1. Searing Time
- Exactly 3
- 2. Finish Time
- 5
- 3. Safe Temp
- 165°F (74°C) as per USDA guidance.
Scaling the Batch
Cutting the Recipe Down
If you're cooking for one, halve everything. Use a smaller 8 inch skillet so the meat doesn't spread too thin and dry out. Reduce the final stir fry time by about 2 minutes.
Doubling the Batch
When making 2 lbs, don't crowd the pan. Work in two batches. If you put too much meat in at once, the temperature drops and the sausage will boil in its own juices rather than browning.
Flavor Adjustments
- Extra heat? → add 1/2 tsp more red pepper flakes.
- Sweeter profile? → add a pinch of brown sugar.
- More herbal? → fold in 1 tsp fresh parsley.
Fixing Common Issues
Meat feels rubbery
This usually happens from over mixing the raw meat. When you work the proteins too much, they bond too tightly. Next time, fold the ingredients together like you would a cake batter.
The pan is sticking
Your pan wasn't hot enough when the meat hit the surface. A hot pan creates an instant sear that releases the meat. Wait until the oil shimmers before adding the chicken.
Flavor tastes muted
Chicken is leaner than pork and doesn't carry flavor as easily. You might need a pinch more salt or an extra clove of garlic to make the tastes pop.
| Problem | Fix |
|---|---|
| Rubbery texture | Mix less during prep |
| Sticking to pan | Increase heat before adding meat |
| Flat taste | Add a pinch more salt |
Common Kitchen Myths
Searing meat doesn't actually "seal in the juices." That's a common misconception. The moisture loss happens regardless of how you start. However, the crust created by searing adds a massive amount of flavor that you can't get from poaching or steaming.
Another myth is that lean meats can't be juicy. While they lack marbled fat, using a bit of olive oil and avoiding overcooking allows the moisture to stay trapped in the protein fibers.
Storage and Waste Tips
Keep cooked sausage in a sealed tub in the cooler for 3 to 4 days. For longer storage, it lasts 2 months in the freezer. Freeze them in a single layer on a tray first so they don't clump together, then move them to a freezer bag.
To avoid waste, save the brown bits left in the pan after cooking. These "fond" bits are packed with flavor. Deglaze the pan with a splash of water or white wine to make a quick pan sauce for your meal.
Adding Your Own Twist
For a Sweet Version
Swap the red pepper flakes for a teaspoon of maple syrup or brown sugar. This Homemade Italian Chicken Sausage Recipe becomes a great pairing for breakfast eggs or pancakes.
For a Hot Version
Double the red pepper flakes and add a pinch of cayenne. This version is great for those who like a slow burn that hits the back of the throat.
Using Turkey
You can use ground turkey as a 1:1 swap. Note that turkey can be even leaner than chicken, so you might want to add an extra teaspoon of olive oil to keep it moist.
Best Ways to Serve
This Homemade Italian Chicken Sausage Recipe is incredibly versatile. I love crumbling it into a skillet with kale and white beans for a healthy lunch. It also works as a protein topper for a big salad with lemon vinaigrette.
For a more comforting meal, try it with a Cavatelli Pasta Recipe. The chewy pasta catches the bits of sausage and garlic perfectly. Just toss the cooked sausage with the pasta, a bit of pasta water, and some fresh parmesan.
If you're keeping it low carb, serve the patties with sautéed spinach and a side of roasted peppers. The acidity of the peppers cuts through the richness of the fennel and oil.
Recipe FAQs
What ingredients go into the recipe?
You will need ground chicken, olive oil, minced garlic, fennel seeds, oregano, salt, pepper, and red pepper flakes. These simple items combine to create a savory, lean sausage.
Which spices create the signature taste?
Crushed fennel seeds and oregano provide the classic Italian profile. The red pepper flakes add a subtle heat that balances the savory garlic.
Common mistakes to avoid during mixing?
Overmixing the meat is the biggest error because it leads to a tough, rubbery texture. Stop stirring as soon as the spices are distributed to keep the sausage tender.
How to make the sausage from scratch?
Combine ground chicken, oil, garlic, and spices in a large bowl. Mix gently by hand or with a fork until the ingredients are evenly distributed.
Other options for ground chicken besides meatballs?
You can make burger patties, lettuce wraps, or this Italian sausage. These sausages pair perfectly with a creamy garlic sauce for a more indulgent meal.
Best way to cook the sausage for a crust?
Sear the meat undisturbed in a hot skillet for 3 to 4 minutes. Stir and continue cooking for 5 to 7 minutes until the internal temperature reaches 165°F.
Is it true that you need casings for chicken sausage?
Surprisingly, no. You can simply form the mixture into bite sized chunks or small patties and sear them in a pan.
Can you store leftover sausage?
Keep cooked sausage in a sealed tub in the cooler for 3 to 4 days. For longer storage, freeze them in a single layer on a tray before moving them to a bag.
Homemade Italian Chicken Sausage