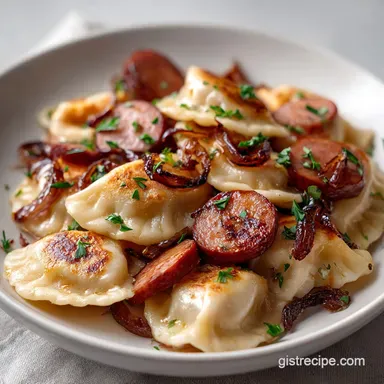
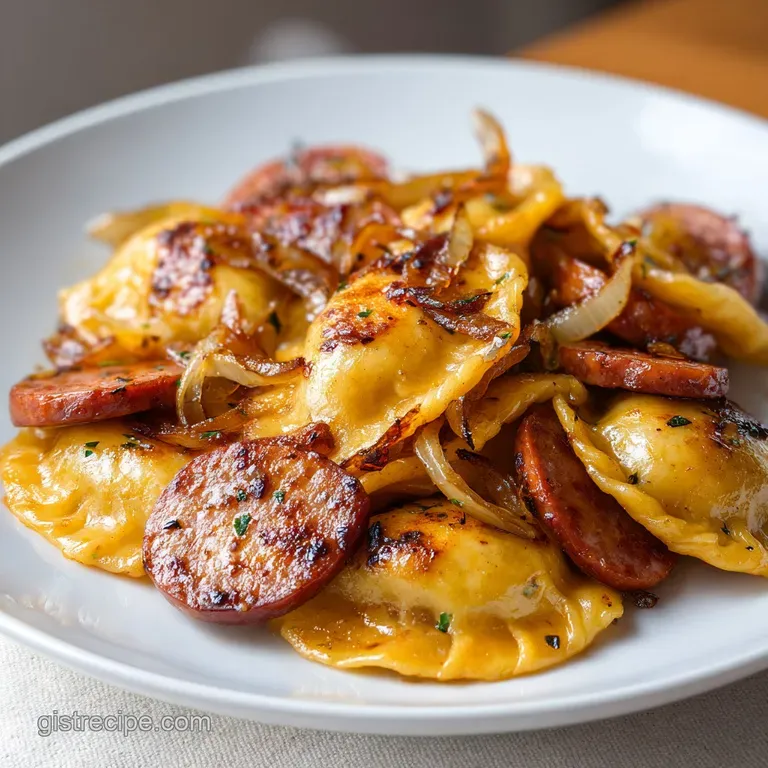
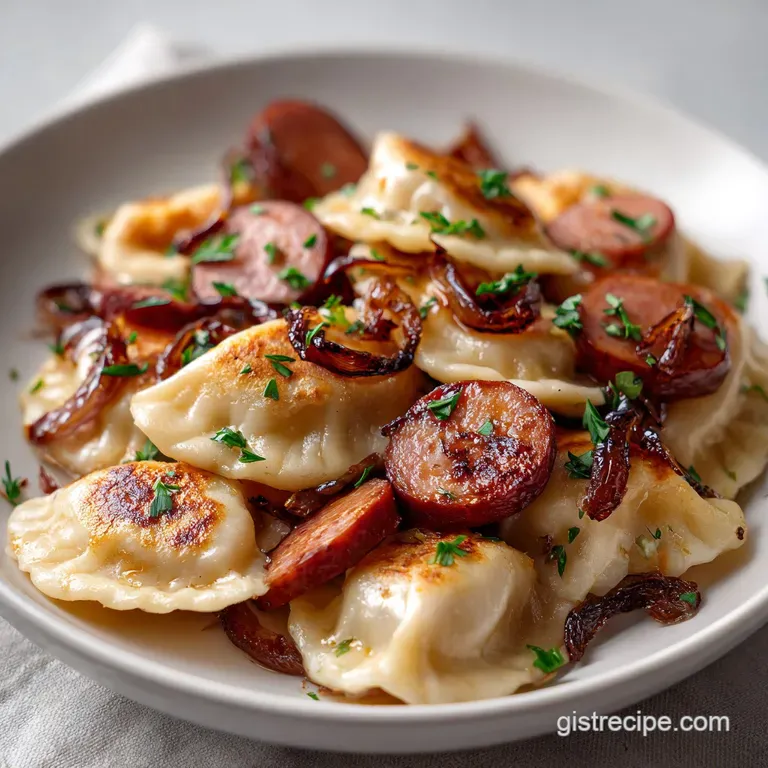
Classic Perogies and Sausage Skillet: Failure-Proof
- Time: 10 min prep + 15 min cook = Total 25 mins
- Flavor/Texture Hook: Shatter crisp pierogies with savory, caramelized onions
- Perfect for: Easy weeknight dinners or comforting meal prep
- The Classic Perogies and Sausage Skillet Recipe
- Quick Recipe Specs
- Essential Ingredient List
- Necessary Kitchen Tools
- Step-by-Step Cooking Process
- Fixing Common Pan Problems
- Troubleshooting Common Issues
- Fun Flavor Twist Ideas
- Adjusting For Different Sizes
- Debunking Common Kitchen Myths
- Storage and Waste Tips
- Best Side Dish Pairings
- Recipe FAQs
- 📝 Recipe Card
Listen, we've all been there. You throw frozen pierogies straight into a pan with some sausage, thinking it'll be a quick win, but then it happens. The outside of the pierogi looks okay, but the inside is still a frozen block of ice.
Or worse, you overcook them trying to heat the center, and they turn into mushy, sad little dough balls. It's a total letdown when you're craving that salty, comforting crunch.
I used to think the secret was just more oil, but that just made them greasy. The real trick is all in the timing and the temperature of the pan. You need a specific sequence of events to get that mahogany crust on the meat and a velvety, crisp finish on the potatoes.
Trust me on this, once you follow this method, you'll never go back to the "dump and stir" approach. This classic perogies and sausage skillet recipe is designed to be foolproof, focusing on minimal tools and maximum flavor. Let's crack on and get this in the pan.
The Classic Perogies and Sausage Skillet Recipe
The biggest struggle with this dish is usually the texture mismatch. You want the kielbasa to be snappy and browned, the onions to be jammy and sweet, and the pierogies to have a thin, crispy shell. If you try to do it all at once, the onions burn before the pierogies are warm, or the pierogies steam instead of fry.
By separating the processes, we control the moisture. Boiling the pierogies for just a few minutes first ensures the filling is hot. Drying them off before they hit the butter is the non negotiable step. Water is the enemy of a crisp crust, so that paper towel session is where the magic actually happens.
This approach turns a basic frozen meal into something that feels like it came from a Polish deli. It's reliable, comforting, and honestly, it's the kind of meal that makes your whole house smell like a cozy winter cabin.
The Secret to Better Texture
- The Par Boil
- Quick boiling hydrates the dough and heats the filling, so the pan fry only needs to focus on the exterior.
- The Fat Blend
- Using oil for the over high heat sausage sear and butter for the pierogies gives you the best of both worlds - high smoke point and rich flavor.
- The Moisture Gap
- Drying the boiled pierogies prevents them from steaming in the pan, which is what usually causes that rubbery texture.
- Controlled Caramelization
- Searing the sausage first creates a flavorful base of rendered fat that the onions soak up.
| Method | Time | Texture | Best For |
|---|---|---|---|
| Frozen to Pan | 15 mins | Soft/Uneven | Extreme rush |
| Boil then Sear | 25 mins | Shatter Crisp | Maximum Flavor |
Quick Recipe Specs
Before we dive into the gear and ingredients, let's look at the basics. This recipe is designed for a standard 12 inch skillet. If you use a smaller pan, you'll crowd the ingredients, and instead of browning, the food will boil in its own juices.
For the best results, keep your heat consistent. Medium high is your friend here. If the pan isn't sizzling when the sausage hits, you're just simmering the meat, and you'll miss out on that deep, savory crust. According to Serious Eats, achieving a proper sear on proteins is essential for developing complex flavors.
Component Analysis
| Ingredient | Science Role | Pro Secret |
|---|---|---|
| Kielbasa | Fat & Salt Base | Slice into 1/4 inch rounds for maximum surface area |
| Frozen Pierogies | Starch/Carb | Use potato and cheese for a classic, savory profile |
| Unsalted Butter | Browning Agent | Add it late to prevent burning while searing meat |
Essential Ingredient List
Stick to these quantities for the best balance. If you use too many onions, the pan gets too wet, and the pierogies won't crisp up. If you use too little butter, the dough will stick and tear.
- 1 lb Kielbasa or Polish sausage, sliced into ¼ inch rounds Why this? Provides the smoky, salty backbone of the dish
- 1 medium yellow onion, thinly sliced Why this? Yellow onions have the best sugar to sulfur ratio for caramelizing
- 3 cloves garlic, minced Why this? Adds a punch of aromatic heat at the end
- 2 tbsp vegetable oil Why this? High smoke point for searing the sausage
- 1 package (16 oz) frozen potato and cheese pierogies Why this? Quick, reliable, and comforting
- 3 tbsp unsalted butter Why this? Gives the pierogies a velvety, golden finish
- ½ tsp coarse salt Why this? Enhances the natural flavors of the potato
- 2 tbsp fresh parsley, chopped Why this? Cuts through the richness with a fresh, herbal note
Smart Substitutes
| Original Ingredient | Substitute | Why It Works |
|---|---|---|
| Kielbasa (1 lb) | Andouille Sausage (1 lb) | Similar fat content. Note: Adds a spicy, Cajun kick |
| Vegetable Oil (2 tbsp) | Avocado Oil (2 tbsp) | Higher smoke point. Note: Very neutral flavor |
| Unsalted Butter (3 tbsp) | Ghee (3 tbsp) | Pure butter fat. Note: Even better for over high heat browning |
| Frozen Pierogies (16 oz) | Fresh Pierogies (16 oz) | Skip the boiling step. Note: Fry directly in butter |
Necessary Kitchen Tools
You don't need a professional kitchen for this, but a few specific tools make the process much smoother. I prefer a heavy bottomed skillet because it holds heat better, which means the pierogies don't drop in temperature when you add them to the pan.
A cast iron skillet is the gold standard here, but a stainless steel pan works just as well. Avoid non stick if you can, as you won't get that same level of "shatter" on the pierogies. Also, make sure you have a slotted spoon for the boiling phase - it's a lifesaver.
Chef Note: If you're using a stainless steel pan, make sure it's truly hot before adding the oil. This creates a natural non stick surface and prevents the sausage from gripping the metal.
Step-by-step Cooking Process
Right then, let's get cooking. Follow these steps in order. The sequence is what prevents the common "soggy" mistake and ensures everything finishes at the same time.
Phase 1: The Par Boil
- Bring a large pot of salted water to a rolling boil.
- Drop in the frozen pierogies and cook only until they float to the surfaceNote: This usually takes 2-3 minutes.
- Use a slotted spoon to remove them immediately and set them aside on a paper towel to dry. Ensure they are damp free before the next step.
Phase 2: The Searing
- Heat the vegetable oil in a skillet over medium high heat.
- Add the sliced kielbasa in a single layer and cook without stirring for 3-4 minutes until a deep mahogany crust forms, then flip.
- Once browned, add the sliced onions and sauté until translucent and golden.
- Stir in the minced garlic for the final 60 seconds until fragrant.
Phase 3: The Golden Crisp
- Push the sausage and onions to the edges of the pan and melt the butter in the center.
- Carefully place the dried pierogies in the butter and fry for 3-5 minutes per side until golden brown and crisp.
Phase 4: The Integration
- Toss everything together in the pan to distribute the butter and juices.
- Garnish with fresh parsley and serve immediately.
Fixing Common Pan Problems
Even with a foolproof plan, things can go sideways. Usually, it's a heat issue or a moisture issue. If your pierogies are sticking, it's often because the butter wasn't hot enough when they hit the pan.
If you find the sausage is getting too dark but the onions are still raw, just pull the sausage out for a minute. There's no rule saying everything has to stay in the pan the whole time.
Troubleshooting Common Issues
| Issue | Solution |
|---|---|
| Why Your Pierogies Are Soft | This happens when you skip the drying step or crowd the pan. Too much moisture creates steam, which boils the dough instead of frying it. |
| Why Your Sausage Is Burnt | High heat is great, but if you leave the kielbasa too long without flipping, the sugars in the meat will scorch. |
| Why Things Are Sticking | This is usually a sign that the pan temperature dropped too low when you added the pierogies, or you tried to flip them too early. |
Common Mistakes Checklist
- ✓ Did I pat the pierogies dry after boiling?
- ✓ Is the sausage in a single layer (not piled up)?
- ✓ Did I wait for the butter to foam before adding the dough?
- ✓ Is the garlic added last to avoid bitterness?
Fun Flavor Twist Ideas
Once you've mastered the classic perogies and sausage skillet recipe, you can start playing with the profile. I love adding a bit of heat or a creamy element to change the vibe.
For a heartier version, try adding sliced cabbage to the pan along with the onions. Sauté the cabbage until it's tender and slightly charred - it adds a wonderful sweetness and a bit of nutrition.
If you're looking for something even more indulgent, you could stir in a splash of heavy cream and a handful of parmesan at the very end for a creamy perogies experience.
If you enjoy this kind of savory, meat heavy comfort, you might also love my Sausage Gravy and Biscuits for a weekend brunch.
Quick Style Shifts
- The Spicy Version: Swap kielbasa for Chorizo and add a pinch of smoked paprika.
- The Veggie Version: Replace sausage with sliced portobello mushrooms and use a Swiss cheese pierogi.
- The Autumn Version: Add cubed apples to the onion sauté for a sweet and salty contrast.
Adjusting For Different Sizes
If you're cooking for a crowd, don't just double everything in one pan. If you put 2 lbs of sausage and 32 oz of pierogies in a standard skillet, they will steam and become mushy.
Scaling Down (1-2 people): Use a smaller 8 inch skillet. Reduce the oil to 1 tbsp and butter to 1.5 tbsp. The cooking time for the sausage will be slightly shorter because the pan heats up faster.
Scaling Up (6-8 people): Work in batches. Brown the sausage and onions, remove them to a bowl, then fry the pierogies in two separate batches. Once all the pierogies are crisp, toss everything back together. Reduce the salt slightly, as the kielbasa provides a lot of sodium. According to USDA FoodData, Polish sausage is quite high in salt, so taste before adding more.
| Quantity | Pan Size | Batching Needed? | Salt Adjustment |
|---|---|---|---|
| 1/2 Batch | 8 inch | No | Keep same |
| Full Batch | 12 inch | No | As listed |
| 2x Batch | 12 inch | Yes (Pierogies) | Reduce salt by 20% |
Debunking Common Kitchen Myths
You'll hear people say that boiling pierogies first is "cheating" or makes them too soft. That's simply not true. Boiling is about temperature control. It ensures the center is cooked so that the pan fry can focus on the crust.
Another myth is that you need a fancy "pierogi press" or homemade dough to get a good result. While homemade is great, high-quality frozen ones are designed for this exact skillet method. They're consistent and save you hours of labor.
Storage and Waste Tips
This dish is best eaten fresh, but leftovers are still great if you handle them right. The challenge is that the crispiness disappears in the fridge.
Storage: Place leftovers in an airtight container. They'll stay good in the fridge for about 3-4 days. I don't recommend freezing the finished skillet meal because the onions get watery and the pierogies lose their structure.
Reheating: Avoid the microwave if you can. It will make the pierogies rubbery. Instead, throw them back in a skillet over medium heat with a tiny bit of butter. This brings back the shatter crisp texture.
Zero Waste: If you have leftover onion slices or garlic, chop them up and freeze them in an ice cube tray with a bit of oil. Next time you start a skillet meal, just pop a cube in the pan. If you have a bit of kielbasa left over, it's great diced into a morning omelet.
Best Side Dish Pairings
Since this is a heavy, rich meal, you need something acidic or fresh to balance it out. A dollop of sour cream is a mandatory classic - the tanginess cuts right through the butter and sausage fat.
I also love serving this with a side of braised sauerkraut or a simple cucumber salad with vinegar and dill. If you want to go all out and make it a feast, a side of Turkey Gravy can add an extra layer of richness, though it's quite filling.
For something lighter, a heap of steamed broccoli or a crisp green salad with a lemon vinaigrette is the way to go. It cleanses the palate between those buttery, savory bites of this classic perogies and sausage skillet recipe.
Recipe FAQs
Can I skip boiling the pierogies and fry them frozen?
No, you should not. Boiling ensures the filling is heated through; frying from frozen often results in a burnt exterior and a cold center.
How to keep the pierogies from becoming soggy?
Dry them on paper towels immediately after boiling. Removing surface moisture prevents steam from forming in the pan, which would otherwise boil the dough instead of frying it.
Is it true that I should stir the sausage constantly to get a good sear?
No, this is a common misconception. Let the sliced kielbasa sit undisturbed for 3-4 minutes to develop a deep mahogany crust before flipping.
How to reheat leftovers without making them rubbery?
Sauté them in a skillet over medium heat with a bit of butter. Avoid using a microwave, as it destroys the crisp texture of the dough.
Can I use a different oil for searing the sausage?
Yes, any neutral oil with a high smoke point works. If you enjoyed managing high heat for the sear here, see how the same principle works in our homemade falafel.
Why are my pierogies sticking to the skillet?
The pan temperature likely dropped too low. Ensure the butter is fully melted and shimmering, and avoid flipping the pierogies too early.
How to prevent the garlic from burning in the pan?
Add the minced garlic only during the final 60 seconds of sautéing. This allows the garlic to become fragrant without scorching.
Classic Perogies And Sausage Skillet