Cheesy Chicken Garlic Wraps: Crispy and Golden
- Time: 10 min active + 10 min cook = Total 20 minutes
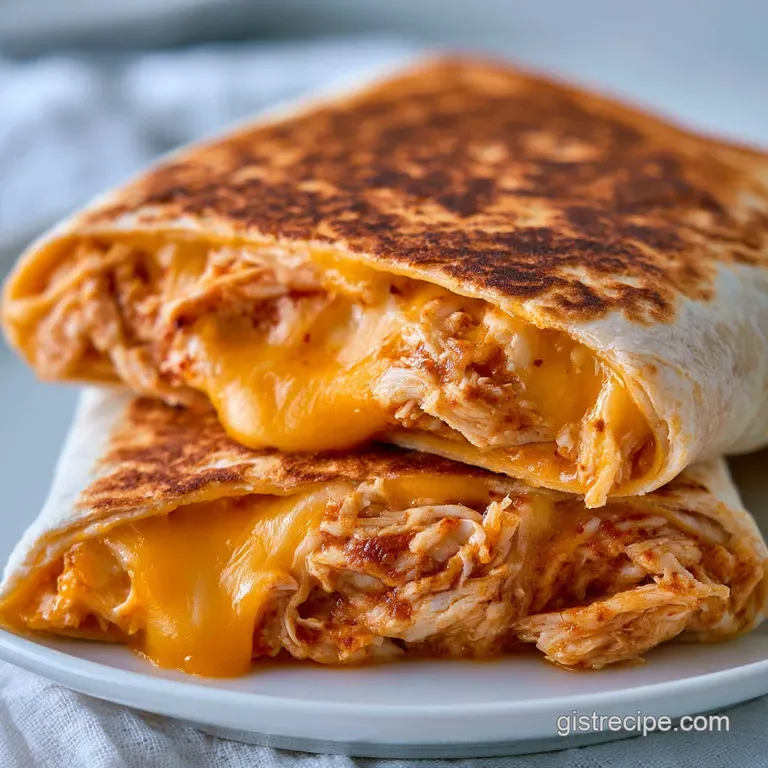
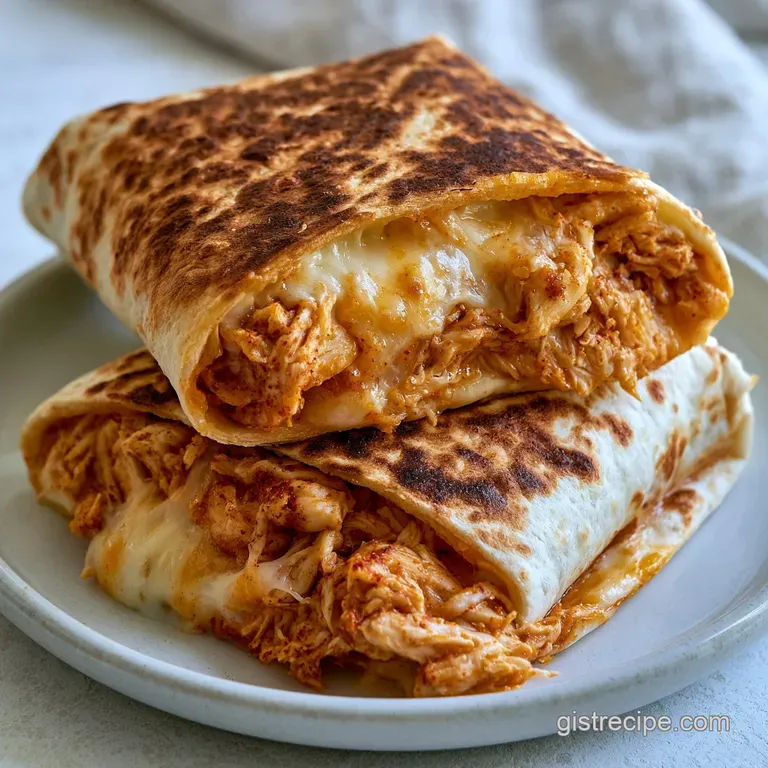
- Flavor/Texture Hook: Golden brown, shatter crisp tortilla with a gooey, melted cheese center
- Perfect for: Busy weeknight dinners, high protein lunches, or a comforting midnight snack
- The Best Cheesy Chicken Garlic Wraps Recipe
- Why These Wraps Actually Work
- Ingredient Breakdown and Secrets
- Basic Tools You'll Need
- Step-by-Step Cooking Guide
- Fixing Common Wrap Issues
- Ways to Customize Flavor
- Scaling and Adjustments
- Misconceptions About Garlic Wraps
- Storage and Waste Tips
- Winning Side Dish Pairs
- Recipe FAQs
- 📝 Recipe Card
The Best Cheesy Chicken Garlic Wraps Recipe
That sound of butter hitting a hot skillet and the immediate sizzle is honestly my favorite part of the day. There is something about the smell of fresh garlic hitting hot fat that just tells your brain "dinner is sorted." I remember the first time I tried making these for a friend who was craving something comforting but didn't want a heavy pasta dish.
I had some leftover chicken in the fridge and a few tortillas, and I just started winging it with whatever cheese was in the drawer.
The result was a wrap that had this incredible contrast, a crisp outer shell and a molten, velvety interior. It wasn't just a sandwich, it was like a toasted quesadilla and a garlic bread hybrid.
I've since tweaked the ratios to make sure the filling doesn't leak out and the tortilla doesn't get soggy, which is the biggest hurdle with most wraps.
If you're looking for a reliable, comforting meal that doesn't require a million pans, this cheesy chicken garlic wraps recipe is exactly what you need. It's a foolproof way to use up leftover protein while making it feel like a brand new meal.
Trust me on this, once you try the yogurt mayo blend, you'll never go back to just using plain cheese.
Why These Wraps Actually Work
I've always been curious about why some wraps turn out like soggy napkins and others feel like professional appetizers. After a lot of trial and error, I realized it's all about how you manage the moisture and the fat.
- The Moisture Buffer: Mixing Greek yogurt and mayo creates a stable emulsion. This prevents the chicken from drying out when it hits the heat, keeping the inside velvety instead of stringy.
- Fat Based Flavor Carry: Using melted butter to coat the chicken before adding the creamy elements ensures the garlic flavor is distributed evenly. Garlic is fat soluble, so the butter carries that punch into every bite.
- The Cheese Seal: Placing a thin layer of mozzarella directly on the tortilla creates a "cheese barrier." As it melts, it fuses the filling to the wrap, preventing the sauce from soaking through the bread.
- Direct Heat Searing: Pan frying with butter instead of baking allows for a quicker sear. This creates that golden, shatter crisp texture without overcooking the chicken inside.
| Method | Time | Texture | Best For |
|---|---|---|---|
| pan-fried | 10 mins | Shatter crisp | Maximum flavor & speed |
| Oven Baked | 15 mins | Uniformly toasted | Large batches |
| Air Fryer | 8 mins | Extra crunchy | Low oil preference |
Ingredient Breakdown and Secrets
When you're working with a few simple ingredients, the quality of each one really stands out. I don't bother with low-fat cheese here because you lose that stretch and the richness that makes this recipe comforting.
| Ingredient | Science Role | Pro Secret |
|---|---|---|
| Greek Yogurt | Acid & Body | Adds a slight tang that cuts through the heavy cheese |
| Mozzarella | Binding Agent | Use low moisture shreds for a better melt without the water |
| Fresh Garlic | Aromatic Base | Mince it into a paste for a more intense, integrated flavor |
| Flour Tortilla | Structural Shell | Warm them for 5 seconds before filling to prevent cracking |
Basic Tools You'll Need
You don't need a professional kitchen to pull this off. In fact, the fewer tools you use, the better. I usually just use a large bowl for the mix and one medium non stick skillet. A sturdy spatula is essential for pressing the wraps down to ensure they get that golden color.
If you have a handheld garlic press, it's a time saver, but a sharp knife and a cutting board work just as well. I recommend a silicone spatula for the chicken mixture because it helps you scrape every bit of that garlic sauce out of the bowl.
Step-by-step Cooking Guide
Right then, let's get into the actual making of it. Make sure your chicken is already cooked and shredded to keep this within the 20 minute window.
1. The Flavor Infusion (Prep)
In a large mixing bowl, combine 280g cooked shredded chicken breast, 30g melted butter, 15g minced fresh garlic, 2g paprika, 1.5g salt, and 1.5g black pepper. Stir in 30g mayonnaise and 30g Greek yogurt until the chicken is fully coated in a velvety sauce.
Note: The yogurt adds a slight acidity that brightens the garlic.
2. The Strategic Layering (Assembly)
Lay two large flour tortillas flat on your counter. In the lower third of each tortilla, sprinkle a thin layer of 115g shredded mozzarella cheese (split between the two). Spoon approximately ⅓ of the chicken mixture over the cheese.
3. The Final Fold
Top the chicken with another handful of mozzarella. Fold the sides inward first, then roll the tortilla tightly from the bottom up. Note: Folding the sides prevents the cheese from leaking out the edges during frying.
4. The Golden Sear (Finishing)
Melt 15g of butter in a skillet over medium heat. Place the wraps seam side down first. Press down lightly with a spatula. Cook for 2-3 minutes per side until the tortilla is golden and crackling.
5. The Resting Phase
Remove the wraps from the pan and let them sit for 2 minutes. This allows the melted cheese to set slightly so the filling doesn't slide out when you take your first bite.
Chef's Tip: For an even deeper flavor, stir a tiny pinch of espresso powder or a drop of Worcestershire sauce into the chicken mix. It doesn't make it taste like coffee or fish, it just adds a "savory" depth that makes people ask what the secret ingredient is.
Fixing Common Wrap Issues
Even with a foolproof recipe, things can go sideways if the heat is too high or the filling is too wet. Most of these problems come down to temperature control.
The "Soggy Bottom" Syndrome
This happens when the filling is too liquid or the pan isn't hot enough. If the butter isn't sizzling when the wrap hits the pan, the tortilla will absorb the fat instead of searing, leading to a greasy, soft texture.
The Filling Explosion
If you overfill the tortilla or don't fold the sides, the cheese will leak out and burn in the pan. This creates a mess and leaves you with a wrap that has a "hole" in the middle.
Bitter Garlic Notes
This is usually caused by burning the garlic. If you're sautéing the garlic separately before adding it to the chicken, make sure it doesn't turn dark brown. It should be pale gold and fragrant.
| Problem | Root Cause | Solution |
|---|---|---|
| Tortilla cracks | Too cold/dry | Warm tortillas 10 seconds in microwave |
| Cheese not melting | Heat too low | Increase to medium; cover pan for 1 min |
| Bland flavor | Under seasoned | Add a pinch more salt or a squeeze of lime |
Reliability Checklist:
- ✓ Chicken is shredded small (not in big chunks)
- ✓ Tortillas are warmed before folding
- ✓ Seam side down first in the pan
- ✓ Heat is steady medium, not high
- ✓ Wraps are pressed firmly with a spatula
Ways to Customize Flavor
Once you've mastered the base cheesy chicken garlic wraps recipe, you can start playing with the profile. This is where it gets fun. If you want more kick, I highly recommend adding 5ml of hot sauce into the creamy binder.
The "Zesty" Twist
Swap the Greek yogurt for a mix of sour cream and lime juice. This gives it a more "tex mex" feel and pairs beautifully with fresh cilantro stirred into the chicken.
The "Spicy" Kick
Add diced pickled jalapeños to the cheese layer. The vinegar in the pickles cuts through the richness of the mozzarella and butter, creating a balanced bite.
The Air Fryer Method
If you don't want to stand over the stove, you can use an air fryer. Brush the outside of the wraps with melted butter and air fry at 200°C for 5-7 minutes, flipping halfway through. It's incredibly efficient, though you lose that specific butter sear taste.
The Oven Bake
For a crowd, place the wrapped tortillas on a baking sheet. Brush with butter and bake at 200°C for 10-12 minutes. To keep them from drying out, you can wrap them loosely in foil for the first 5 minutes, then open them up to crisp.
If you're in the mood for something even creamier, you could serve these with a side of my Creamy Garlic Sauce for dipping. It turns a simple wrap into a full on restaurant experience.
Scaling and Adjustments
When you're cooking for more than two people, you can't just multiply everything by four and expect it to be the same. The physics of the pan change.
Scaling Down (1 serving): Use half of all ingredients. Since you're using half an egg or a small amount of yogurt, mix it in a smaller ramekin first to ensure the emulsion doesn't break. Use a smaller skillet so the butter doesn't spread too thin.
Scaling Up (4-6 servings): Don't crowd the pan. If you put six wraps in one skillet, the temperature will drop, and you'll end up steaming them instead of searing them. Work in batches of two. For the spices, only increase the salt and paprika to 1.5x instead of 2x, then taste it.
Salt tends to intensify more than you'd expect in large batches.
Baking Adjustments: If you double the recipe and bake them, lower your oven temp by about 10-15°C and extend the time by 3-5 minutes. This ensures the center cheese is molten before the outside of the tortilla burns.
Misconceptions About Garlic Wraps
There are a few things people often get wrong when making these. One big one is the idea that you need to cook the garlic in the pan before adding it to the chicken. Actually, since the chicken is already cooked and we're just searing the wrap, adding minced raw garlic to the creamy binder is fine.
It mellows out during the pan frying process, giving you a smoother flavor.
Another myth is that you should use "heavy" tortillas for more stability. In reality, standard flour tortillas are better because they're more pliable. The stability comes from the "cheese seal" and the tight roll, not the thickness of the bread.
Storage and Waste Tips
If you have leftovers, you're in luck. These store surprisingly well in the fridge for up to 3 days. Keep them in an airtight container, but place a piece of parchment paper between the wraps so they don't stick together.
To reheat, avoid the microwave if you can. The microwave makes the tortilla rubbery. Instead, toss them back in a dry skillet over medium heat for 2 minutes per side. This brings back that shatter crisp exterior.
- Chicken Scraps
- If you have odd bits of chicken breast left, simmer them with a carrot and onion to make a quick stock.
- Tortilla Ends
- If your tortillas are torn, cut them into triangles, toss with a bit of the garlic butter, and bake them for 5 minutes to make garlic chips.
- Yogurt Leftovers
- Use any remaining Greek yogurt as a base for a quick dip with lemon and dill.
Winning Side Dish Pairs
Because these wraps are quite rich and buttery, you need something with a bit of acid or crunch to balance the plate. A simple arugula salad with a lemon vinaigrette is a classic choice.
If you're looking for something more filling, a side of roasted carrots or a light corn salad works well. For those who love a full on comfort feast, these pair surprisingly well with a serving of Chicken Broccoli Casserole, though that might be a bit of a cheese overload for some!
Keep it simple, keep it reliable, and just enjoy that first, crunchy bite. This cheesy chicken garlic wraps recipe is all about the joy of simple ingredients done right. Let's crack on and get cooking!
Recipe FAQs
What to put in a garlic chicken wrap?
Combine shredded chicken, melted butter, minced garlic, paprika, salt, pepper, mayonnaise, and Greek yogurt. Layer this mixture with shredded mozzarella inside a flour tortilla for the best result.
How to make cheesy chicken wraps?
Mix the chicken and sauce ingredients, then layer mozzarella and filling into tortillas. Roll them tightly and toast in a buttered skillet for 2 3 minutes per side over medium heat.
What cheese melts best for these wraps?
Shredded mozzarella. It offers the ideal melt and stretch, which helps seal the wrap and provides a gooey texture.
Can I use pre-cooked or rotisserie chicken?
Yes. Rotisserie chicken is a perfect time saver and works excellently once shredded and combined with the sauce.
Can I make these wraps dairy-free?
No, not with this specific ingredient list. This recipe relies on butter, yogurt, and mozzarella; for a naturally dairy-free option, try our homemade falafel.
How do I prevent soggy wraps?
Toast them in a skillet over medium heat. Frying for 2 3 minutes per side creates a crisp exterior barrier that prevents the tortilla from softening.
Can I bake the wraps instead of skillet toasting?
Yes, but you lose the signature crunch. Baking is possible, but skillet frying with butter is essential for that golden brown, shatter crisp finish.
Cheesy Chicken Garlic Wraps

