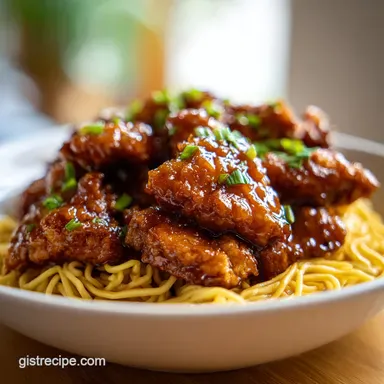
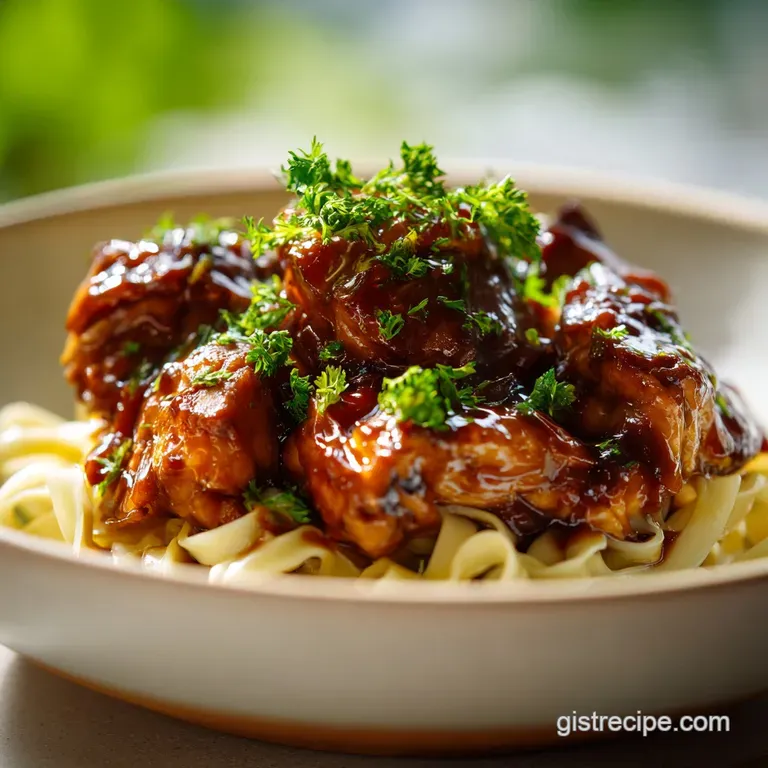
Sticky Garlic Chicken Noodles: Velvety Glaze
- Time:15 minutes prep + 15 minutes cook = Total 30 minutes
- Flavor/Texture Hook: Velvety, savory glaze with a golden brown chicken crust
- Perfect for: Busy weeknight dinners or a foolproof meal prep option
- The Best Sticky Garlic Chicken Noodles Recipe
- Why This Glaze Actually Sticks
- Component Analysis
- Essential Ingredients And Swaps
- Step By Step Cooking Guide
- Fixing Common Cooking Issues
- Troubleshooting Common Issues
- Scaling For More People
- Common Kitchen Myths
- Storage And Zero Waste
- Plating For Best Results
- High in Sodium
- Recipe FAQs
- 📝 Recipe Card
The Best Sticky Garlic Chicken Noodles Recipe
The sound of chicken hitting a screaming hot skillet is honestly my favorite part of the day. That immediate, aggressive sizzle tells you everything you need to know about the texture you're about to get.
For a long time, I struggled with this dish because my noodles always ended up as a soggy, clumped together mess, or the sauce would just slide off the chicken like water on a raincoat. I thought I was doing something wrong with the heat, but the problem was actually the timing of the noodle boil.
I remember one Tuesday where I was rushing to get dinner on the table, and I overcooked the noodles by just two minutes. By the time they hit the pan with the sauce, they were so soft they practically dissolved. It was a disaster. But then I tried the "under boil" trick, and everything changed.
Now, this sticky garlic chicken noodles recipe is the one I turn to when I want something that feels like a treat but doesn't take over my entire evening.
You can expect a dish that hits all the right notes: salty soy, sweet honey, and a punch of fresh garlic. The chicken gets a lovely brown crust that holds onto the glaze, and the noodles stay bouncy and firm.
Trust me on this, once you see how the sauce transforms from a liquid to a thick, shimmering coating in the pan, you'll never go back to the basic stir fry method.
Why This Glaze Actually Sticks
I used to think "sticky" just meant adding more sugar, but it's actually about how the liquids interact with the starch. If you just simmer honey and soy, you get a syrup that's too thin.
- The Slurry Grip: Cornstarch molecules swell when heated, creating a network that traps the honey and soy sauce, turning it into a velvety glaze.
- The Under Boil: By pulling noodles out early, they finish cooking in the sauce, absorbing the flavor directly into the pasta rather than just coating the outside.
- Surface Area: Searing the chicken first creates tiny crevices in the meat, which give the sauce more "hooks" to grab onto.
- The Emulsion: The small amount of oil and the starch work together to keep the sauce from separating, which is why it looks so glossy.
Right then, before we get into the ingredients, let's look at how this compares to other methods. I've tried doing a version of this in the oven to save on pan watching, but the results are completely different.
| Method | Time | Texture | Best For |
|---|---|---|---|
| Stovetop | 30 mins | Glossy & Bouncy | Maximum flavor and speed |
| Oven | 45 mins | Roasted & Softer | Large crowds/Hands off |
| Slow Cooker | 4 hours | Shredded & Wet | Meal prep (though less "sticky") |
Component Analysis
Understanding what each ingredient does helps you fix things on the fly. If your sauce feels too thin, you know it's a starch issue; if it's too salty, it's a soy issue.
| Ingredient | Science Role | Pro Secret |
|---|---|---|
| Honey | Viscosity Agent | Use a runny honey for easier whisking |
| Soy Sauce | Umami Base | Low sodium allows better salt control |
| Cornstarch | Thickener | Always mix with cold water first |
| Rice Vinegar | Acid Balance | Cuts through the honey's sweetness |
If you enjoy this kind of flavor profile, you might also like my Beef and Broccoli Sauce recipe, which uses a similar thickening technique to get that classic restaurant finish.
Essential Ingredients And Swaps
I've found that being too rigid with ingredients can kill the joy of cooking. While I love the classics, a few swaps can make this work for whatever is in your fridge. Just remember that some changes will alter the final texture.
The Protein & Base 1 lb (450g) boneless skinless chicken breast, cut into bite sized pieces Why this? Lean protein that sears quickly 12 oz (340g) dried egg noodles Why this? Heartier than rice noodles, holds sauce better 1 tbsp (15ml)
Vegetable oil Why this? High smoke point for searing ½ tsp (3g) salt Why this? Basic seasoning ¼ tsp (1g) black pepper Why this? Subtle heat
The Sticky Sauce ¼ cup (60ml) soy sauce Why this? Deep savory base 3 tbsp (45ml) honey Why this? Natural sweetness and shine 1 tbsp (15ml) oyster sauce Why this? Adds complex saltiness 1 tbsp (15ml)
Rice vinegar Why this? Brightens the heavy flavors 4 cloves (12g) garlic, minced Why this? The aromatic heart of the dish 1 tsp (5g) fresh ginger, grated Why this? Adds a zingy, fresh note 1 tbsp (8g) cornstarch mixed with 2
Tbsp (30ml) cold water Why this? The thickening magic
The Finishing Touches 2 stalks (30g) green onions, sliced Why this? Fresh crunch and color 1 tbsp (8g) toasted sesame seeds Why this? Nutty aroma 1 tsp (5ml) sesame oil Why this? Prevents sticking and adds
Fragrance
| Original Ingredient | Substitute | Why It Works |
|---|---|---|
| Honey | Brown Sugar | Similar sweetness. Note: Less glossy finish |
| Egg Noodles | Spaghetti | Easy pantry swap. Note: Slightly different chew |
| Chicken Breast | Chicken Thighs | More fat/flavor. Note: Takes slightly longer to cook |
| Oyster Sauce | Hoisin Sauce | Similar salty/sweet profile. Note: Heavier, sweeter taste |
Step by step Cooking Guide
Let's crack on with the actual cooking. The key here is momentum. Have your sauce whisked and your cornstarch slurry ready before the chicken hits the pan, or you'll be scrambling while the garlic burns.
- Prep the noodles. Boil a large pot of salted water. Cook your egg noodles according to the package, but remove them 2 minutes early. Drain them and immediately toss with a drop of sesame oil. Note: This keeps them from clumping while you finish the chicken.
- Mix the glaze. In a small bowl, whisk together the soy sauce, honey, oyster sauce, rice vinegar, minced garlic, and grated ginger.
- Sear the chicken. Heat vegetable oil in a large non stick skillet or wok over medium high heat. Add chicken pieces in a single layer. Cook without moving for 3 minutes until a golden brown crust forms, then flip and cook for another 2-3 minutes until cooked through.
- Aromatics burst. Lower the heat to medium. If you didn't put the garlic and ginger in the sauce, stir them in now and sauté for 30 seconds. Note: Don't let them turn dark brown or they'll taste bitter.
- Pour the sauce. Pour in the sauce mixture. Stir and let it come to a bubble.
- Thicken the glaze. Whisk in the cornstarch slurry. Stir constantly for 1-2 minutes until the sauce becomes a thick, glossy glaze that coats the back of a spoon.
- The final toss. Add the under cooked noodles to the skillet. Toss vigorously with tongs for 2 minutes until the noodles absorb the sauce and look shiny.
- Finish and serve. Remove from heat immediately. Garnish with sliced green onions and toasted sesame seeds.
Chef's Tip: If you want a deeper flavor, try adding a pinch of espresso powder or a splash of dark soy sauce to the glaze. It doesn't make it taste like coffee, but it adds a rich, mahogany color that looks stunning on the plate.
Fixing Common Cooking Issues

Even with a reliable sticky garlic chicken noodles recipe, things can go sideways. Usually, it's a matter of temperature or timing.
Troubleshooting Common Issues
| Issue | Solution |
|---|---|
| Why Your Noodles Are Mushy | This is the most common mistake. If you boil the noodles fully and then toss them in a hot pan for two more minutes, they overcook. The solution is the under boil method. According to [Serious Eats](h |
| Why Your Garlic Tastes Bitter | Garlic burns in seconds at high heat. If you add it at the very beginning with the oil, it'll be charcoal by the time the chicken is done. Always add your garlic either in the pre mixed sauce or durin |
| Why Your Sauce Is Too Thin | If the sauce isn't clinging and is instead pooling at the bottom, your slurry didn't activate. This happens if the sauce wasn't bubbling when you added the cornstarch. You can fix this by mixing anoth |
Common Mistakes Checklist
- ✓ Did I remove the noodles 2 minutes early?
- ✓ Is the cornstarch mixed with cold water (not hot)?
- ✓ Did I let the chicken sear without moving it for 3 minutes?
- ✓ Did I wait for the sauce to bubble before adding the slurry?
- ✓ Are the green onions added at the very end to keep them crisp?
Scaling For More People
When you're cooking for a crowd, you can't just multiply everything by four and expect it to work the same way. The surface area of your pan becomes the limiting factor.
Scaling Down (½ Recipe) If you're just cooking for two, use a smaller skillet. You'll notice the sauce reduces much faster because there's less volume. Reduce your cooking time for the glaze by about 20%, or you might end up with a paste rather than a glaze.
If the recipe calls for one egg (for other noodle types), beat it first and then pour out half.
- Work in batches
- Sear the chicken in two separate turns.
- Adjust seasonings
- Increase salt and spices to 1.5x rather than 2x. You can always add more at the end, but you can't take it out.
- Liquid reduction
- Reduce the total liquid by about 10% when doubling, as there is less evaporation relative to the volume.
If you find yourself making this often, you might be interested in how different thickeners work. For example, a Creamy Garlic Parmesan Sauce relies on fat and cheese for body rather than a starch slurry, which creates a completely different mouthfeel.
| Scaling Factor | Chicken Method | Sauce Adjustment | Noodle Tip |
|---|---|---|---|
| 0.5x (Small) | Single layer | Reduce simmer time | Use a small pot |
| 2x (Medium) | Two batches | 1.8x the liquids | Use your largest wok |
| 4x (Large) | Three batches | 1.5x the salt/spices | Boil noodles in two pots |
Common Kitchen Myths
I've heard a lot of "rules" about stir fry and noodles that are honestly just myths. Let's clear a few of those up so you can cook with more confidence.
Myth: Searing seals in the juices. You'll hear this one a lot, but it's not true. Searing the chicken in this sticky garlic chicken noodles recipe doesn't create a waterproof seal. Instead, it creates flavor.
That brown crust is the result of sugars and proteins breaking down, which adds a savory depth that you just can't get from steaming or poaching.
Myth: You must use a wok for stir fry. While a wok is great for heat distribution, a heavy bottomed non stick skillet works perfectly fine. The most important thing is having enough room to move the ingredients. If you use a pan that's too small, the chicken will crowd and boil in its own liquid.
Myth: Cornstarch is only for soups. A lot of home cooks are afraid of cornstarch, thinking it makes things taste "chalky." The trick is the slurry. When you mix it with cold water and then heat it, the starch granules burst and create a clear, glossy coating. It's the secret to that professional look.
Storage And Zero Waste
This dish is a fantastic candidate for meal prep, though noodles can be finicky when reheated.
Fridge & Freezer Store leftovers in an airtight container in the fridge for 3-4 days. I wouldn't recommend freezing this specific dish because the noodles tend to break down and become grainy after thawing.
If you must freeze it, freeze the cooked chicken and sauce separately, and then boil fresh noodles when you're ready to eat.
The Reheating Secret When you microwave this, the sauce often tightens up and becomes a bit gummy. To fix this, add a tablespoon of water or chicken broth before heating. This loosens the starch bonds and brings back that velvety texture.
Heat on medium power for 2 minutes, stirring halfway through.
- Onion Ends
- Don't throw away the white ends of your green onions. Toss them into a freezer bag with other veggie scraps (carrot peels, celery ends) to make a homemade veg stock later.
- Garlic Peels
- If you have a lot of garlic skins, you can actually steep them in oil for a few hours to create a light garlic infused oil for sautéing other vegetables.
- Leftover Noodles
- If you have plain boiled noodles left over, toss them with a bit of sesame oil and keep them in the fridge. They're great for a quick breakfast stir fry with an egg.
Plating For Best Results
Since this is a sticky garlic chicken noodles recipe, the presentation is all about the contrast between the deep brown glaze and the bright garnishes.
Start by swirling the noodles into a mound in the center of a shallow bowl. Pile the glazed chicken on top so the pieces are visible and not buried. The glossy sauce should look like it's just barely dripping down the sides of the noodle mound.
Scatter the sliced green onions over the top use the green parts for the most vibrant color. Finish with a generous sprinkle of toasted sesame seeds. For a professional touch, drizzle a tiny bit of extra sesame oil around the edge of the bowl. It adds a fragrant aroma the second the dish hits the table.
If you have some fresh red chili flakes, a pinch of those on top adds a pop of red that makes the whole dish look like it came from a high end bistro.
High in Sodium
980 mg 980 mg of sodium per serving (43% 43% of daily value)
The American Heart Association recommends a daily sodium limit of no more than 2,300 mg for most adults to maintain heart health.
Tips to Reduce Sodium
-
Swap the Soy Sauce-30%
Replace regular soy sauce with low-sodium soy sauce or coconut aminos to drastically reduce the salt content.
-
Eliminate Added Salt-25%
Remove the ½ tsp of salt entirely; the soy and oyster sauces provide enough seasoning on their own.
-
Modify Oyster Sauce-20%
Use a low-sodium oyster sauce or replace it with a small amount of mushroom sauce for a similar savory profile.
-
Choose Better Noodles-15%
Select low-sodium egg noodles or substitute with brown rice noodles to lower the processed sodium baseline.
-
Enhance with Aromatics
Increase the amount of fresh ginger, garlic, and black pepper to add depth and punch without adding any sodium.
Recipe FAQs
Why are my noodles mushy?
You likely boiled them for too long. Since the noodles cook further in the pan with the sauce, removing them 2 minutes early prevents overcooking.
Why does my garlic taste bitter?
The garlic burned during the searing process. Add minced garlic either within the pre-mixed sauce or for only 30 seconds on medium heat to avoid charring.
How to get the sauce thick and glossy?
Whisk in a cornstarch slurry once the sauce begins bubbling. Stir constantly for 1-2 minutes until the glaze thickens and coats the chicken.
Can I freeze these noodles?
No, I don't recommend it. Frozen noodles often break down and become grainy upon thawing. Freeze the chicken and sauce separately, then boil fresh noodles when reheating.
How to reheat leftovers without the sauce becoming gummy?
Add a tablespoon of water before microwaving. This loosens the sauce and restores the original glossy texture.
Is it true I should boil the noodles completely before adding them to the pan?
No, this is a common misconception. Fully cooked noodles will turn mushy when tossed in the skillet for the final 2 minutes of cooking.
What can I serve with this dish?
Fresh greens or a bright side work best. If you enjoyed the balance of fresh aromatics here, see how we use similar vibrant flavors in our cilantro sauce.
Sticky Garlic Chicken Noodles