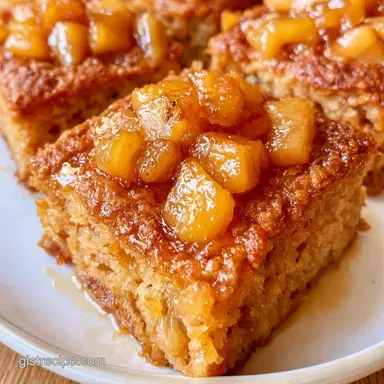
Apple Squares: Nutty and Tart
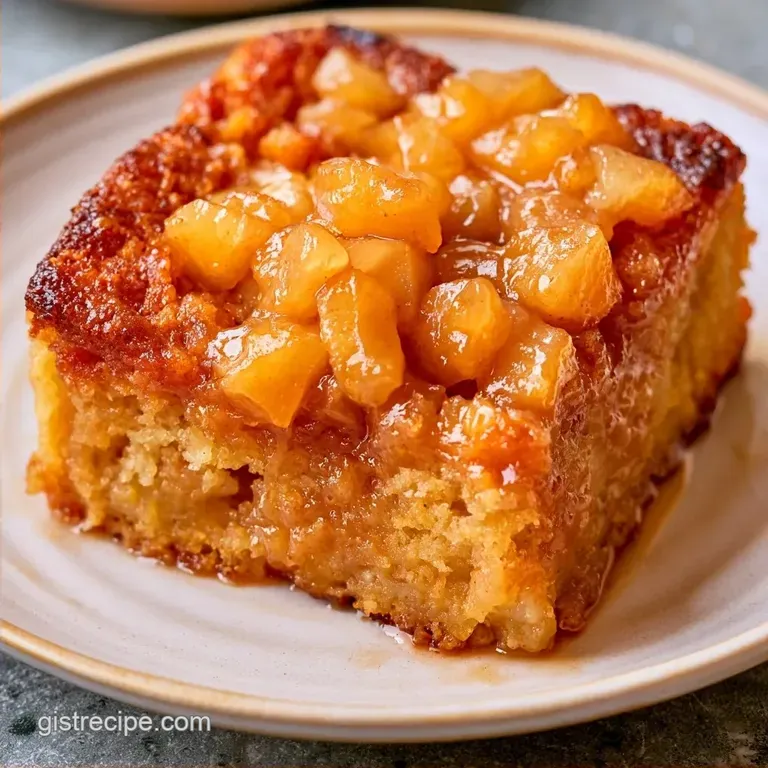
- Time: 20 min active + 50 min baking
- Flavor/Texture Hook: Tart Granny Smith apples with a nutty, crisp whole grain crust
- Perfect for: Fall potlucks or a cozy weekend treat
The smell of cinnamon and browned butter hitting the air is enough to make anyone walk into the kitchen. I used to make these for a neighbor who loved old school desserts, but my first few tries were a disaster.
I remember one batch where the bottom was practically raw dough because the apple juices just soaked right through.
It was a mess. I spent an hour trying to save them, but they were essentially apple pudding in a crust. That's when I realized the problem was the moisture.
You need a barrier. By slightly baking the base first, these Apple Squares get that distinct snap and structure. It's a simple shift, but it makes the whole thing feel more like a professional treat and less like a kitchen accident.
Why Most Recipes Get This Wrong
The Crust Barrier: Most people put wet apples on raw dough. Pre baking the crust for 10 minutes sets the structure, so it doesn't absorb the filling.
Apple Choice: Using soft apples leads to a mushy center. Granny Smiths hold their shape during the 50 minute cook time, keeping the bite distinct.
Starch Balance: Without cornstarch, the juices run wild. A small amount binds the liquid into a glossy glaze that stays put.
| Method | Time | Texture | Best For |
|---|---|---|---|
| Fresh Apples | 20 min prep | Chunky & Tart | Weekend Baking |
| Canned Apples | 5 min prep | Soft & Sweet | Quick Cravings |
Trust me, the extra 10 minutes of pre baking is worth every second. It's the difference between a dessert you can actually hold in your hand and one you have to eat with a spoon.
Tools for the Job
While a professional kitchen isn't required, a few specific items make this process much simpler. A 9x9 inch baking pan is the best fit here; opting for a larger pan will result in thinner Apple Squares that are prone to overcooking.
I suggest using a pastry cutter to work in the butter, although a fork is a great substitute. The goal is to blend the butter into the flour until the mixture resembles wet sand. Parchment paper is essential I always leave a bit hanging over the sides so the entire block can be easily lifted out after it cools.
For dicing, a mandoline or a sharp chef's knife is helpful. Ensure the apple pieces are small and uniform to guarantee an even cook. If the sizes are inconsistent, you'll likely end up with a combination of mushy and undercooked fruit.
What the Ingredients Do
Whole wheat pastry flour gives a nuttier flavor than white flour. It also adds a bit more structure. If you can't find it, regular all purpose flour works, but you'll lose that rustic taste.
The maple syrup in the crust is a nice touch. It adds a subtle sweetness and helps the dough brown. Cold butter is the key to the texture. If it melts before it hits the oven, you get a cookie instead of a shortbread style base.
Granny Smith apples provide the necessary acidity to balance the sugar. The lemon juice isn't just for flavor, it stops the fruit from turning brown while you're working. Coconut sugar adds a deeper, caramel like note compared to white sugar.
Recipe Specs and Details
Prep for these Apple Squares takes roughly 20 minutes, followed by 50 minutes of baking.
Keep an eye on your oven temperature, which should be set to 350°F (175°C). Should the edges brown too fast due to a hot oven, simply cover the pan with aluminum foil for the final 10 minutes.
| Original Ingredient | Substitute | Why It Works |
|---|---|---|
| Whole Wheat Pastry Flour | All Purpose Flour | Maintains structure. Note: Lacks the nutty taste |
| Maple Syrup | Honey | Comparable sweetness. Note: More pronounced floral notes |
| Coconut Sugar | Brown Sugar | Comparable molasses profile. Note: Adds a bit more moisture |
| Unsalted Butter | Vegan Butter | Equivalent richness. Note: Adjust salt as needed |
Let the pan cool entirely before slicing. Cutting into the Apple Squares while they're still hot may cause the filling to spill out.
Making These Apple Squares
Phase 1: Preparing the Foundation
- Preheat the oven to 350°F (175°C). Line a 9x9 inch pan with parchment paper, letting the sides hang over the edges.
- In a bowl, combine 1.5 cups (190g) whole wheat pastry flour and 0.25 tsp (1.5g) salt.
- Using a fork, cut in 0.5 cup (115g) of chilled, cubed butter until the mixture resembles coarse crumbs.
- Stir in 0.25 cup (60ml) maple syrup and 2 tbsp (30ml) cold water. Note: Mix only until a dough forms; avoid overworking it.
- Press the dough into the pan and prick the base with a fork.
- Bake for 10 minutes until the crust is matte and set.
Phase 2: Crafting the Apple Heart
- Toss 4 cups (540g) diced Granny Smith apples with 2 tbsp (30ml) lemon juice.
- Whisk together 3 tbsp (40g) coconut sugar, 1 tbsp (8g) cinnamon, 1 tbsp (8g) cornstarch, and 0.25 tsp (1.5g) nutmeg.
- Fold these spices into the apples. Note: Make sure every piece is well coated to prevent cinnamon clumps.
- Layer the apple mixture over the pre-baked crust.
Phase 3: The Final Golden Bake
- Bake for 35-40 minutes until the center is set and the edges have a mahogany color.
- Allow the pan to cool entirely.
- Whisk 0.5 cup (60g) powdered sugar, 1 tbsp (15ml) maple syrup, and 2 tsp (10ml) milk.
- Drizzle the icing over the cooled Apple Squares and slice into 15 bars.
Chef's Note: For the cleanest edges, refrigerate the pan for 30 minutes after it has reached room temperature. This helps solidify the butter in the crust.
Solving Common Baking Issues
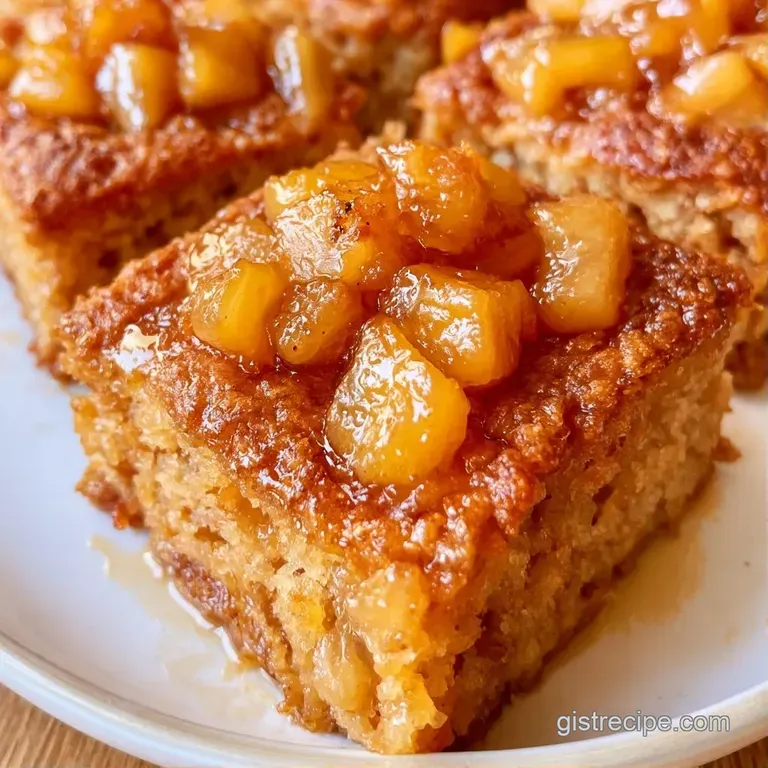
If you find the crust is too crumbly, it's usually because the butter got too warm before baking. This happens a lot in hot kitchens. Next time, keep the butter in the freezer for 10 minutes before cubing it.
Another common issue is a runny filling. If the apples were extra juicy, the cornstarch might not have been enough. You can add an extra teaspoon of cornstarch if you're using a very wet apple variety.
If the edges are getting too dark but the middle is still wobbly, your oven might have hot spots. Rotate the pan halfway through the 35-40 minute bake.
Fixing a Crumbly Base
When the dough won't hold together, you just need a tiny bit more moisture. Add cold water one teaspoon at a time.
Managing Wet Filling
If the fruit releases too much liquid, the bars can feel soggy. Increasing the starch helps bind the juice.
Handling Burnt Edges
Over browned edges usually mean the sugar is caramelizing too fast. Foil is your best friend here.
| Problem | Fix |
|---|---|
| Crust too crumbly | Add ice water tsp by tsp |
| Filling too runny | Increase cornstarch by 1 tsp |
| Edges burnt | Tent with foil after 30 mins |
I've found that using a small offset spatula helps get the apple layer perfectly even. It prevents the corners from being too thin, which is where most Apple Squares tend to burn.
Adjusting the Batch Size
To make a smaller portion, you can cut the recipe in half and use a loaf pan. Just note that the baking time may decrease by about 20%. When halving recipes that call for eggs (though this one doesn't), beat one egg and use only half of it.
Scaling up is slightly more complex. If you double the Apple Squares, avoid simply doubling all the spices, as cinnamon and salt can become overpowering. Instead, scale those to 1.5x rather than 2x.
For a 2x batch, I suggest using two 9x9 pans instead of one oversized pan to ensure heat reaches the center of the fruit. If you prefer a larger pan, lower the oven temperature to 325°F and increase the bake time.
Lastly, if your mixing bowl is small, work in smaller quantities. Overmixing a double batch of dough will result in a crust that is tough and bready.
Baking Beliefs Debunked
You might hear that you need to peel apples to get a better texture. That's not actually true. The skin adds fiber and a bit of a rustic chew, though it does change the look of the Apple Squares.
Some say you should pre cook the apples on the stove first. While that works for pies, it's overkill here. Since these are smaller squares, the 35-40 minute bake is plenty to soften the fruit without losing the bite.
Another myth is that whole wheat flour always makes a dessert taste "healthy" or bland. In these Apple Squares, the wheat actually complements the cinnamon and maple, adding a depth that white flour just can't match.
Storage and Waste Tips
Once they've cooled, store these Apple Squares in a single layer. If you stack them, the icing will smudge and the crust might soften. They stay fresh in the fridge for about 5 days.
For the freezer, wrap each bar individually in parchment paper and toss them in a freezer bag. They'll keep for 3 months. To reheat, just pop one in the microwave for 15 seconds or a toaster oven for 3 minutes to get that crispness back.
Don't toss the apple peels. I usually toss them in a pot with a bit of water, cinnamon, and a slice of ginger to make a quick syrup. , if you're feeling fancy, you can dry them in the oven at 200°F for a few hours to make apple chips.
If you have leftover diced apples, they're great in morning oatmeal. Just sauté them with a pinch of cinnamon before adding them to the pot.
Fun Flavor Changes
For a different twist, try adding a handful of chopped walnuts to the crust. This gives the Apple Squares an extra crunch and a deeper flavor.
You can also swap the cinnamon for cardamom and ginger for a more aromatic, spicy profile. This works especially well if you're using a sweeter apple like Honeycrisp.
If you want something a bit more decadent, you can dollop a bit of Caramel Apple Sauce on top of each square after they've cooled. The extra sweetness pairs well with the tart fruit.
For a vegan version, replace the butter with a chilled plant based butter and use a splash of almond milk in the icing. The structure of the Apple Squares remains almost identical.
Another idea is to add a layer of thinly sliced pears mixed in with the apples. It adds a softer texture and a milder sweetness that balances the Granny Smiths.
What to Serve With
While these Apple Squares are wonderful on their own, adding a dollop of chilled whipped cream is a timeless pairing. The cream provides a smooth balance to the apples' acidity.
If you're preparing a brunch, serve them with some Apple Doughnuts for a festive autumn spread. It's definitely an apple centric menu, but that's the best part.
A slice of sharp cheddar cheese also pairs beautifully. The salty, savory notes of the cheese against the sweet cinnamon in the squares create a surprising and delicious contrast.
As for beverages, a strong coffee or a steaming cup of Earl Grey tea is ideal. The coffee's bitterness cuts through the sweetness of the maple syrup in the crust.
Skip the elaborate plating. Simply cut them into neat squares and present them on a wooden board; a rustic look suits these Apple Squares perfectly.
Recipe FAQs
How do you make apple squares?
Press the dough into a 9x9 pan, pre-bake for 50 minutes, layer on spiced apples, and bake for 35-40 minutes.
Tip: Leave a parchment paper overhang to lift the bars out easily.
What prevents apple squares from getting soggy?
Pre-baking the crust and adding cornstarch to the apples absorbs excess juices.
Tip: Ensure the diced apples are well coated in the spice mixture.
Is it true that canned pie filling works as a substitute for fresh apples?
No, this is a common misconception. Canned fillings add too much moisture, which ruins the crust's texture.
Tip: Use Granny Smith apples for a firm, tart result.
Is it possible to bake these in a sheet pan?
Spread the mixture over a larger rimmed baking tray and shorten the final bake time slightly.
Tip: If you enjoyed practicing your dough technique here, give our white bread recipe a try as well.
Which apple variety is best for these bars?
Granny Smith apples are the best choice because they retain their shape when heated.
Tip: Peel and dice them finely for a consistent bite.
How should finished apple squares be stored?
Store them in a single layer in the refrigerator to keep the icing intact.
Tip: Individually wrap bars in parchment paper before freezing for up to 3 months.
Apple Squares Dessert Bars