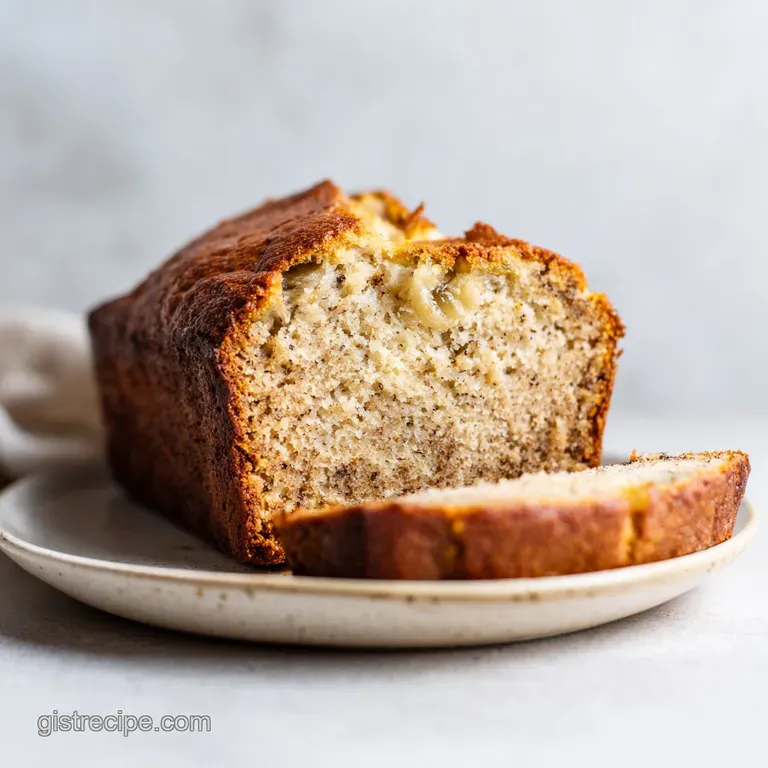
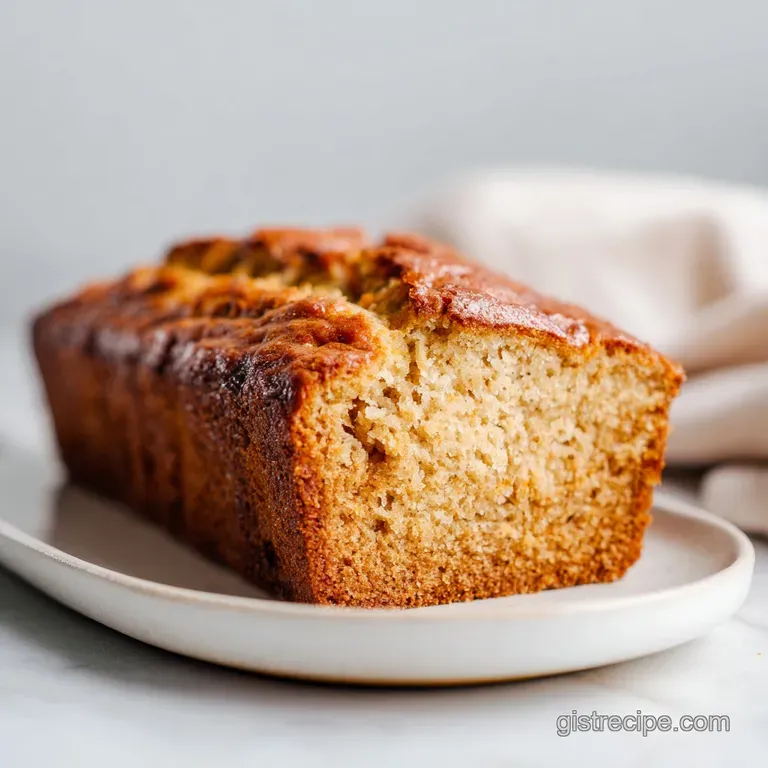
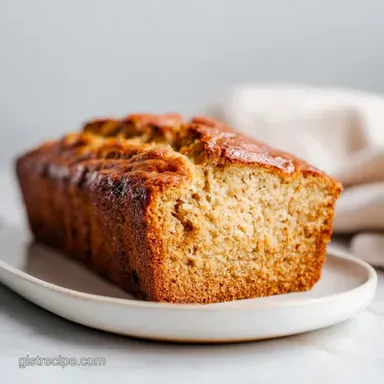
Gluten Free Banana Loaf: Moist and Tender
- Time: Active 15 minutes, Passive 60 minutes, Total 75 minutes
- Flavor/Texture Hook: A velvety, banana forward interior with a golden, slightly caramelized crust.
- Perfect for: Lazy Sunday mornings, meal prep breakfasts, or a simple afternoon treat with tea.
- Creating a Moist Gluten Free Banana Loaf
- What Actually Makes This Recipe So Soft
- A Deep Dive Into Our Components
- Essential Ingredients and Their Easy Substitutes
- Necessary Kitchen Equipment for Success
- Step by Step Baking Instructions
- Solving Your Common Baking Texture Problems
- Creative Flavor and Texture Swaps
- Maximizing Freshness with Proper Storage Habits
- Myths About Gluten Free Baking
- Perfect Pairings for Your Morning Slice
- Recipe FAQs
- 📝 Recipe Card
Creating a Moist gluten-free Banana Loaf
The air in my kitchen currently smells like a dream heavy with the scent of caramelized light brown sugar and that unmistakable, intoxicating aroma of bananas that have finally reached their peak. You know the ones I mean?
The bananas that look slightly terrifying on the counter, covered in dark spots, almost weeping with sweetness. That is the exact moment they are ready to be transformed into something spectacular.
I remember the first time I tried making a banana bread without wheat; it was a gritty, sad brick that even the birds wouldn't touch. But that mistake taught me the biggest secret of gluten-free baking: it's all about how you treat the flour.
When the batter hits the pan, you want it to have that thick, lava like flow that promises a dense yet tender slice. There is something so rewarding about hearing the slight crackle of the crust as you pull it from the 350°F oven, knowing that inside is a velvety crumb just waiting for a smear of salted butter.
We are going to skip the fussy techniques and focus on what actually works for a busy home cook. This isn't just about avoiding gluten; it's about making a loaf that everyone, regardless of their dietary needs, will be fighting over.
Trust me on this, once you see that golden brown top and smell the warm cinnamon, you'll realize that the "gist" of great baking is simply respecting your ingredients and giving them a little time to breathe.
What Actually Makes This Recipe So Soft
Most gluten-free bakes end up dry because the alternative flours act like tiny sponges that never stop drinking. We solve that here with a few simple tricks that I've picked up over the years. It's not magic, it's just a bit of kitchen logic that makes every bite better.
- The Power of Almond Flour: Adding 1/2 cup of fine almond flour introduces natural fats and proteins that mimic the structure of gluten, providing a tender "chew" that doesn't crumble away.
- The Ten Minute Hydration Rest: This is the one step most people skip, but it's vital. Letting the batter sit for 10 minutes allows the rice based flours to fully absorb the liquids, which completely eliminates that "sandy" or gritty mouthfeel.
- Double Leavening Action: By using both baking soda and baking powder, we ensure the loaf rises tall even without the elastic strength of gluten. The soda reacts with the acidic bananas, while the powder provides that extra lift during the 60 minutes of baking.
- Emulsified Fat Barrier: Whisking the melted butter and brown sugar until they are perfectly smooth creates a coating around the flour particles, which helps lock in moisture throughout the cooking process.
| Servings | Ingredient Adjustments | Pan Size | Cook Time |
|---|---|---|---|
| 5 People | Use 1.5 bananas, 1 egg, half all dry | 4x4 Mini Loaf | 40 minutes |
| 10 People | 3 bananas, 2 eggs, 1.5 cups GF flour | 9x5 inch Loaf | 60 minutes |
| 20 People | 6 bananas, 4 eggs, 3 cups GF flour | Two 9x5 pans | 65 minutes |
If you find yourself enjoying the process of making this loaf, you might also want to look into my gluten-free Zucchini Bread for a summer friendly version of this quick bread technique. The hydration principles remain very similar!
A Deep Dive Into Our Components
| Ingredient | Science Role | Pro Secret |
|---|---|---|
| Overripe Bananas | Primary hydration and natural sugar source. | The blacker the skin, the more intense the banana flavor will be in the final bake. |
| Light Brown Sugar | Adds moisture and a hint of molasses flavor. | Pack it tightly into the cup to ensure you get the full 150g needed for a soft crumb. |
| 1 to-1 GF Flour | Provides the essential structure and starch base. | Ensure it contains xanthan gum; otherwise, the loaf will fall apart once sliced. |
| Fine Almond Flour | Adds "fatty" moisture and prevents dryness. | Sift it if it’s clumpy to ensure it incorporates evenly without over mixing. |
Essential Ingredients and Their Easy Substitutes
To get this gluten-free Banana Loaf exactly right, you'll need the following items. I've included the best swaps I've found through my own kitchen trials so you don't have to guess.
- 3 overripe bananas: Use approximately 350g of mashed fruit. Why this? They provide the bulk of the moisture and sweetness. (Swap: 1.25 cups of unsweetened applesauce, though the flavor will change).
- 2 large eggs: These act as the binder. Why this? They provide structure and lift in gluten-free bakes. (Swap: 2 flax eggs, but the loaf will be slightly denser).
- 1/2 cup unsalted butter, melted: Use 113g for richness. Why this? Butter adds flavor that oil simply cannot match. (Swap: Melted coconut oil for a dairy-free option).
- 3/4 cup light brown sugar: Packed (150g). Why this? The molasses in brown sugar keeps the bread soft. (Swap: Coconut sugar for a lower glycemic alternative).
- 2 tsp pure vanilla extract: For depth. Why this? It rounds out the sweetness of the bananas. (Swap: 1 tsp almond extract for a nutty twist).
- 1.5 cups 1 to-1 gluten-free flour blend: 210g with xanthan gum. Why this? It’s designed to replace wheat flour directly. (Swap: A homemade blend of rice flour, potato starch, and tapioca).
- 1/2 cup fine almond flour: 50g for texture. Why this? It prevents the "gummy" center common in GF breads. (Swap: Oat flour, provided it is certified gluten-free).
- 1 tsp baking soda: For browning and lift. Why this? It reacts with the acids in the bananas. (Swap: Use an extra 2 tsp of baking powder if out of soda).
- 1 tsp baking powder: For consistent rise. Why this? It ensures the loaf doesn't sink in the middle. (Swap: 1/4 tsp baking soda plus 1/2 tsp cream of tartar).
- 1/2 tsp fine sea salt: To balance sugars. Why this? Salt makes all the other flavors pop. (Swap: Kosher salt, but use 3/4 tsp).
- 1 tsp ground cinnamon: For warmth. Why this? It’s the classic partner for banana. (Swap: Pumpkin pie spice or nutmeg).
Necessary Kitchen Equipment for Success
You don't need a professional bakery setup for this. I usually just use a sturdy whisk and a big bowl because I hate cleaning up extra attachments from a stand mixer. A 9x5 inch loaf pan is the standard here. If you use a smaller pan, the batter might overflow, and a larger pan will result in a very flat loaf.
The most important tool is actually the parchment paper. I always make a "sling" by cutting a piece that fits the width of the pan but hangs over the long sides. It makes lifting the loaf out so much easier.
Also, grab a wire rack; cooling the loaf in the pan for too long can lead to a soggy bottom, and nobody wants that.
step-by-step Baking Instructions
- Preheat your oven to 350°F (175°C). Line your 9x5 inch loaf pan with parchment paper, making sure you have those "handles" hanging over the sides.
- Peel your 3 overripe bananas and place them in a large mixing bowl. Mash them with a fork until they are mostly liquid with only tiny lumps remaining. Note: Liquid bananas distribute moisture more evenly than chunks.
- Pour in the 1/2 cup of melted butter and add the 3/4 cup light brown sugar. Whisk vigorously until the mixture looks smooth and emulsified.
- Add the 2 large eggs one at a time, whisking after each, then stir in the 2 tsp of vanilla extract.
- In a separate smaller bowl, sift together the 1.5 cups of gluten-free flour, 1/2 cup almond flour, baking soda, baking powder, salt, and cinnamon.
- Gently fold the dry ingredients into the banana mixture using a spatula until no white streaks of flour are visible.
- Let the batter rest in the bowl for exactly 10 minutes. Do not skip this step as it allows the rice flours to hydrate.
- Pour the batter into the prepared pan and smooth the top with your spatula.
- Bake for 60 minutes. You’ll know it’s done when a toothpick inserted into the center comes out clean and the top is dark golden brown and firm to the touch.
- Cool in the pan for 10 minutes, then use the parchment sling to move it to a wire rack to finish cooling completely.
Solving Your Common Baking Texture Problems
The Loaf is Gummy Inside
If your loaf feels wet or sticky in the center even after the full 60 minutes, it's usually one of two things. Either the bananas were exceptionally large (adding too much moisture), or the oven temperature was slightly low.
Always check the center with a toothpick; it shouldn't just come out clean, it should feel hot to the touch.
The Bread Didn't Rise Enough
A flat banana loaf is often the result of old leavening agents. Baking soda and powder lose their punch over time. If your soda doesn't fizz when you drop a bit into vinegar, it's time to replace it. Also, make sure you didn't over mix the batter after adding the dry ingredients, as this can knock out the air bubbles.
| Problem | Root Cause | Solution |
|---|---|---|
| Gritty Texture | Flours didn't hydrate | Always rest the batter for 10 minutes before baking. |
| Sunken Middle | Too much leavening or underbaked | Measure baking powder carefully and check for doneness at 60 mins. |
| Burnt Crust | Sugar caramelized too fast | Tent the pan with foil after 40 minutes of baking. |
Common Mistakes Checklist:
- ✓ Using "just yellow" bananas instead of spotted/black ones (lacks flavor).
- ✓ Forgetting to whisk the eggs thoroughly into the fat/sugar base.
- ✓ Skipping the parchment sling (makes removal very difficult).
- ✓ Slicing the bread while it is still hot (it will crumble!).
- ✓ Not measuring the flour by weight (cups can be packed too tightly).
Creative Flavor and Texture Swaps
The beauty of a basic gluten-free Banana Loaf is how well it takes to additions. If you want to get a bit fancy, you can toss in 1/2 cup of semi sweet chocolate chips or chopped walnuts. I personally love adding a handful of toasted pecans for a bit of crunch. If you are looking for a slightly different flavor profile, you might enjoy this Banana Bread Recipe gluten-free which focuses on a slightly different moisture balance.
| Method | Time | Texture | Best For |
|---|---|---|---|
| Oven (350°F) | 60 minutes | Crispy crust, soft center | Traditional loaf lovers |
| Dutch Oven (Stovetop) | 50-55 mins | Steamed, very moist | Hot climates / No oven |
Decision Shortcut: If you want a Rich/Dessert vibe, add 1/2 cup chocolate chips and a pinch of espresso powder. If you want a Healthy Breakfast, add 2 tbsp of chia seeds and 1/4 cup of pumpkin seeds.
If you want an Extra Moist loaf, add 2 tbsp of sour cream or Greek yogurt to the wet ingredients.
Maximizing Freshness with Proper Storage Habits
Once your loaf is completely cool, you need to store it correctly to keep it from drying out. gluten-free bakes go stale faster than wheat bakes because they lack the gluten structure that traps moisture. Keep it in an airtight container at room temperature for up to 2 days.
If you still have leftovers, move them to the fridge for up to 5 days.
For long term storage, this loaf freezes beautifully. I like to slice it first, then place pieces of parchment paper between the slices before putting them in a freezer bag. This way, you can just pull out one slice at a time and pop it directly into the toaster. It will stay fresh in the freezer for about 3 months.
Zero Waste Tip: If you have a few slices that have gone a bit too dry, don't toss them! They make the most incredible French toast. Because the bread is denser, itaks up the egg wash without falling apart.
You can also dry them out completely in a low oven to make "banana bread biscotti" or sweet croutons for a fruit salad.
Myths About gluten-free Baking
The Flour Myth: Many people think you can just swap any gluten-free flour for wheat flour 1:1 and get the same result. The truth is that every blend is different. Using a blend with almond flour, like we do here, is the key to preventing that dry, crumbly texture that plagues many "all purpose" GF mixes.
The Over mixing Myth: In traditional baking, over mixing develops gluten and makes the bread tough. Since there is no gluten here, you don't have to worry about "toughness," but you do have to worry about "toughness" from over aerating the eggs or deflating the leavening agents.
Gentle folding is still the best practice for a tender crumb.
The Cooling Myth: You might be tempted to cut into that warm, steaming loaf immediately. Resist! gluten-free bread needs to "set" as it cools. If you cut it too early, the steam escapes, and the internal structure collapses, leaving you with a gummy, wet looking slice.
Give it at least 30 minutes on that wire rack.
Perfect Pairings for Your Morning Slice
I usually serve this with a generous slab of salted butter, but it’s also fantastic with a bit of almond butter or even a drizzle of honey. If you're feeling indulgent, try a dollop of mascarpone cheese. It pairs perfectly with a strong cup of black coffee or a spicy chai tea.
If you have extra bananas and want to try something even simpler, you can use this same batter to make gluten-free banana muffins. Just pour them into a lined muffin tin and reduce the bake time to about 20-25 minutes. They are the ultimate grab and-go snack for busy work weeks.
Right then, let's get those bananas mashed and the oven preheated you're going to love how this turns out!

Recipe FAQs
Is it true that I must use a bread machine to get a good gluten-free rise?
No, this is a common misconception. You can achieve a professional, tall loaf using a standard oven as long as you follow the specific gluten-free bread machine techniques for hydration and resting the batter.
How to ensure the loaf is not gritty?
Let the batter rest for 10 minutes before baking. This allows the rice flours in the blend to fully hydrate, which eliminates that sandy texture often found in gluten-free baking.
How to tell when the banana loaf is finished baking?
Insert a toothpick into the center of the loaf. The loaf is fully cooked when the toothpick comes out clean without any wet batter clinging to it.
Why is it necessary to mash the bananas into a liquid state?
Liquid bananas distribute moisture more evenly throughout the crumb. Avoiding large chunks prevents the bread from having soggy spots and helps create a uniform, tender texture.
How to prevent the loaf from sticking to the pan?
Line the 9x5 inch pan with parchment paper. Ensure you leave extra paper hanging over the long sides to create handles, which allows you to lift the loaf out easily once it has cooled for 10 minutes.
How to properly mix the butter and sugar for the best emulsion?
Whisk the melted butter and brown sugar into the mashed bananas vigorously. Continue until the mixture looks completely smooth and emulsified to ensure the fats are evenly distributed for a moist final product.
How to incorporate the dry ingredients without overworking the batter?
Gently fold the dry ingredients into the wet batter using a spatula. Stop mixing immediately once you no longer see any white flour streaks to keep the loaf tender.
gluten-free Banana Loaf 2
Ingredients:
Instructions:
Nutrition Facts:
| Calories | 291 kcal |
|---|---|
| Protein | 3.6 g |
| Fat | 12.9 g |
| Carbs | 41.5 g |
| Fiber | 2.7 g |
| Sugar | 21.2 g |
| Sodium | 195 mg |
