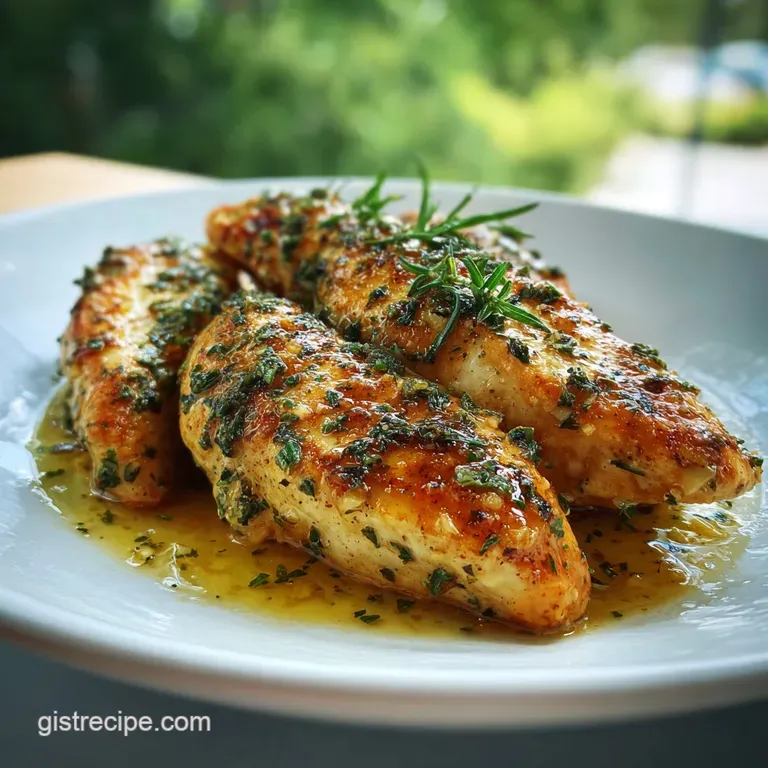
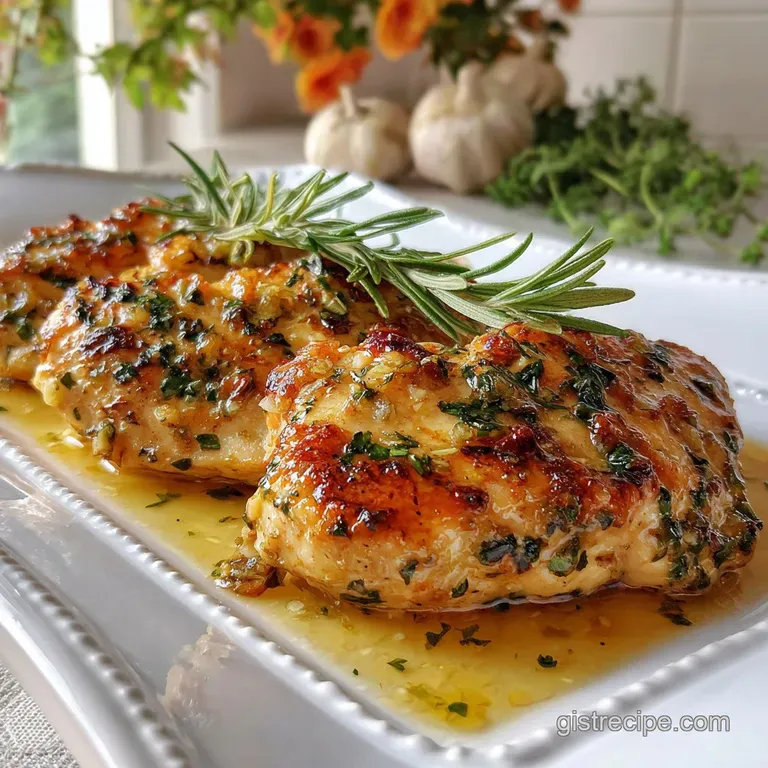
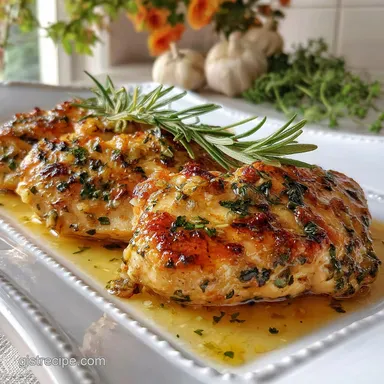
Chicken Tenderloin Recipe with Garlic and Herbs
- Time: Active 5 minutes, Passive 10 minutes, Total 15 minutes
- Flavor/Texture Hook: Buttery, herbaceous, and golden crisp
- Perfect for: Busy weeknight dinners or high protein meal prep
- Heat Control for Juicy Meat
- Key Recipe Specifications and Details
- Essential Ingredients and Smart Swaps
- The Best Kitchen Equipment Needed
- Step by Step Searing Guide
- Fixing Common Texture Problems
- Creative Variations and Flavor Ideas
- Smart Storage and Leftover Tips
- Best Side Dishes for Chicken
- Recipe FAQs
- 📝 Recipe Card
You know that sound when cold chicken hits a heavy, preheated pan? That immediate, sharp sizzle is the best indicator that you're about to have a great dinner. I used to struggle with chicken tenders, thinking they were just for kids or destined to be dry, stringy strips of regret.
Then I realized the trick isn't in the breading, but in how you treat the "tender" itself specifically that pesky white tendon.
This chicken tenderloin recipe with garlic and herbs will become your new weeknight favorite because it feels like a bistro meal but costs less than a takeout burger. I remember making this on a Tuesday when the fridge was basically empty except for a half stick of butter and some woody herbs in the garden.
It turned out so well that I didn't even bother with a side dish; I just ate them right off the cutting board.
We are aiming for a texture that is velvety on the inside with a crust that has a slight snap. You don't need fancy equipment, just a decent pan and the patience to let the meat sit still for three minutes. Once you master the timing, you'll never go back to the frozen bag again.
Trust me, the fresh garlic hitting that hot butter at the end is a scent you'll want to bottle up.
Heat Control for Juicy Meat
Cooking lean poultry is all about managing moisture loss through temperature control. Because tenderloins are small, the window between "perfectly cooked" and "rubber tire" is narrow.
Using a combination of oil for over high heat searing and butter for lower heat finishing ensures the meat browns without the fat burning or the interior drying out.
- Maillard Reaction: High heat transforms amino acids and sugars into a brown, savory crust that provides the primary flavor profile.
- Butter Emulsification: Adding cold butter at the end creates a silky sauce that coats the chicken, acting as a barrier against air and preventing immediate moisture evaporation.
- Carry over Cooking: Pulling the chicken at 160°F (71°C) allows the internal energy to finish the job, reaching the safe 165°F (74°C) mark while resting on the plate.
| Chicken Thickness | Internal Temperature | Rest Time | Visual Cue |
|---|---|---|---|
| 0.5 inch | 160°F | 2 minutes | Opaque throughout, firm press |
| 0.75 inch | 160°F | 3 minutes | Gold crust, juices run clear |
| 1.0 inch | 160°F | 5 minutes | Deep brown, springy texture |
Providing the meat with a brief rest is the difference between a plate full of leaked juices and a tender bite. When the protein fibers relax, they hold onto the moisture you worked so hard to keep inside.
Key Recipe Specifications and Details
Before we get the pan hot, let's look at the numbers that make this dish reliable. We are working with 1.5 lbs of chicken tenderloins, which is the sweet spot for a standard 12 inch skillet. Overcrowding is the enemy of the sear; if the pieces touch, they will steam instead of fry, leaving you with gray, sad meat.
Why Dry Brining Works
Even five minutes of sitting with 1 tsp of Kosher salt allows the salt to penetrate the surface. This alters the protein structure, helping the muscle fibers hold more water during the cooking process. It’s a small step that yields a much more supple result.
The Magic of Butter Basting
Using 2 tbsp of unsalted butter at the very end isn't just for flavor. As the butter foams, it reaches into the nooks and crannies of the meat. This ensures every millimeter of the chicken is infused with the rosemary and thyme aromatics.
| Ingredient | Science Role | Pro Secret |
|---|---|---|
| Chicken Tenders | Lean Protein | Remove the white tendon for a "shatter" bite. |
| Smoked Paprika | Color Catalyst | Provides an earthy depth without needing a grill. |
| Fresh Garlic | Aromatic Punch | Smash before mincing to release more allicin. |
| Lemon Zest | Acid Balance | Essential for cutting through the heavy butter fat. |
Fresh herbs like rosemary and thyme contain volatile oils that are released most effectively when tossed into hot fat. Using dried herbs is okay in a pinch, but they won't give you that vibrant, "just picked" scent that defines this dish.
Essential Ingredients and Smart Swaps
For this recipe, we are using 1.5 lbs chicken tenderloins, 1 tsp Kosher salt, 0.5 tsp freshly cracked black pepper, 0.5 tsp smoked paprika, 4 cloves fresh garlic, 2 tbsp unsalted butter, 1 tbsp extra virgin olive oil, 1 tbsp fresh rosemary, 1 tbsp fresh thyme, and 1 tsp fresh lemon zest.
- Chicken Tenderloins: The most tender part of the breast. Why this? High surface area ensures fast cooking and maximum seasoning coverage.
- Substitute: Chicken breast sliced into 1 inch strips.
- Fresh Garlic: Smashed and minced. Why this? Fresh garlic has a sharp bite that mellows beautifully in butter.
- Substitute: 1 tsp garlic powder (add to dry rub instead of butter).
- Unsalted Butter: high-quality fat. Why this? Allows you to control the salt level while adding a velvety finish.
- Substitute: Ghee or clarified butter for a higher smoke point.
- Fresh Rosemary & Thyme: Finely chopped. Why this? These earthy herbs stand up well to over high heat pan frying.
- Substitute: 1 tsp dried Italian seasoning.
- Lemon Zest: Finely grated. Why this? Adds a bright top note that brings all the savory flavors together.
- Substitute: A tiny squeeze of fresh lemon juice at the end.
| Original Ingredient | Substitute | Why It Works |
|---|---|---|
| Unsalted Butter (2 tbsp) | Olive Oil (2 tbsp) | dairy-free option. Note: Lacks the nutty "brown butter" flavor profile. |
| Fresh Rosemary (1 tbsp) | Dried Rosemary (1 tsp) | Concentrated flavor. Note: Can be "needle like" if not crushed well. |
| Smoked Paprika (0.5 tsp) | Chili Powder (0.5 tsp) | Adds heat. Note: Changes the flavor profile from smoky to spicy. |
When swapping fresh for dried herbs, always remember the 3 to-1 ratio. Since dried herbs are more potent by volume, you need much less. However, in a quick sear dish like this, fresh herbs are truly the gold standard for texture.
The Best Kitchen Equipment Needed
You don't need a pantry full of gadgets, but a heavy bottomed pan is non negotiable. I prefer a cast iron skillet for its heat retention, which prevents the temperature from plummeting when you add the cold chicken. If you use a thin non stick pan, you'll likely struggle to get that deep golden crust.
A pair of stainless steel tongs is also your best friend here. You need to be able to flip the tenders precisely without tearing the delicate meat. Finally,, a microplane or fine grater is the only way to get that lemon zest light and fluffy so it melts into the sauce rather than clumping.
| Fresh Garlic | Jarred Minced Garlic | Impact on Results |
|---|---|---|
| Sharp, pungent, and sweet when browned. | Mellow, often acidic from preservatives. | Fresh provides better "stick" to the meat surface. |
| Creates a crispy "bit" in the butter sauce. | Can stay soft or turn mushy in the pan. | Jarred is faster but lacks the aromatic punch. |
If you are using a stainless steel pan (like an All Clad), remember the "water bead test." If a drop of water flicked onto the pan dances around like a bead of mercury, it's hot enough to add the oil. This prevents the chicken from sticking to the steel.
step-by-step Searing Guide
Follow these steps closely to ensure your chicken stays juicy. The process moves very fast once the meat hits the heat, so have your garlic and herbs prepped and sitting by the stove before you start.
- Trim the tenders. Locate the white tendon at the top of the meat. Use a paper towel to grip it and a fork to "zip" the meat away from the tendon.
- Dry the meat. Pat the 1.5 lbs chicken tenderloins completely dry with paper towels. Note: Moisture on the surface creates steam, which prevents browning.
- Season thoroughly. Toss the chicken with 1 tsp salt, 0.5 tsp pepper, and 0.5 tsp smoked paprika until evenly coated.
- Heat the skillet. Place 1 tbsp olive oil in a heavy pan over medium high heat until the oil shimmers and barely wisps smoke.
- Initial sear. Add the chicken in a single layer. Cook for 3 minutes without moving them until a dark golden crust forms.
- Flip the meat. Turn the tenders over. They should release easily from the pan if the sear is sufficient.
- Add the aromatics. Drop in 2 tbsp butter, 4 cloves minced garlic, 1 tbsp rosemary, and 1 tbsp thyme. Note: The butter will foam and turn brown, which is exactly what we want.
- The butter baste. Tilt the pan slightly and use a spoon to pour the foaming herb butter over the chicken repeatedly for 2 minutes until the garlic smells nutty and toasted.
- Final touch. Remove from heat and sprinkle with 1 tsp lemon zest.
- Rest the chicken. Transfer to a warm plate and let sit for 3 minutes before serving.
Protein Prep and Trimming
That white tendon in the tenderloin can be tough and chewy if left alone. I find that using the "fork trick" placing the tendon between the tines of a fork and pulling with a paper towel is the most efficient way to remove it without mangling the meat.
It takes an extra minute but makes the final dish feel much more professional.
The Searing Phase
Don't be tempted to crowd the pan. If you have to cook in two batches, do it. Use half the oil for the first batch, then wipe the pan and use the rest for the second. This ensures every piece gets that "shatter" crispness on the edges.
Fixing Common Texture Problems
Sometimes things go sideways in the kitchen, but usually, it's a simple fix. Most issues with this chicken tenderloin recipe with garlic and herbs stem from temperature or moisture. If your chicken looks gray, your pan wasn't hot enough. If the garlic is black, the heat was too high after the flip.
Why Your Chicken Is Dry
The most common culprit is overcooking. Because tenders are thin, they continue to cook for a few minutes after you take them out of the pan. If you wait until they look "totally done" in the center while still on the heat, they will be overdone by the time you eat them.
Aim for that 160°F pull temperature.
Why the Garlic Burned
Garlic has a high sugar content and burns easily. If you add it at the very beginning with the oil, it will be charcoal by the time the chicken is cooked. Always add it during the last two minutes with the butter.
The butter helps regulate the temperature and keeps the garlic from direct contact with the intense heat of the pan bottom.
| Problem | Root Cause | Solution |
|---|---|---|
| Meat is sticking to pan | Pan wasn't hot enough or moved too soon | Wait for the meat to naturally release before flipping. |
| Garlic tastes bitter | Garlic burned in the hot oil | Add garlic only during the final butter basting stage. |
| Chicken is rubbery | Overcooked or tendon not removed | Use a meat thermometer and pull at 160°F (71°C). |
Common Mistakes Checklist:
- ✓ Skipping the paper towel pat down (wet chicken won't crust).
- ✓ Using a cold pan (leads to sticking and uneven cooking).
- ✓ Moving the chicken too early (interrupts the Maillard reaction).
- ✓ Forgeting to rest the meat (juices will run out on the plate).
- ✓ Adding lemon juice too early (can make the crust soggy).
Creative Variations and Flavor Ideas
If you want to change things up, this base recipe is incredibly flexible. You can take it in a spicy direction or lean into a more Mediterranean vibe depending on what you have in your pantry. It’s a great way to use up leftover herbs or that last bit of citrus sitting in the crisper drawer.
- The Spicy Kick: Add 0.5 tsp of red pepper flakes to the butter at the end. The heat infuses into the fat and coats the chicken perfectly.
- The Honey Garlic Twist: Stir in 1 tbsp of honey with the lemon zest at the end for a sweet and savory glaze.
- Mediterranean Style: Swap the rosemary for oregano and top with crumbled feta and chopped kalamata olives before serving.
15 Minute Bistro Pasta
If you’re extra hungry, boil some angel hair pasta while the chicken cooks. Once the chicken is done, remove it from the pan and toss the pasta directly into the leftover garlic herb butter. Add a splash of pasta water to create a quick sauce. This Weeknight Chicken Pasta recipe technique works wonders for a complete meal in record time.
Scaling the Recipe
If you are cooking for a crowd, do not double the ingredients in one pan. Work in batches. When doubling the spices, use only 1.5x the salt to prevent it from becoming overly salty, as salt doesn't always scale linearly in flavor.
If you're cooking for just one or two, you can easily halve the recipe, but keep the butter at 1.5 tbsp you need enough volume to properly baste the meat!
Smart Storage and Leftover Tips
Leftover chicken tenders are a gift for future you. They make excellent salad toppers or sandwich fillers for lunch the next day. The key is to cool them quickly and store them in an airtight container to prevent the fridge from smelling like a garlic factory.
- Fridge: Store in an airtight container for up to 4 days.
- Freezer: Wrap tightly in foil and place in a freezer bag for up to 3 months.
- Zero Waste Tip: Don't throw away the herb stems! Save them in a bag in your freezer to add to your next batch of chicken stock or soup.
- The Lemon Hack: If you have leftover lemon halves after zesting, throw them into the pan face down for the last 60 seconds of cooking. The charred lemon juice is much sweeter and makes a great garnish.
When reheating, avoid the microwave if possible, as it turns the chicken into rubber. Instead, pop them in an air fryer at 350°F (180°C) for 3-4 minutes or in a toaster oven.
This helps the exterior regain some of that "shatter" crispness while keeping the middle moist.
Best Side Dishes for Chicken
Since this dish is so savory and buttery, I love pairing it with something bright and crisp. A simple green salad with a vinaigrette is a classic choice, but if you want something warm, roasted vegetables are the way to go. The earthy tones of the herbs play really well with root vegetables or greens.
I highly recommend serving this alongside my Sauteed Green Beans recipe. The garlic in the beans echoes the flavors in the chicken, and the snap of the beans provides a great texture contrast to the tender meat. If you’re looking for a starch, a pile of fluffy jasmine rice or some smashed potatoes will soak up that extra garlic butter beautifully.
One thing I've learned: don't overthink the sides. The chicken is the star here. A simple piece of crusty bread to swipe through the pan juices is sometimes all you really need to feel like you’ve had a five star meal. Just make sure you serve everything while it’s still hot!
The Searing Myth
Many people believe searing "seals in the juices." Science tells us this isn't true; moisture is lost regardless of the crust. However, the sear is essential for flavor and texture. The "sealing" effect actually comes from resting the meat, which allows the muscle fibers to reabsorb the liquid.
Fresh vs Dried Herbs
While dried herbs are convenient, they lack the bright chlorophyll and essential oils found in fresh rosemary and thyme. In a quick cook recipe like this, fresh herbs soften in the butter and become edible "chips" that add a lovely crunch. Dried herbs often stay woody and can feel gritty on the tongue.
If you must use dried, crush them in your palm first to "wake up" the oils.

Recipe FAQs
How to cook chicken tenderloins so they don't dry out?
Sear hard, finish gently, and rest immediately. Use high heat to form a crust quickly, then lower the heat or baste with butter to cook the interior without over drying. Pull the meat when the internal temperature hits 160°F (71°C) and let it rest for three minutes to redistribute the juices.
Is it better to bake chicken tenderloins at 350 or 400?
Stovetop searing is superior to baking for tenders. Baking risks a slower temperature rise, which encourages moisture loss across the entire surface. For fast cooking lean meat, the quick, intense heat of a skillet sear locks in texture much better.
What's the best way to season chicken tenderloins?
Dry brine with salt first, then layer aromatics while searing. Pat the meat very dry, apply salt, pepper, and paprika, and let it sit for at least five minutes. Add minced garlic and fresh herbs only during the final butter basting stage to prevent them from burning.
Do you add garlic before or after chicken hits the hot pan?
Add garlic after the chicken has been seared on both sides. If you add minced garlic at the beginning, its high sugar content will cause it to burn quickly over high heat, resulting in a bitter flavor. Wait until you reduce the heat for the butter baste.
Why must I remove the white tendon from the tenderloin?
No, you don't have to, but you should remove it for texture. The white tendon is largely composed of connective tissue that does not break down during this quick cook time, resulting in a tough, chewy bite against the tender meat. Mastering tendon removal here is key to a professional texture, similar to how precisely trimming fat improves the texture in a Quaker Oats Meatloaf Recipe.
How do I prevent the garlic butter from turning black too fast?
Control the timing and the heat application. Add the butter only after the chicken has already achieved its deep golden brown sear on both sides. The butter should foam and brown, not smoke furiously; if it smokes immediately, lower the heat slightly before adding the minced garlic.
Can I substitute dried herbs for the fresh rosemary and thyme?
Yes, but you must adjust the quantity significantly. Dried herbs are much more concentrated than fresh herbs, so use a 3-to-1 ratio (use 1 teaspoon of dried for every 1 tablespoon of fresh). Crush the dried herbs in your hand before adding them to release maximum volatile oils.
Garlic Herb Chicken Tenders
Ingredients:
Instructions:
Nutrition Facts:
| Calories | 272 kcal |
|---|---|
| Protein | 39.1 g |
| Fat | 11.3 g |
| Carbs | 1.3 g |
| Fiber | 0.3 g |
| Sugar | 0.1 g |
| Sodium | 582 mg |
