Gluten Free Bread in Bread Machine: Silky Loaf
- Time: Active 10 minutes, Passive 2 hours 15 mins, Total 2 hours 25 mins
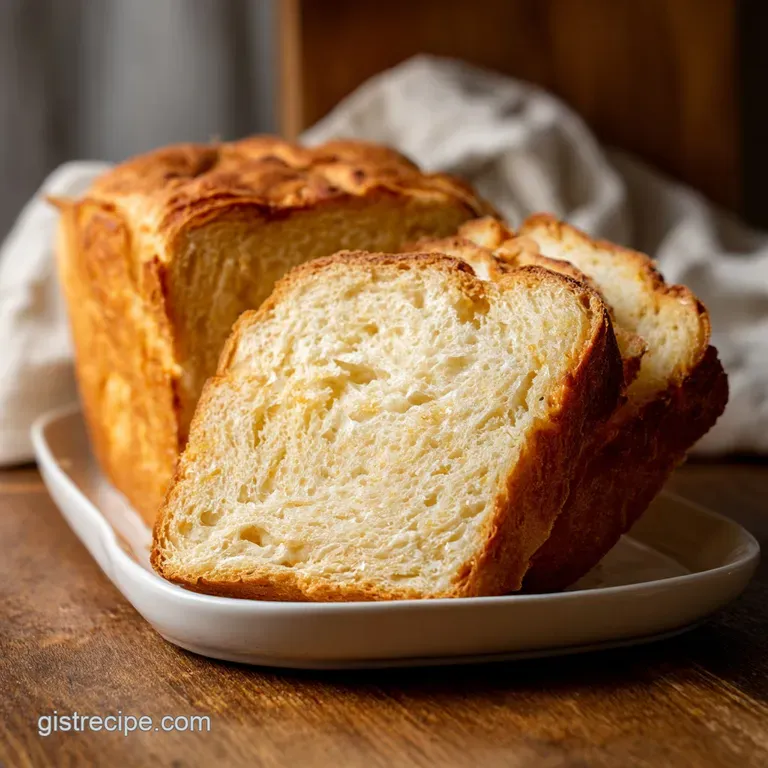
- Flavor/Texture Hook: Silky crumb center with a golden, shatter crisp crust
- Perfect for: Weekend meal prep and beginner friendly sandwich making
- How to Bake the Softest Gluten Free Bread in Bread Machine
- The Simple Science Behind a Soft and Springy Loaf
- Fast Tracking Your Way to Fresh Homemade Sandwich Bread
- Essential Components for a Golden and Fluffy Crust
- The Basic Tools Required for Minimal Mess Baking
- Step by Step Guide for a Stress Free Bake
- Fixing Common Problems for a Perfect Rise Every Time
- Scaling the Recipe for Different Pan Sizes
- Flavorful Additions and Easy Swaps for Your Daily Loaf
- Debunking Bread Machine Misconceptions
- Keeping Your Homemade Bread Fresh and Soft for Days
- Delicious Ways to Serve and Enjoy Your Fresh Bake
- Recipe FAQs
- 📝 Recipe Card
How to Bake the Softest gluten-free Bread in Bread Machine
There is nothing quite like the yeasty, buttery aroma of fresh bread wafting through the house on a lazy Sunday morning. I remember my first attempt at this I followed a standard wheat recipe but just swapped the flour, and the result was a literal brick that could have doubled as a doorstop.
It was a disheartening, crumbly mess that tasted mostly like sadness and cardboard.
But then I realized that gluten-free baking isn't just a swap; it's a completely different science. When you finally hear that "thump thump" of a hollow, perfectly baked loaf hitting the cooling rack, it feels like winning the lottery.
This recipe is the gist of everything I've learned about getting that velvety interior without the fuss of traditional kneading.
We’re going to use the bread machine to do the heavy lifting, but we’re treating it more like a cake batter than a stiff dough. Trust me on this: the batter will look weirdly wet, almost like thick muffin mix, but that is exactly where the magic happens.
You’ll get a loaf that’s actually flexible enough to hold a piece of turkey without snapping in half.
The Simple Science Behind a Soft and Springy Loaf
To get this right, we have to look at how the ingredients interact without that gluten "web" to hold things up. We are basically building a scaffold out of starches and proteins that can trap air bubbles before the heat sets the structure.
- Hydration to Starch Ratio: gluten-free flours are incredibly thirsty and require significantly more liquid than wheat to prevent a gritty, sandy mouthfeel.
- The Single Rise Rule: Unlike wheat, gluten-free dough loses its structural integrity if punched down, so we only rise it once to maximize volume.
- Protein Scaffolding: Eggs and dry milk powder provide the essential proteins that mimic gluten's stretch, giving the bread its necessary "bounce."
1. The Single Rise Science
In a traditional bread machine cycle, the machine kneads, rises, punches down, and rises again. For this recipe, we want to avoid that second rise because the air bubbles created by the yeast are fragile.
Most modern machines have a specific gluten-free setting that skips the punch down, but even if yours doesn't, we can work around it by choosing a quick cycle or a custom program.
2. Hydration to Starch Ratio
If your dough looks like something you could shape by hand, it’s too dry. We want a thick, sticky batter that requires a spatula to smooth out. This high moisture content is what creates steam during the bake, helping the loaf expand and stay soft for days instead of turning into a rock by dinner time.
3. The Protein Scaffold
Since we don't have gluten to hold the air, we use eggs and milk powder. The eggs act as a binder and an emulsifier, while the milk powder helps with browning through the Maillard reaction. This is the same trick I use in my gluten-free Bread recipe to get that beautiful golden hue on the crust.
Fast Tracking Your Way to Fresh Homemade Sandwich Bread
| Method | Total Time | Texture | Best For |
|---|---|---|---|
| Bread Machine | 2 hours 25 mins | Soft, uniform, thin crust | Daily sandwiches and toast |
| Oven Bake | 1 hour 30 mins | Artisanal, thick crust | Dinner parties and dipping |
| Dutch Oven | 1 hour 45 mins | Craggy, rustic, chewy | Soups and heavy stews |
Choosing the bread machine method is the ultimate shortcut for busy cooks because it maintains a consistent temperature. Consistency is the enemy of gluten-free baking drafts or cold countertops can kill a rise in minutes.
The machine acts as a controlled proofing box, ensuring your yeast stays happy and active throughout the entire process.
Essential Components for a Golden and Fluffy Crust
| Ingredient | Science Role | Pro Secret |
|---|---|---|
| GF Flour Blend | Provides the structural base | Always use a blend with xanthan gum already included |
| Warm Water | Activates yeast and hydrates starch | Keep it at 110°F; too hot kills yeast, too cold stalls it |
| Apple Cider Vinegar | Provides acidity for lift | The acid reacts with yeast to create a lighter, airier crumb |
| Dry Milk Powder | Aids browning and structure | Use non fat dry milk for the best rise without excess fat |
1. The Liquid Base
We start with 1.5 cups warm water (110°F), 2 large room temperature eggs, 1 tsp apple cider vinegar, and 3 tbsp melted butter. Using room temperature eggs is vital; cold eggs will chill the water and prevent the yeast from waking up properly.
The vinegar might sound odd, but it helps the yeast work harder and also acts as a natural preservative.
2. The Dry Architecture
For the dry side, we need 3.25 cups gluten-free all purpose flour blend, 1.5 tsp fine sea salt, 2 tbsp granulated sugar, and 0.25 cup non fat dry milk powder. The sugar isn't just for flavor; it's food for the yeast. Without it, your loaf will be pale and squat.
If you find yourself out of milk powder, you can skip it, but the crust won't be as golden.
3. The Leavening
We finish with 2.25 tsp instant yeast. Make sure it's "Instant" or "Bread Machine" yeast, not "Active Dry." Instant yeast is designed to dissolve quickly in the moist environment of a bread machine and doesn't need to be bloomed in water first. Just make sure it stays dry until the machine starts mixing.
The Basic Tools Required for Minimal Mess Baking
One of the best things about this recipe is that the cleanup is almost non existent. You really only need your bread machine, a set of measuring cups, and a small bowl for melting the butter.
I highly recommend using a digital scale if you have one, but if not, use the spoon and level method for the flour to avoid packing it down.
Right then, before you start, make sure your bread pan paddle is securely in place. There is nothing more frustrating than dumping all your ingredients in only to realize the paddle is sitting on the counter. I’ve done it more times than I care to admit!
Also, have a silicone spatula handy to help the machine incorporate the flour from the corners during the first few minutes of mixing.
step-by-step Guide for a Stress Free Bake
- Prep the liquids. Whisk the 2 large eggs and 1 tsp apple cider vinegar into the 1.5 cups warm water. Note: This ensures the eggs are fully integrated before hitting the flour.
- Add liquid base. Pour the water mixture and 3 tbsp melted butter into the bread machine pan.
- Layer the dry. Spoon 3.25 cups gluten-free flour over the liquid, followed by 0.25 cup milk powder, 2 tbsp sugar, and 1.5 tsp sea salt. Note: Creating a "raft" of flour keeps the yeast dry.
- Add the yeast. Create a small divot in the center of the flour and pour in the 2.25 tsp instant yeast.
- Select the setting. Set your machine to the "gluten-free" cycle. If your machine doesn't have one, use the "Quick" or "Rapid" setting.
- Assist the mix. After 5 minutes of mixing, use a spatula to scrape down the corners. Do this until no dry flour pockets remain.
- Smooth the top. Once the mixing cycle ends, use wet fingers to smooth the top of the batter. Note: This prevents a craggy, uneven top once baked.
- Bake the loaf. Let the machine run for the full 2 hours 15 mins until the crust is golden and the internal temp is 205°F.
- The shake out. Remove the pan and let it sit for 5 minutes before shaking the loaf out onto a wire rack.
- The cool down. Allow the bread to cool for at least 1 hour until completely room temperature before slicing.
Chef's Tip: If you want a really soft crust, brush the top with a little extra melted butter the moment it comes out of the machine. It soaks right in and keeps the top from getting too crunchy.
Fixing Common Problems for a Perfect Rise Every Time
If your loaf looks like a canyon in the middle, don't panic. This usually happens because there was too much moisture or too much yeast. gluten-free bread is a bit like a soufflé it's all about balance. The most common mistake I see is people cutting into the bread while it's still warm.
I know it's tempting, but that steam inside is still finishing the cooking process!
1. The Sunken "Canyon" Top
A sunken top is the most common "fail" in bread machine history. It usually happens when the bread rises too fast and then collapses because the structure wasn't strong enough to hold the weight. This can be caused by using water that is too hot or simply having a very humid kitchen.
2. Unincorporated Flour Pockets
Because the batter is so thick, bread machine paddles sometimes struggle to reach the very corners of the rectangular pan. This leaves you with a crust that has white, dusty patches of raw flour. A quick 30 second assist with a spatula during the first mix solves this entirely.
| Problem | Root Cause | Solution |
|---|---|---|
| Loaf is too dense | Yeast was old or water was too cold | Check yeast expiration; use a thermometer for 110°F water |
| Crumbly texture | Not enough hydration or eggs | Measure flour by weight; ensure eggs are Large size |
| Top is pale | Not enough sugar or milk powder | Check that you didn't skip the dry milk powder or sugar |
Common Mistakes Checklist
- ✓ Forgot to scrape the corners (leads to dry flour clumps in the crust)
- ✓ Slicing while hot (causes the center to become gummy and wet)
- ✓ Using "Active Dry" yeast instead of "Instant" (it won't rise enough)
- ✓ Leaving the bread in the pan too long (steam makes the sides soggy)
- ✓ Measuring flour by packing the cup (results in a dry, heavy brick)
Scaling the Recipe for Different Pan Sizes
If you have a smaller machine (1 lb capacity), you should halve the recipe. When halving, beat one egg in a cup and use exactly half of it by weight or volume to keep the ratios precise. Reduce the total baking time by about 20% and keep a close eye on it through the window.
Scaling up to a 2 lb or 2.5 lb loaf is generally safer, but don't just double everything blindly. For the spices and salt, use only 1.5x the amount to avoid an overpowering flavor. If you find the loaf is hitting the lid of the machine, reduce the yeast by 1/4 tsp next time.
Baking larger loaves sometimes requires a slightly lower temperature to ensure the middle cooks before the outside burns.
| Premium Ingredient | Budget Alternative | Flavor Impact | Savings |
|---|---|---|---|
| Grass fed Butter | Salted Margarine | Slightly less rich, more salty | Save $2.00 |
| High end GF Blend | Store Brand GF Flour | May need 1/4 tsp extra xanthan | Save $4.00 |
| Fine Sea Salt | Table Salt | Sharper saltiness | Save $0.50 |
Flavorful Additions and Easy Swaps for Your Daily Loaf
One of my favorite things to do is turn this into an "Everything Bagel" loaf. Just add 2 tablespoons of everything bagel seasoning into the dry ingredients. The aroma while it bakes is absolutely incredible.
If you're looking for something sweeter, you might enjoy trying a gluten-free Banana recipe which uses a similar "wet batter" logic but with a much denser, cake like result.
1. The Everything Bagel Loaf
To make this, follow the base recipe but add 1 tbsp of dried onion flakes and 1 tbsp of poppy seeds to the flour. Once the machine is done mixing and you're smoothing the top, sprinkle a generous amount of coarse salt and sesame seeds over the surface. It’s the perfect base for an avocado toast.
2. The dairy-free Swap
If you can't do dairy, simply swap the melted butter for a neutral oil like avocado or grapeseed oil. For the milk powder, you can use a coconut milk powder or just omit it entirely. If you omit it, add an extra teaspoon of sugar to help with the browning, as the lactose in milk is what usually provides that color.
Debunking Bread Machine Misconceptions
One major myth is that you must use the "gluten-free" setting. While it's helpful because it skips the second rise, many older machines don't have it. You can actually use the "Rapid" or "Quick" setting effectively because those cycles also feature a shorter rise time.
The key is monitoring the dough to ensure it doesn't over proof.
Another myth is that you can't get a good crust in a machine. People think the steam gets trapped and makes it soggy. The trick is the "5 minute rule" take the loaf out of the pan 5 minutes after the beep.
If you leave it in there, the "sweat" from the cooling bread will turn your beautiful crust into a damp sponge.
Keeping Your Homemade Bread Fresh and Soft for Days
gluten-free bread is notorious for going stale quickly because it lacks the gluten structure to hold onto moisture. Store your cooled loaf in an airtight container at room temperature for up to 2 days.
If you aren't going to eat it all by then, slice the entire loaf and freeze it with pieces of parchment paper between the slices. This way, you can grab a single slice and pop it straight into the toaster.
For zero waste, don't throw away the "heels" or any dry ends! I toss them into a food processor to make homemade gluten-free breadcrumbs. You can also cube them up, toss them with garlic butter, and bake them at 300°F for 15 minutes to make the best croutons you've ever had.
If you have a lot of leftovers, they work beautifully in a gluten-free Zucchini recipe as a base for a bread pudding style treat.
Delicious Ways to Serve and Enjoy Your Fresh Bake
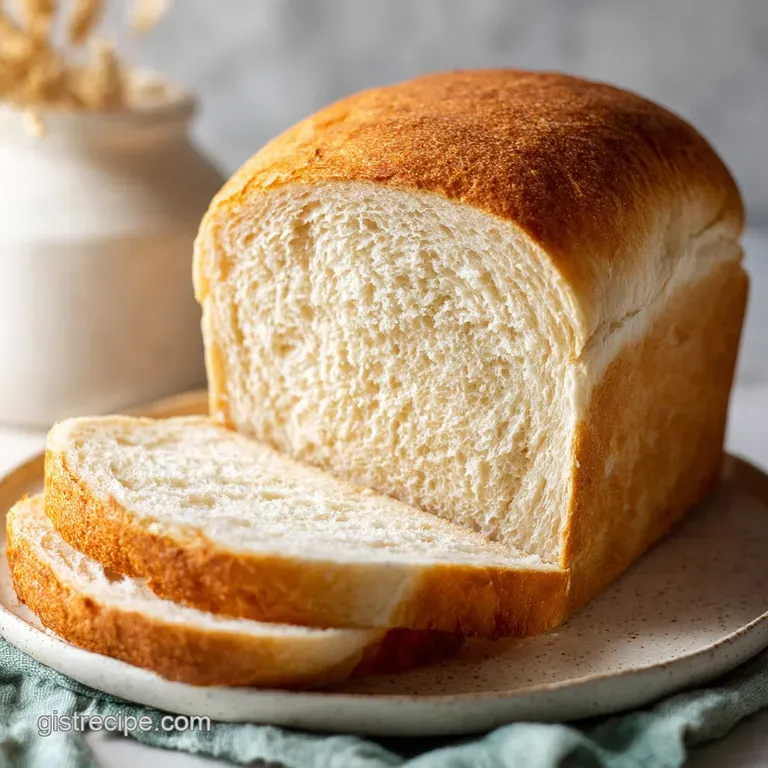
This bread is a superstar when it's toasted. Because of the higher sugar and fat content compared to store-bought GF bread, it carmelizes beautifully. I love it slathered in salted butter and honey, or used as the foundation for a classic grilled cheese.
The structure is sturdy enough that it won't fall apart even with heavy fillings like tuna salad or thick slices of heirloom tomatoes.
If you're feeling adventurous, try using a thick slice for French toast. The bread soaks up the custard without becoming a soggy mess, which is a rare feat for gluten-free loaves. Whether you're making a quick weekday sandwich or a fancy brunch, this loaf is the reliable workhorse your kitchen needs. Happy baking!

Recipe FAQs
Does gluten-free bread work in a bread maker?
Yes, provided you use the correct settings. Bread machines offer excellent temperature control, which is crucial for gluten-free yeast activation. Ensure you select the dedicated gluten-free cycle, which skips the "punch down" stage.
Can I use King Arthur gluten-free bread flour in a bread machine?
Yes, most commercial gluten-free blends, including King Arthur's, work well. These blends already contain binders like xanthan gum, which is necessary for structure. Always start with the exact liquid ratio in your specific recipe, as minor adjustments might be needed based on blend humidity.
What is the trick to making good gluten-free bread?
The main trick is high hydration, aiming for a thick, wet batter consistency. gluten-free flours absorb more liquid than wheat, and this excess moisture creates the necessary steam for a soft interior crumb. If you master this texture control, you'll find the resulting loaf is less crumbly.
What is the best gluten-free flour to use in a bread maker?
The best flour is a pre-mixed gluten-free all-purpose blend that contains xanthan gum. Avoid using single flours like just rice or just oat flour, as they lack the necessary balance of starches and proteins. Using a quality blend simplifies the process significantly, similar to how precise measuring helps in our gluten-free Apple recipe.
How do I prevent my gluten-free bread machine loaf from collapsing in the middle?
Reduce the amount of yeast slightly or ensure your mixing cycle is not too long. Collapse often happens when the bread rises too fast and the structure can't support the air pockets. If you notice the dough over proofing, you may need to switch to a 'Rapid' setting instead of the full GF cycle.
Why does my gluten-free bread come out crumbly even after baking?
The crumbly texture is almost always caused by slicing the loaf before it is fully cooled. Wait at least one hour until the bread is room temperature before cutting; the internal structure needs time to set as the steam escapes. If the issue persists, try adding an extra egg for binding, much like we use stabilizers in our Classic Banana Bread recipe.
What liquid temperature should I use to activate yeast in the bread machine?
Aim for a water temperature between 105°F and 115°F (40°C to 46°C). This range is warm enough to activate instant yeast quickly without killing the delicate organisms. If you don't have a thermometer, use water that feels pleasantly warm but not hot to the touch.
Bread Machine Gf Loaf

Ingredients:
Instructions:
Nutrition Facts:
| Calories | 181 kcal |
|---|---|
| Protein | 3.6 g |
| Fat | 3.7 g |
| Carbs | 32.9 g |
| Fiber | 0.8 g |
| Sugar | 3.1 g |
| Sodium | 277 mg |
